How To Update A 20 Year Old Home To A Fresh Look That Will Last - Before And After!
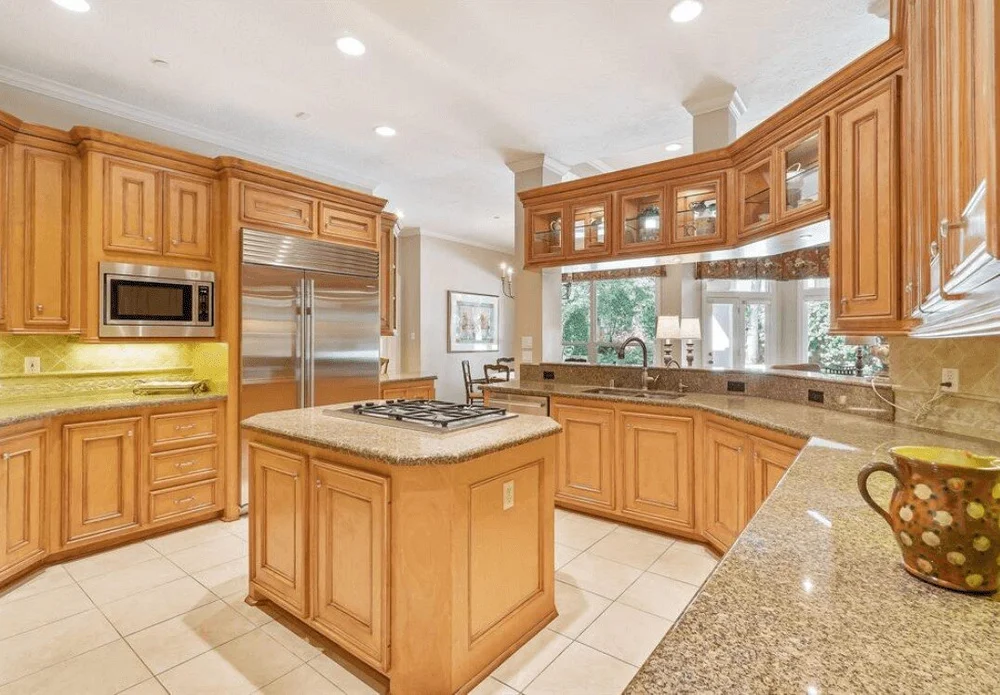
BEFORE KITCHEN REMODEL
I’m sharing an update done to a 20+ year old home for a fresh look that will last with some awesome before and after pics!
This home was nice, it had a good layout for this family, was in an ideal location, and as a 20+ year old home, nothing was falling apart. It had good bones but the features and colors were dated and this young family wanted to give it an update before they moved in.
In most homes this age, and especially homes that were built by a custom home builder during this period of time here in our area, it had certain features that were a little less than desirable for a home of this value.
Orange toned wood, a slightly yellowed color scheme, some dated tile and rather cheap cabinetry details were the biggest offenders that needed some adjustment.
Often these builders did site built cabinets around here and painted them, and they used really cheap hinges, glides, cabinet details, and door styles. Getting new doors and then new hardware for this cabinetry helps a lot here, but tearing out and redoing them completely also works well if bigger modifications need to occur.
TV equipment has probably had some of the biggest changes over the years and built-ins designed for big tube tvs just don’t work anymore. While we can modify media cabinetry like I show in this post, sometimes if the changes needed are too dramatic, it is just better to start fresh with a new design.
Design Work For This Project
I did a few consultations for this homeowner, going over modifications they could make to their kitchen and finishes and then designed the built-ins for their media cabinets. We reviewed lighting, wood flooring, countertop materials and tile.
The homeowner had some ideas of what she had wanted to use, she just needed some direction that would help get her the look she wanted. She also had a slew of contractors lined up and was ready to manage her own project.
I don’t normally recommend this for most homeowners, as managing a project of this size can be really daunting and a lot more than most people are comfortable handling with busy lives. This homeowner, however, had a very capable assistant :-), her mother, who was a former client of mine, very resourceful and design savvy.
I knew that together, as a team, these two could build just about anything. :-)
It also helped that the family wasn’t living in during the construction of this job. That can really make it hard to manage for a homeowner.
BTW, I didn’t even manage my own kitchen remodel, I hired a general contractor. Believe me, a big undertaking like this one, is a huge task!
I’ve already shared the fireplace in the living room in this post and how it was made over for a more current look. While I would have loved for them to use marble slab here, they ended up going with a porcelain tile that looks like marble and it turned out really well and saved them a few dollars.
This homeowner wanted the orange toned wood look out of the house, going with more upgraded oak flooring. That meant paint on this fireplace would be good option.
We also did a few window treatments in this home and the drapery in this room was one of them.

Before Fireplace Remodel - Orange stained wood dominated the color with dated spotty granite tile as the surround. With all the remodeling needed in this home, we opted for a minimal update here with paint and a new tile surround.

After Fireplace Remodel - The gray paint and white marble look tile gave this fireplace a more up to date look.
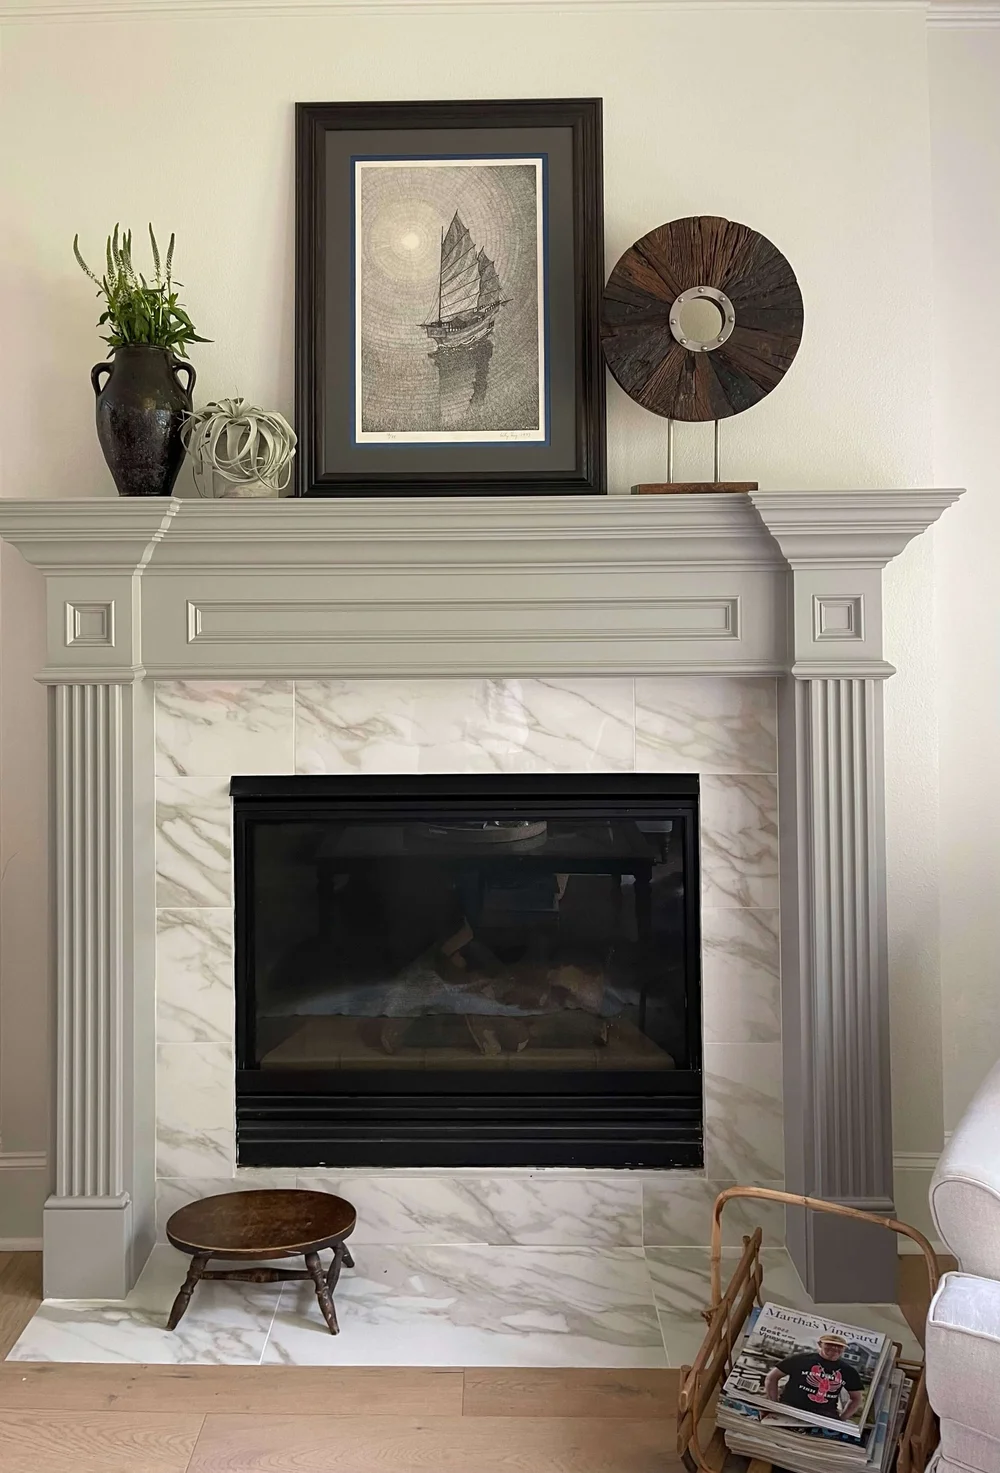
After Fireplace Remodel - The gray paint and white marble look tile gave this fireplace a more up to date look.
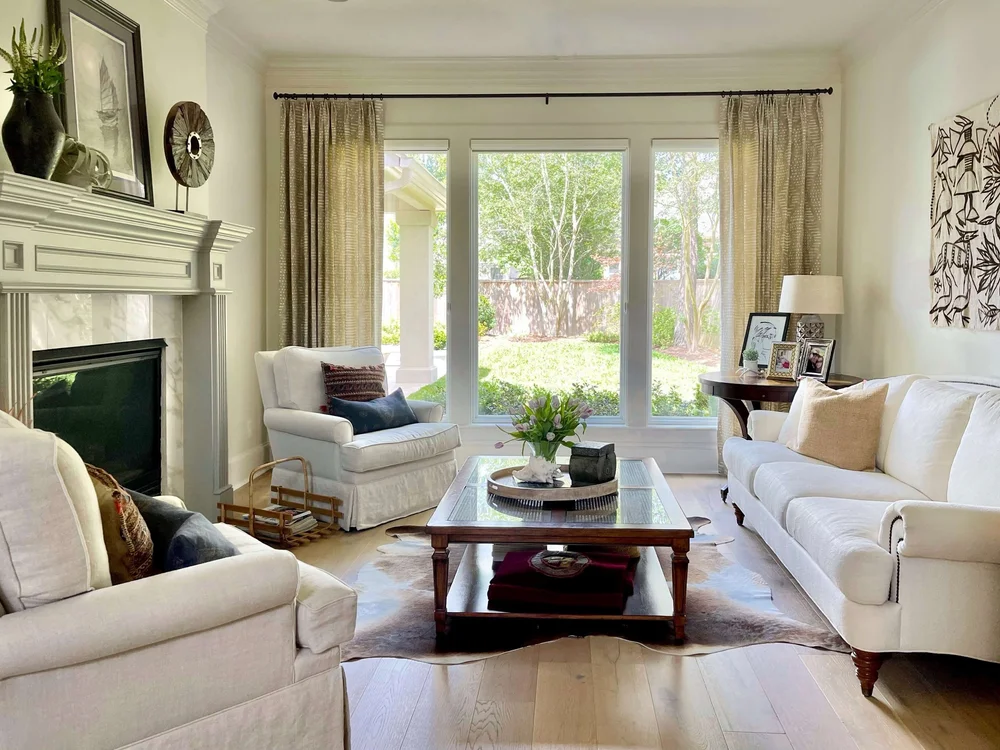
Living room fireplace update and window treatment - Designer, Carla Aston
Family Room TV Built-in
Here are photos of the tv built-in in the family room, before.

BEFORE REMODEL - The TV cabinet was an outdated size for newer model tvs and the orange toned wood and cabinet door style needed to be replaced.
You can see the size of the cabinet for the television just doesn’t work for today’s tv. The orange toned wood and cabinet door style was dated too, so it was best here to just totally remove and design some new ones.
The homeowner wanted some storage and shelving for display. This new built-in houses the tv, speakers, and all equipment nicely. We highlighted the open shelving with some sconces to add interest.
I suggested they use some of their flooring material as backer inside their cabinets to warm up the painted built-in. I like to do a darker material behind the tv if possible, a black screen on white cabinetry tends to really stand out.
This was such a deep niche, I designed this so that they could install their speakers in the back wall of the cabinetry, embedded there. My faux finisher I’ve used before did a great job finishing those speakers so that they can’t be seen.
I really love how this turned out. :-)

After - TV cabinet built in | Carla Aston, Designer

Custom Family Room tv cabinetry - Carla Aston, Designer
Upstairs TV Cabinet Built-In
The cabinetry in the game room/play room upstairs was really not needed as designed.
The homeowner didn’t want the built-in desks, and they wanted a big screen tv up here. They needed more closed storage for toys and games.
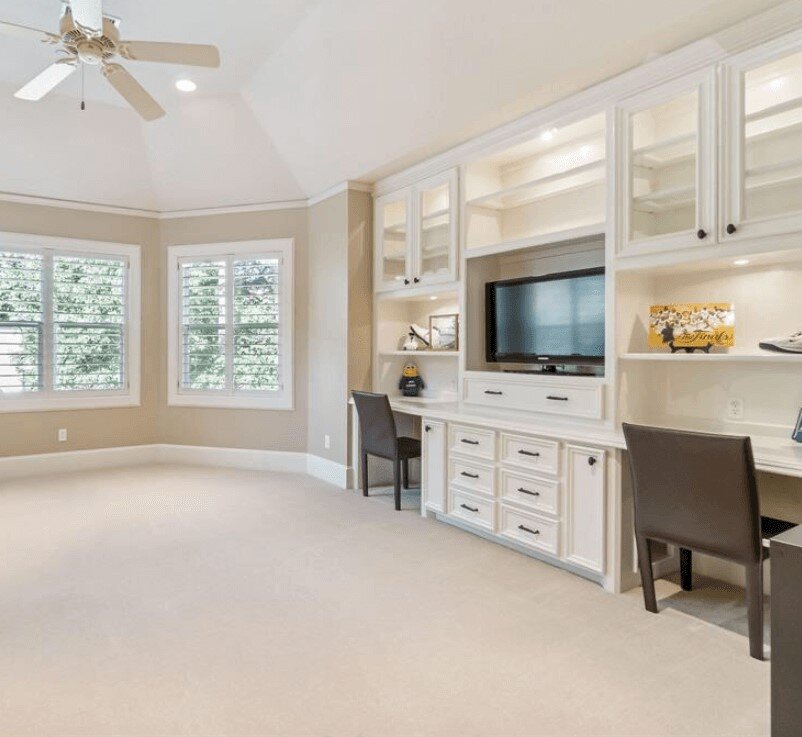
BEFORE REMODEL - TV / Desk Built-In Upstairs | Desks weren’t needed up here and more space for a large flat screen tv was desired.
We went with navy paint up here and I think it looks so smart.
A little design on the doors helps break up those tall cabinet doors and make this cabinet feel a little more special.

AFTER - This cabinetry in the game room looks great and has lots of storage. Designer, Carla Aston
Kitchen Update
The kitchen was updated in this home, keeping the existing cabinetry.
New countertops, backsplash, and cabinet door/drawers on the existing boxes, helped give this kitchen a whole new look.
The heavy overhead cabinet above the kitchen sink was removed, it really closed in the kitchen and felt dated. The homeowner opted to cut down the bar too, so that there was a more open feel between the kitchen and family room.

BEFORE REMODEL - This kitchen was updated with new finishes, new cabinet doors and removal of the cabinet hanging over the sink.

BEFORE REMODEL - This kitchen was updated with new finishes, new cabinet doors and removal of the cabinet hanging over the sink.
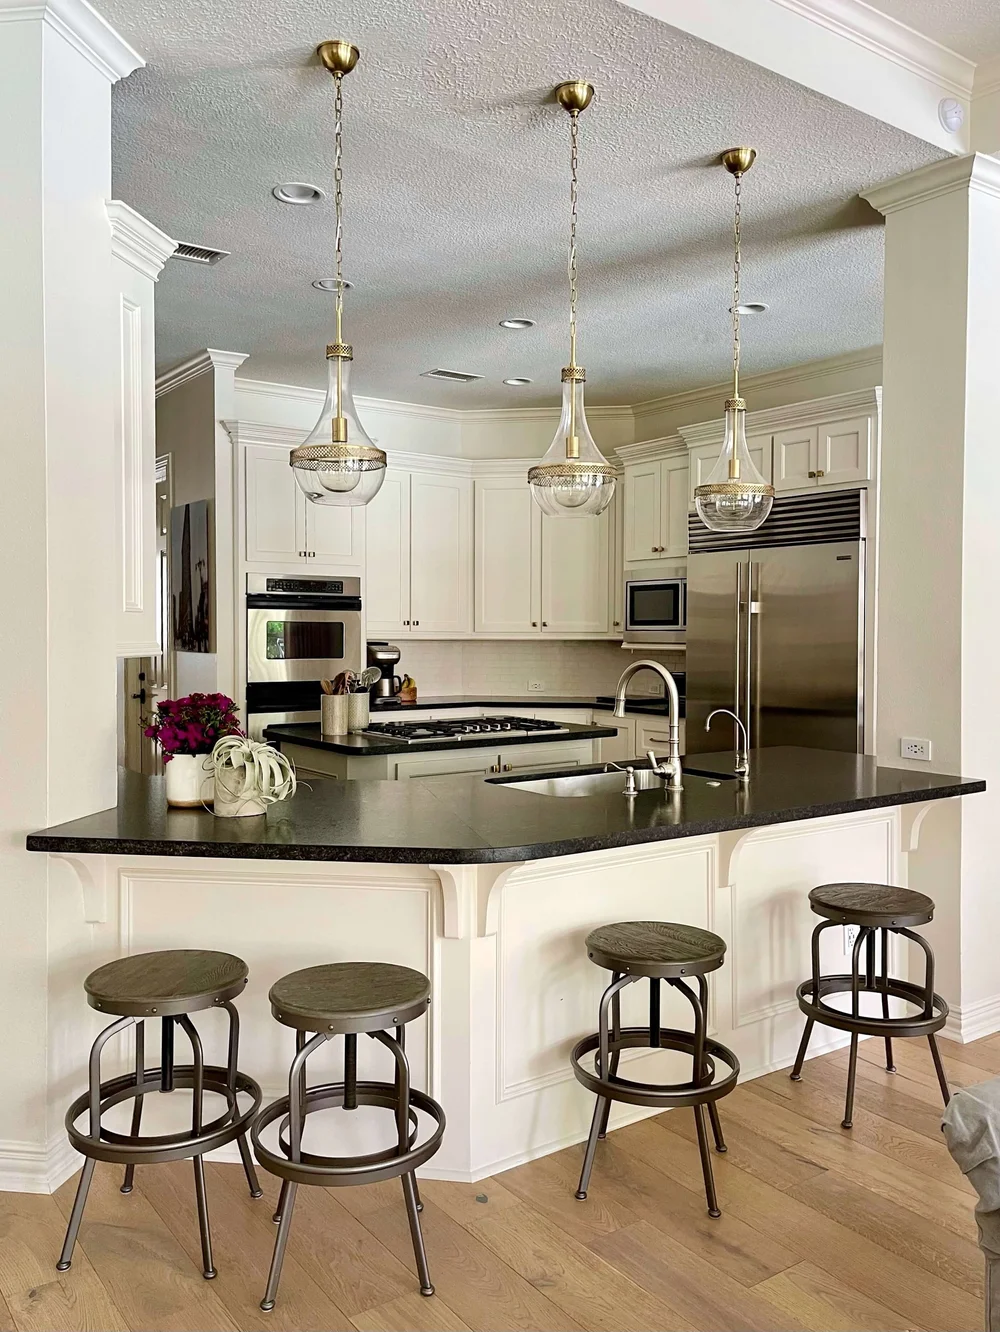
AFTER Kitchen Remodel - The overhead cabinet was removed, new cabinet doors, counters, splash and hardware for a nice partial update with a big impact.

AFTER Kitchen Remodel - The overhead cabinet was removed, new cabinet doors, counters, splash and hardware for a nice partial update with a big impact.
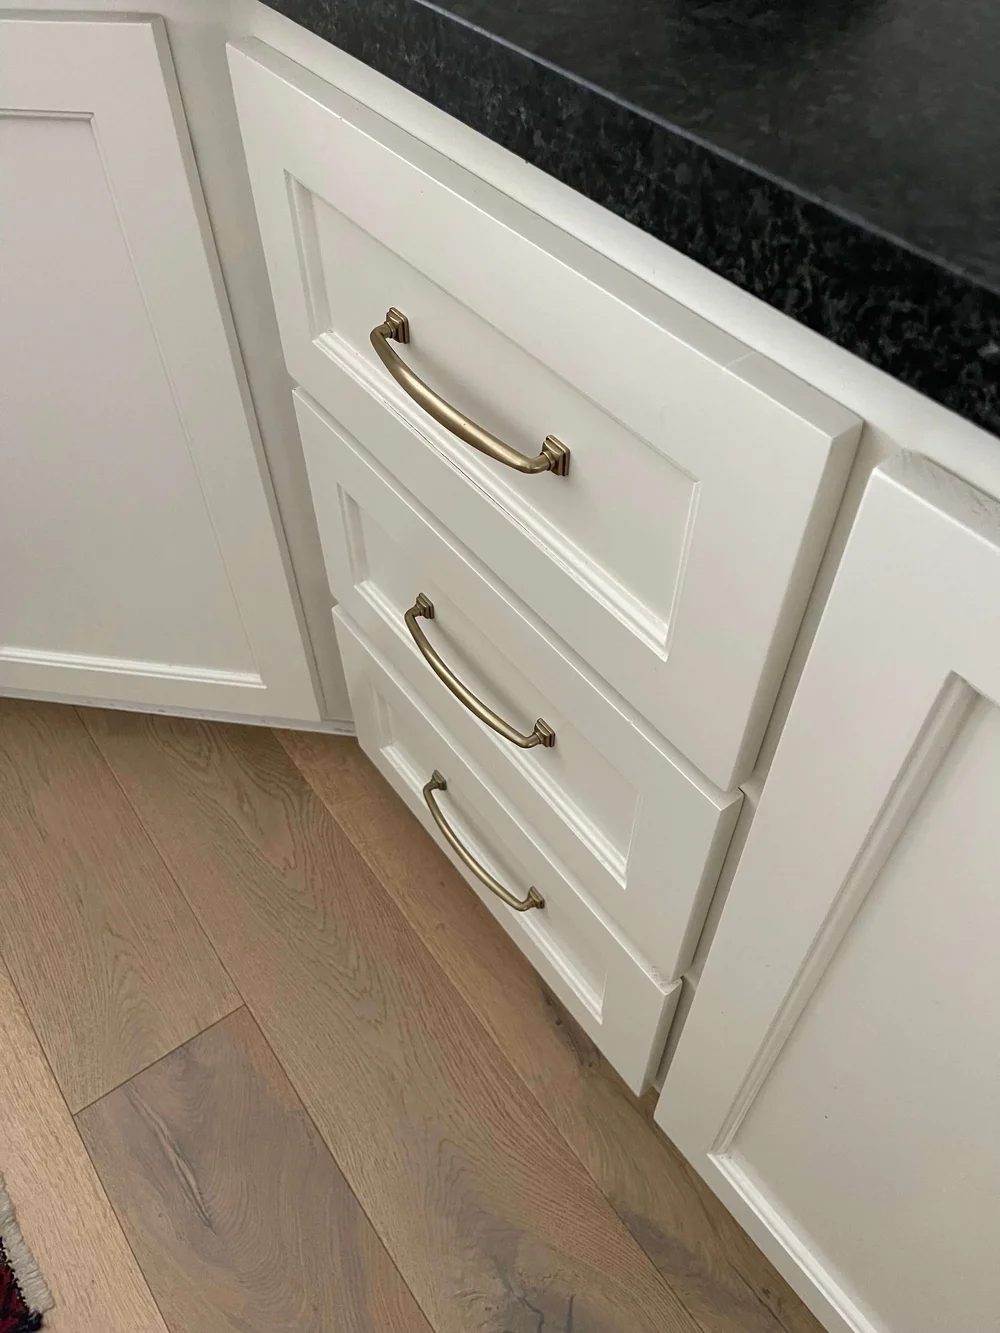
New door and drawer fronts were done for the cabinetry to minimize the excessive detailing and new brushed brass hardware completes the look.
Laundry Room Update
The laundry room was updated with some new floor tile, paint, new counter and sink and a cute window treatment.

Laundry room updated with new flooring, paint, counter/sink/faucet and a cute window treatment. Carla Aston, Designer

Patterned tile floor in laundry room and guest bath
Not only do I feel like the overall finishes were updated to last in this home, but the modifications made to the cabinetry with the kitchen and tv cabinets really help finish things off.
I think they are going to enjoy this home for many years to come and have a lovely envelope of finishes to add custom touches to along the way.
Final Note: I actually wrote up this post in March of 2020, when this project was almost done. Covid hit and I didn’t get some finished photographs until this week when I did a window treatment install there.
The homeowner and I were chatting about the design decisions made and she has really loved them all. At one point she was considering a Morrocan look tile for the backsplash and looking back, she is really glad she didn’t go with that. The small subway tile gave her a more timeless look that is easy to live with and will last style-wise a lot longer. :-)
When is it NOT a good idea to do only a partial remodel of your kitchen? Check out this post below that is a great example.
