
A DIY Kitchen Renovation In Two Parts (Plus A Reno Pep Talk)


Emily has loved following along with Jess and Tyler Marés, of Renovate 108, on Instagram as they renovate their 1500 sq ft home in Los Angeles. And their kitchen is truly a crown jewel. And since I’m about to embark on my own kitchen renovation journey (so far it’s terrifying), I caught up with Jess over email to pick her brain about all things kitchen renovation. Especially since they did so much of the renovation THEMSELVES. Talk about inspiration.
The couple bought the home back in 2015, and did a first round kitchen “update” in 2017. But they finally gave the kitchen the full renovation of her dreams in 2019, and it’s giving me serious kitchen inspiration/hope. Let’s dive in . . .
First of all, how long did you live with your “intermediate” kitchen and why did you decide to do an “in-between” design? I feel like a lot of people slowly fix up spaces, but to make a concerted PHASE ONE effort seems like a big financial decision, versus just saving for one big renovation.
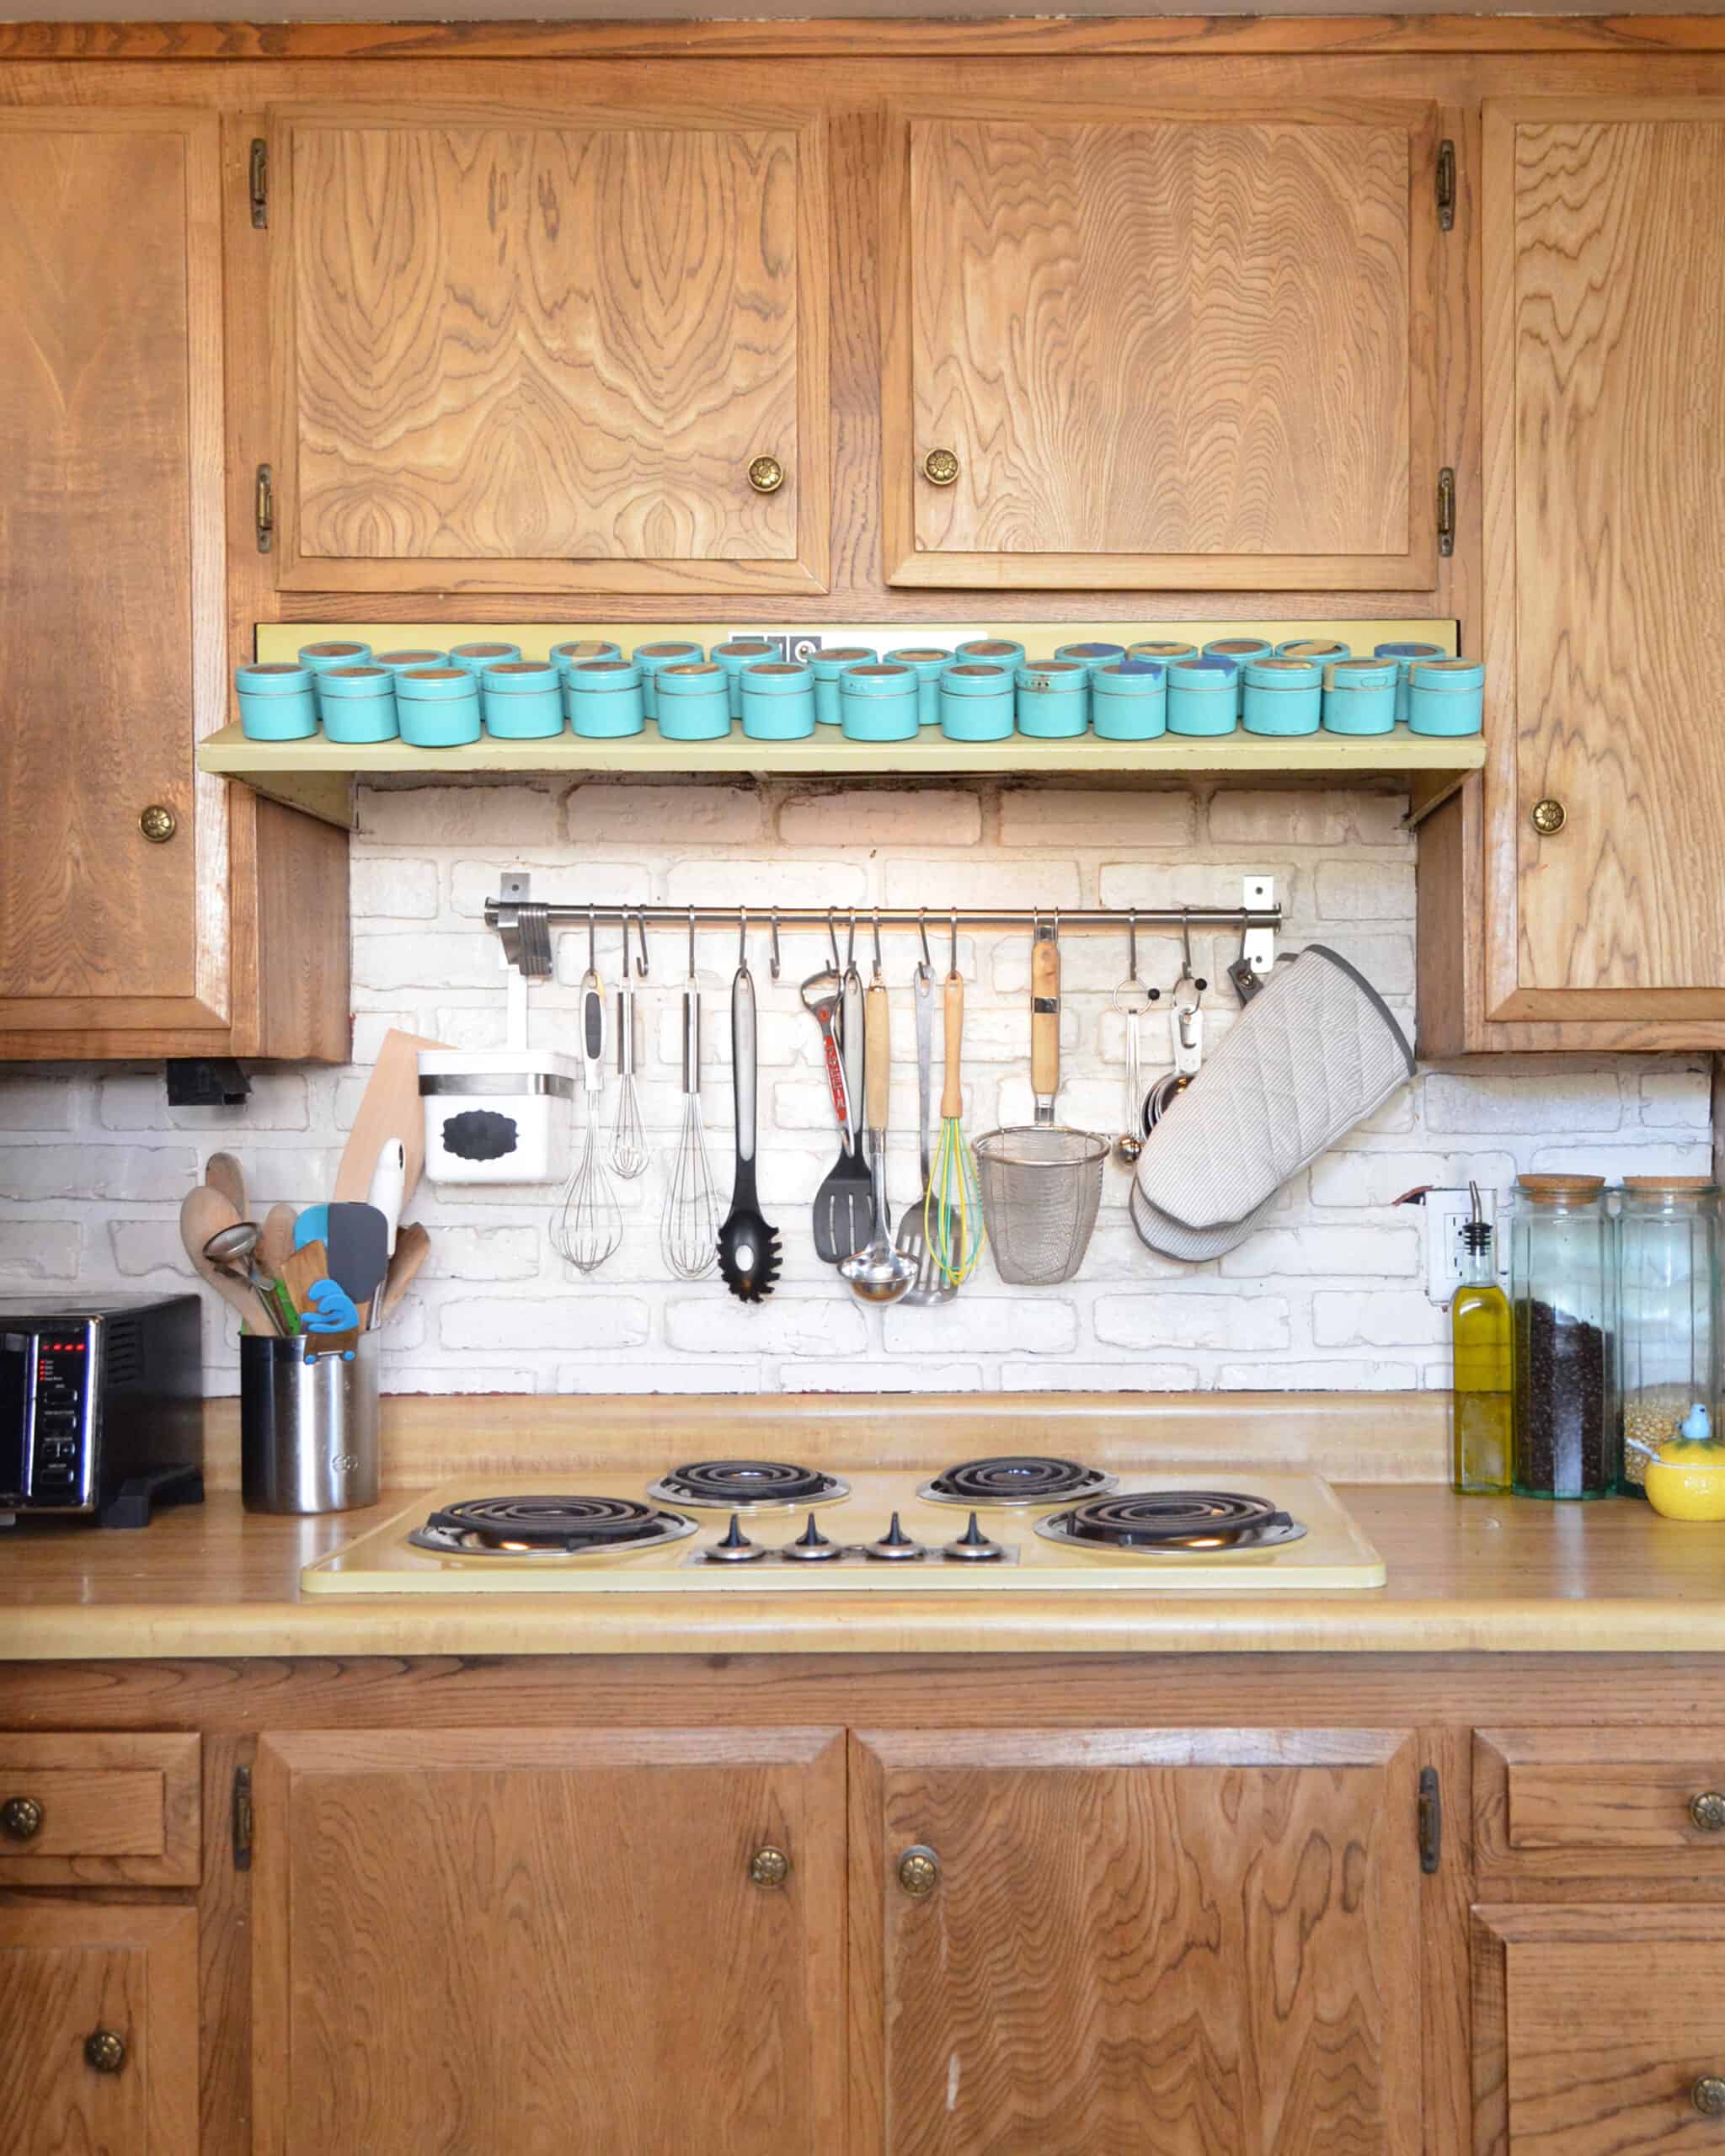
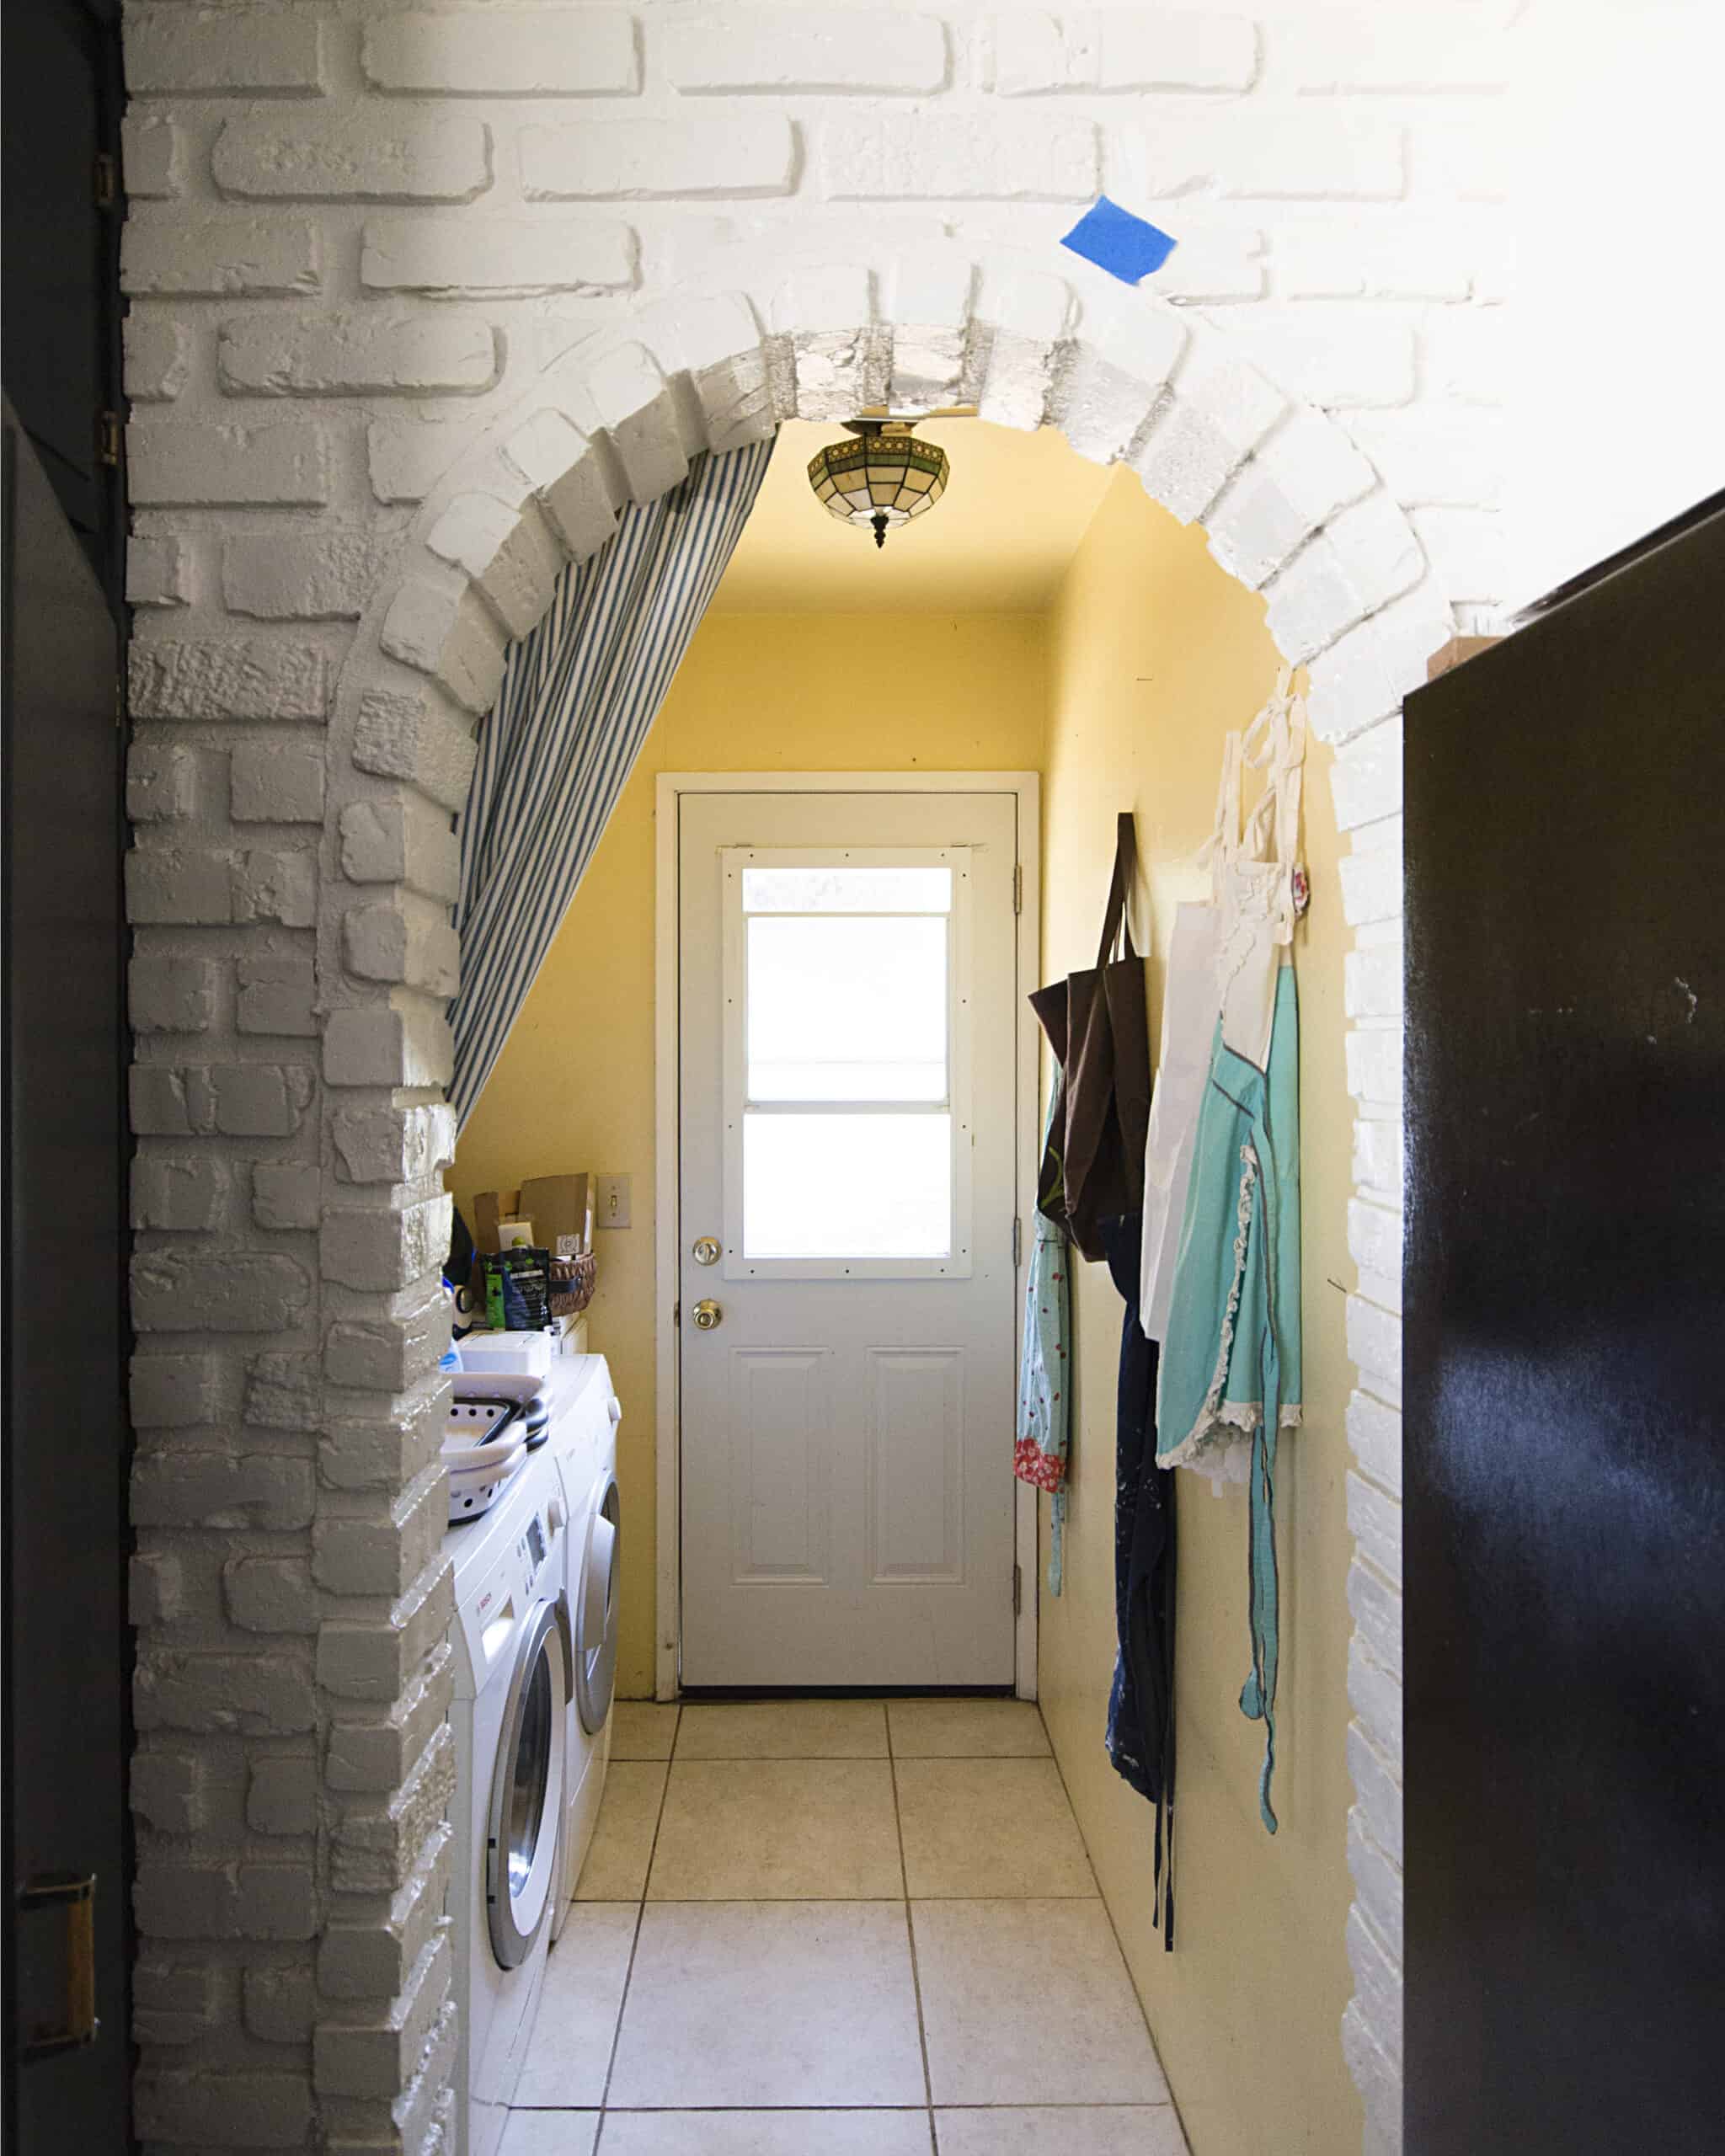
When we first moved in (Summer 2015), I didn’t want to spend an extra penny on anything that was “not permanent”. This was mostly because we had just come off of a couple of strict years of low-spending and high saving in order to get out of debt and save up our (very small) down payment. I look back now and see that reaction as a mix of naïveté, exhaustion, and not knowing where to start (I knew I wanted to change everything about the kitchen, so it was a bit overwhelming!). Hence, it took me a year and a half (Feb 2017) to get to the point where I had a vision and the energy to give the original kitchen a facelift.

We had just finished the living room and I realized just how much better I felt in that room, and I knew I could have that too in the kitchen with a little paint and some new hardware. I did originally intend to also get a new sink and faucet (the very ones we’d use in our future kitchen, so that we wouldn’t be wasting those items) and do a concrete finish on the counters, but my dad and Tyler talked me out of it (I still wish I did it though!)
How much did your kitchen “update” cost you, and was it worth it?
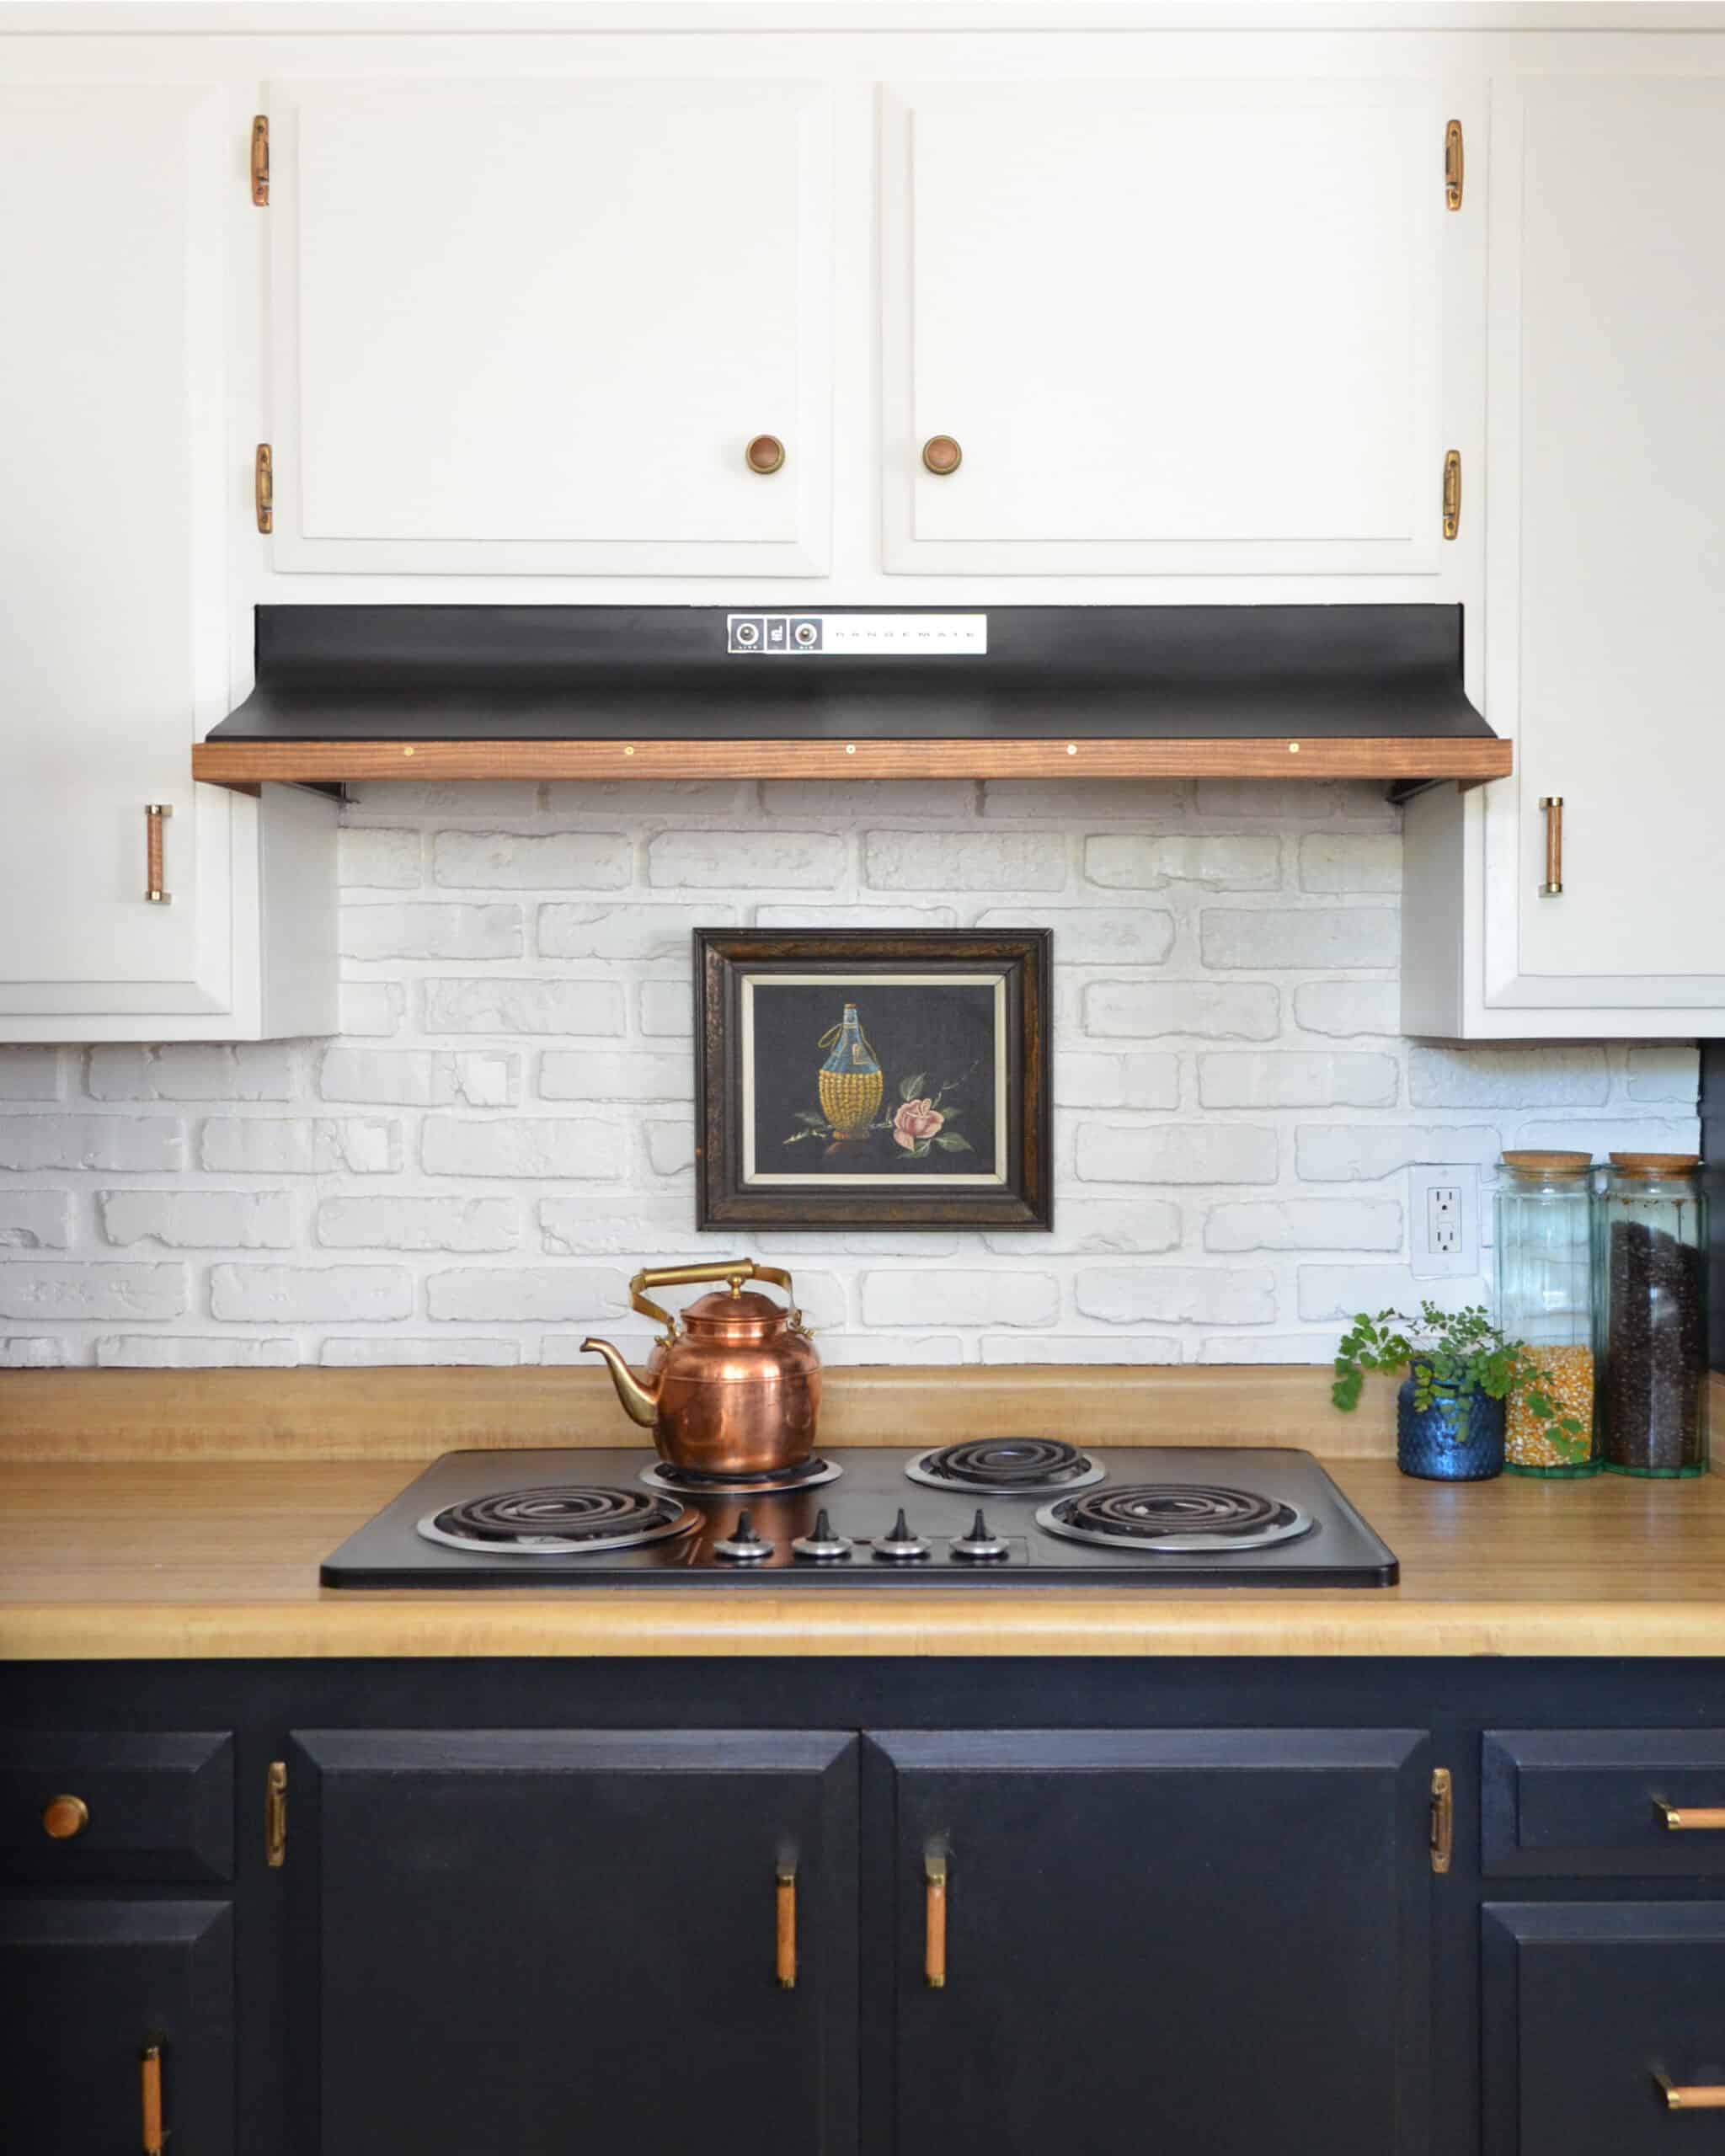
I only spent about $200 total! It was two gallons of Benjamin Moore Advance Paint, new hardware (I got them for $1 a piece from eBay – unused vintage hardware!), a can of high heat black spray paint, and two samples of rubber straps to hide the seam in our little faux beam that we did to wrap the ceiling. We had the plywood and the beadboard leftover from other projects, but it probably wasn’t even $40 worth of product for those items. Our Rejuvenation light was about $150 but I don’t include it in this makeover, since we use it now in our pantry and I don’t consider it a loss between the original kitchen and our renovation.
If you tap forward to a bit over halfway into this Instagram highlight, you can see where I walk you through all that we did and what we spent!
My verdict is that IT WAS SOOOOO WORTH IT, and I do wish I had done it sooner. The house had a sort of sad energy when we moved in, the rooms/walls everything just felt sad and depressing. I am very affected by my environment and, I think if I had been open to repainting the kitchen right away, it would have been just the burst of energy the house needed. To be fair, we had just exhausted ourselves financially to make it happen, but the update cost so little in the end. I think I would look a lot more fondly on moving in if I had a better attitude about working with what it was from the beginning. It really felt cute and like it reflected “us” in its last moments.

Now when it came time to your actual kitchen reno, where did you start? The idea of renovating my kitchen has been brutally overwhelming. Physically exhausting. Emotionally draining. Where did you get the energy to even begin, and what was your jumping point in the design that you were able to build/design out from?
I’ve always loved the opportunity to make a space my own since I was very very young. I would re-design every room I walked into to bring out the full potential of a space in my head (like I can see lines coming down and walls and windows being moved around in moments, the same way they illustrate that on HGTV haha). And visiting job sites with my dad showed me that I could, in fact, make those changes! So my energy for this has yet to reach an endpoint. The only thing that holds me back is usually time and money (*YAAWWNNN*). I suppose I am an odd bird in that respect.

I have been pulling specific ideas for what I want in MY kitchen since I joined Pinterest in Feb 2011. I officially decided on Carrara marble counters in 2012. Other inspirations come from ideas I gathered as a child; I’d see something and say “I want that in my house when I grow up”. This is where the brass Schluter comes into my flooring. I remember seeing brass inlay in Tomorrowland (at Disneyland) and municipal buildings growing up in LA, especially being worked in with terrazzo, and knowing I loved that detail and I wanted it in my house. The tumbling blocks in my pantry is because of a visit to the Getty Villa on a 6th-grade field trip.

At some point between 2010-2014 Semihandmade came out, and I thought FINALLY. Paintable fronts for IKEA kitchens was the product I needed to make a DIY kitchen work for me. I LOVE IKEA kitchens, but I also knew I needed to be able to paint my kitchen cabinets – I want to choose the color of my cabinets, I want to be able to touch up paint, I want to be able to replace things when something gets irreparably damaged, and I want to be able to CHANGE the color in 10 years if I so desire!


I already knew that the only way I was going to be able to afford and create the kitchen I wanted would be if I were able to get creative and build it myself. (Unless I wanted to wait another 10 years, but all this energy was already so bound up I couldn’t bear to wait that long.) And, I knew I needed creative control and to not have to rush through problem-solving. This is why both Tyler and I prefer to do the finish work in our house ourselves, probably even if we could afford to hire out the job. We play off of each other’s energy and come up with fun ideas that we would not have if we worked alone. So we knew we needed an affordable, “hackable”, semi-customizable, install-yourself kitchen – and really, the only answer to that was Semihandmade and IKEA.
I made the first designs for the kitchen when we were in escrow on the house in June 2015! Actual IKEA plans, where I was discovering which cabinets would go where and such. Later, in a fit of despair and depression, after our main sewer pipe collapsed 6 months after we moved in, I went on a cleaning strike, taught myself SketchUp in a day, and then spent a month designing our house in 3D. I was able to finally put all that I had been gathering over the years together and see it come together in full dimension. It was totally a life-changing experience for me. No longer did I have to rely on flat drawings, inspiration photos, and wild gesturing to explain to the hapless people in my life what my plans were for my kitchen. I can just SHOW them my future kitchen in exquisite detail.

So all of this has been brewing for me for years. If I was going to give a suggestion for someone who has indeed not been dreaming about her future kitchen since she was 6, I would say “close your eyes and imagine how you want your new kitchen to feel; What makes you want to cook? What restaurants or coffee shops have you been in that make you know that the food is going to be good, that the conversation will flow, the atmosphere that can make even the most mediocre of wines taste delicious? How can you distill those elements into an everyday kitchen?” Okay, so maybe I’m not good at making this simple or less intimidating . . . Let’s just say that if you want a lovely kitchen that fits into a modest home, it’s best to focus on beautiful utility.
I’m currently trying to teach myself SketchUp, and it is HARD. So kudos to you. Now, where did you go for inspiration, and what were some of your biggest influences?
For this kitchen, my biggest direct influence on the cabinetry is DeVol Kitchens, specifically their shaker style. It is what led to my choice of mixing slab drawers with shaker doors, and the end panel design.
*AUDIBLE GASP* DeVol Kitchens is a huge inspiration for me too!
After that, I would say Jessica Helgerson and touches of Amber Lewis here and there, also Jean Stoffer. I wanted a kitchen that had less of a “timestamp” on it (although, in hindsight, that is almost always unavoidable, and not something I think we should be overly concerned with). And I was an early adopter of Pinterest so I usually go there for specific inspiration (like Double L kitchen layouts—which is an uncommon kitchen shape).

I also kept my romantic idea of how I wanted to use my kitchen at the forefront of my mind. I routinely imagined summer evening get-togethers with friends and family, being barefoot in long skirts with kids running around, sipping wine, string lights abound with Fleetwood Mac blaring, and my kitchen as the backdrop for all of this. I think mostly because that’s exactly how I grew up! But still, even local things were an influence. The pantry evokes Main Street Disneyland to me. Because, why not? I love Disneyland, and their store displays are the perfect sort of backdrop for a walk-in pantry.
Organizationally, I would say Marie Kondo is a huge influence, as well as just going into IKEA and looking in all the drawers of their display kitchens. That was a big help!
How did you decide to go dark on the cabinets? Did you ever consider a light color? I was originally going to go dark, then bounce to light, and now have landed somewhere in the middle.
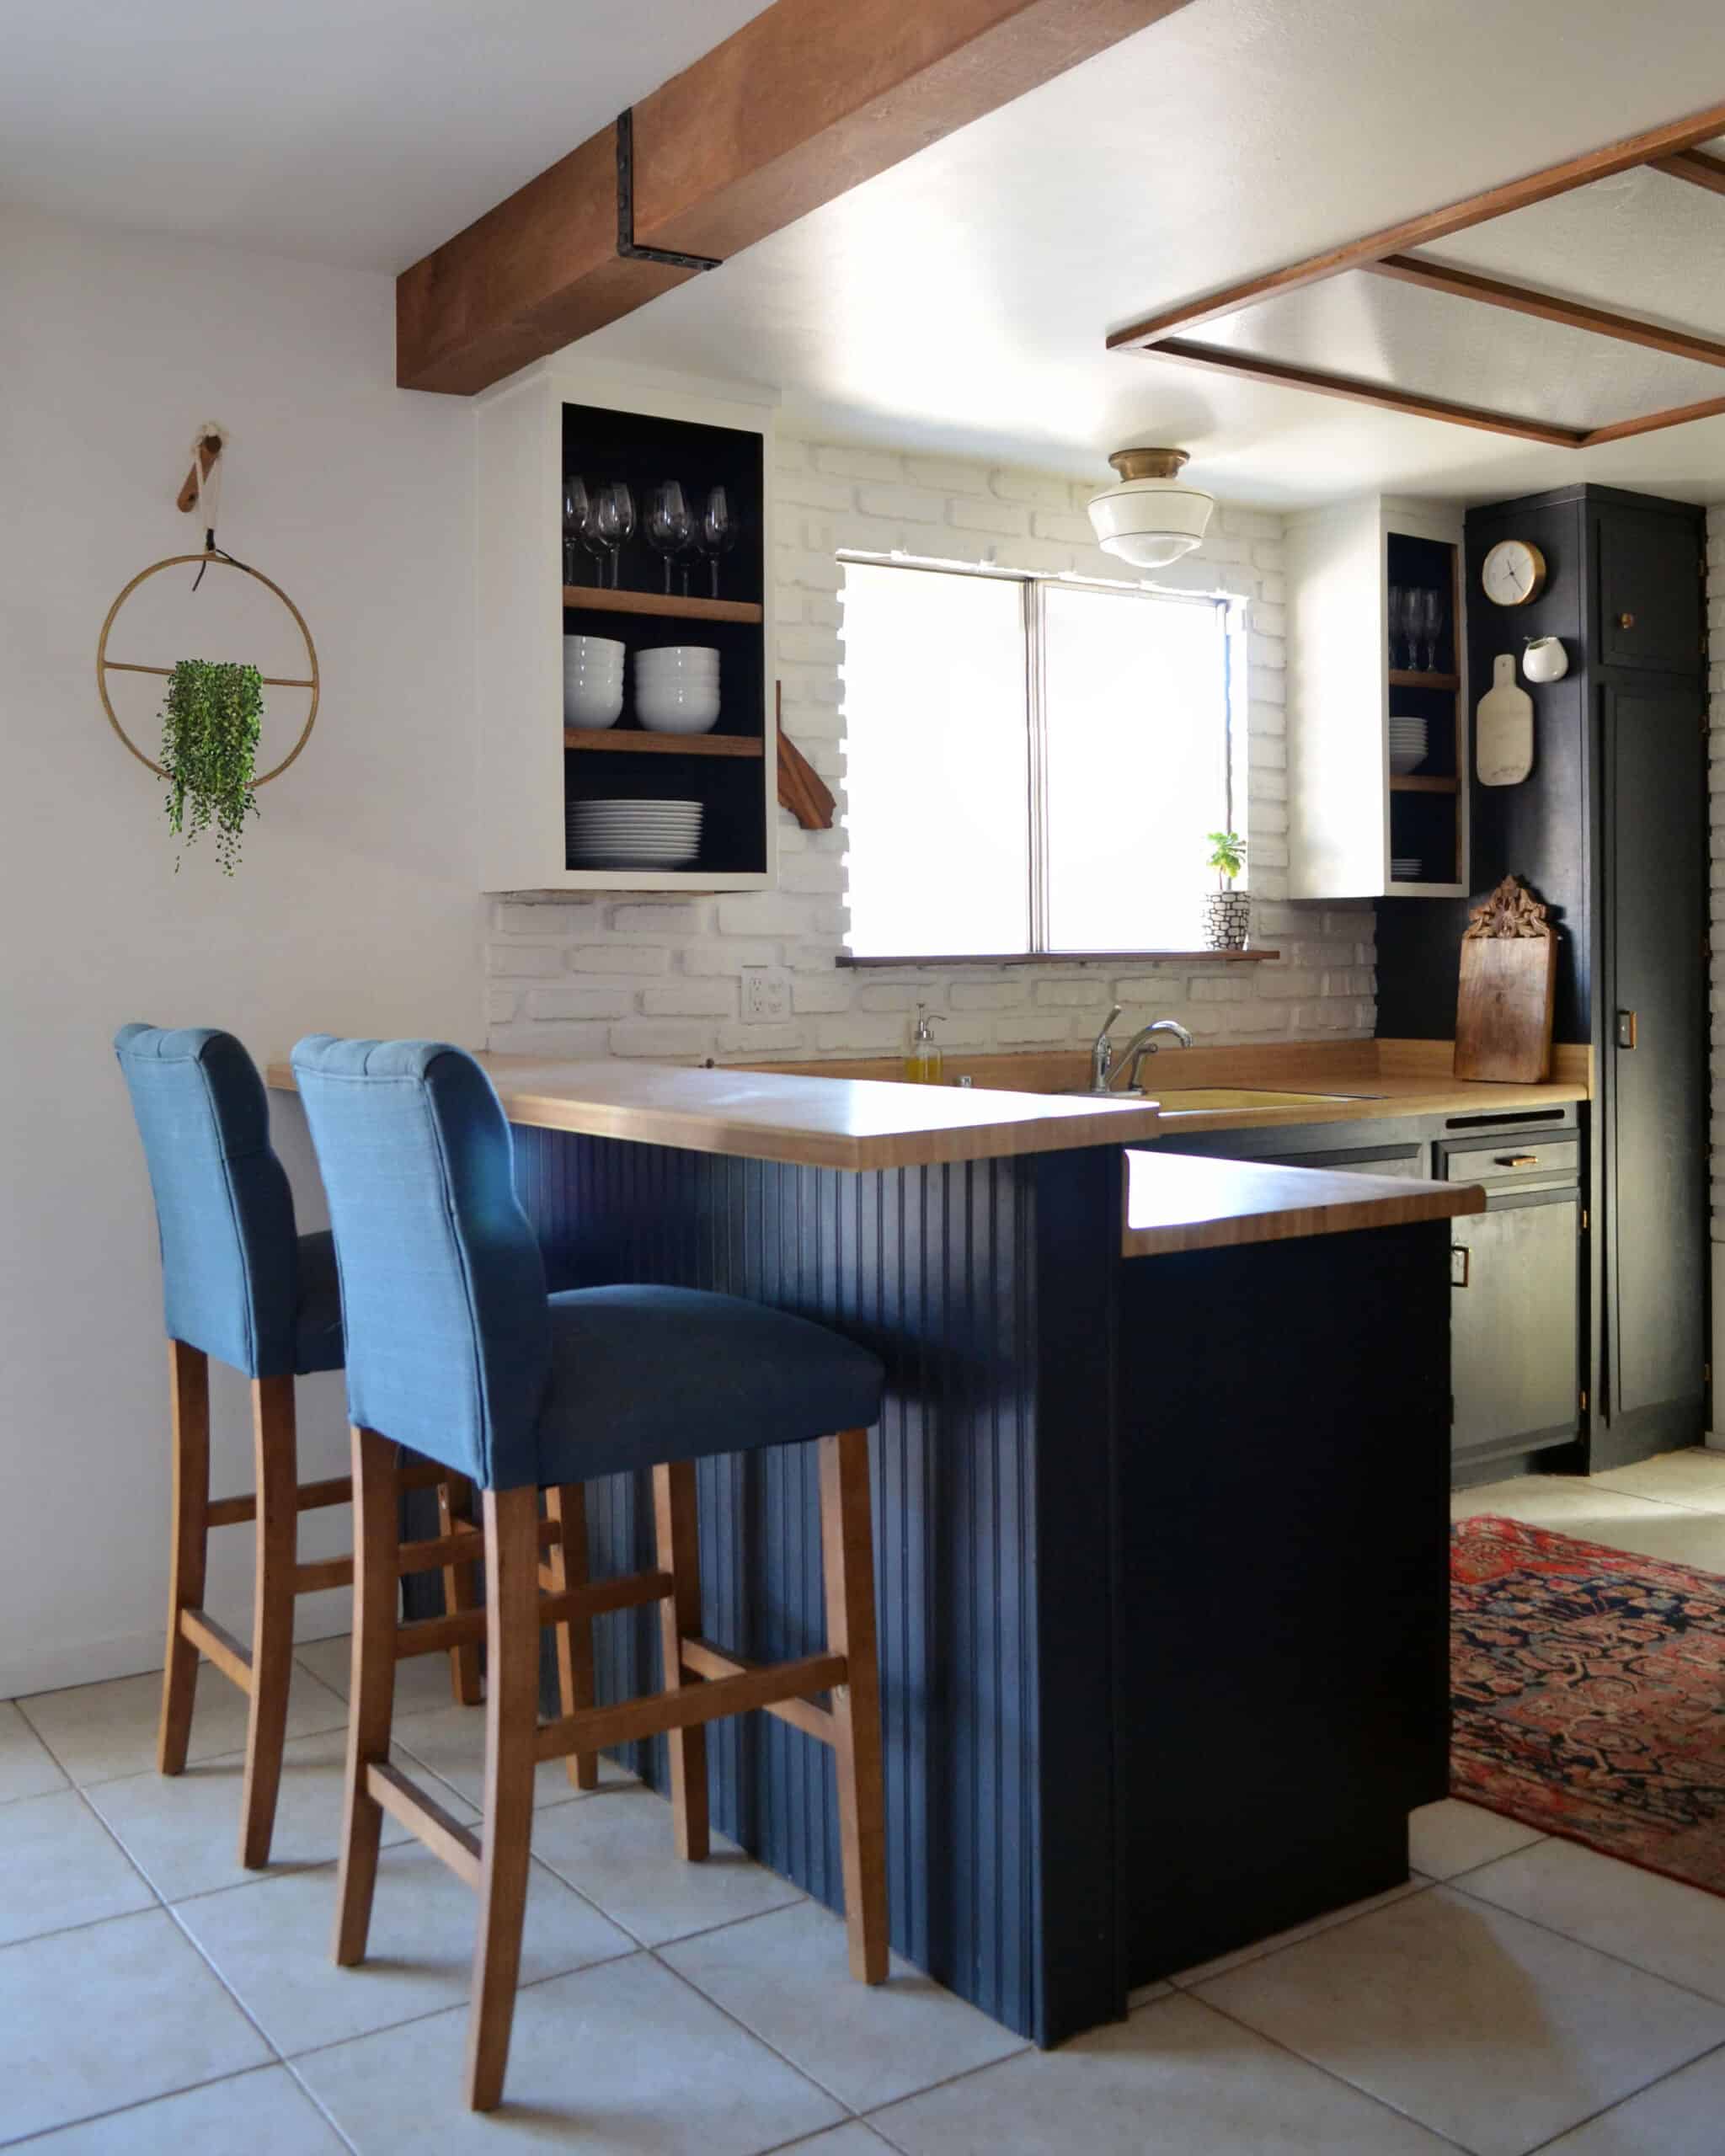
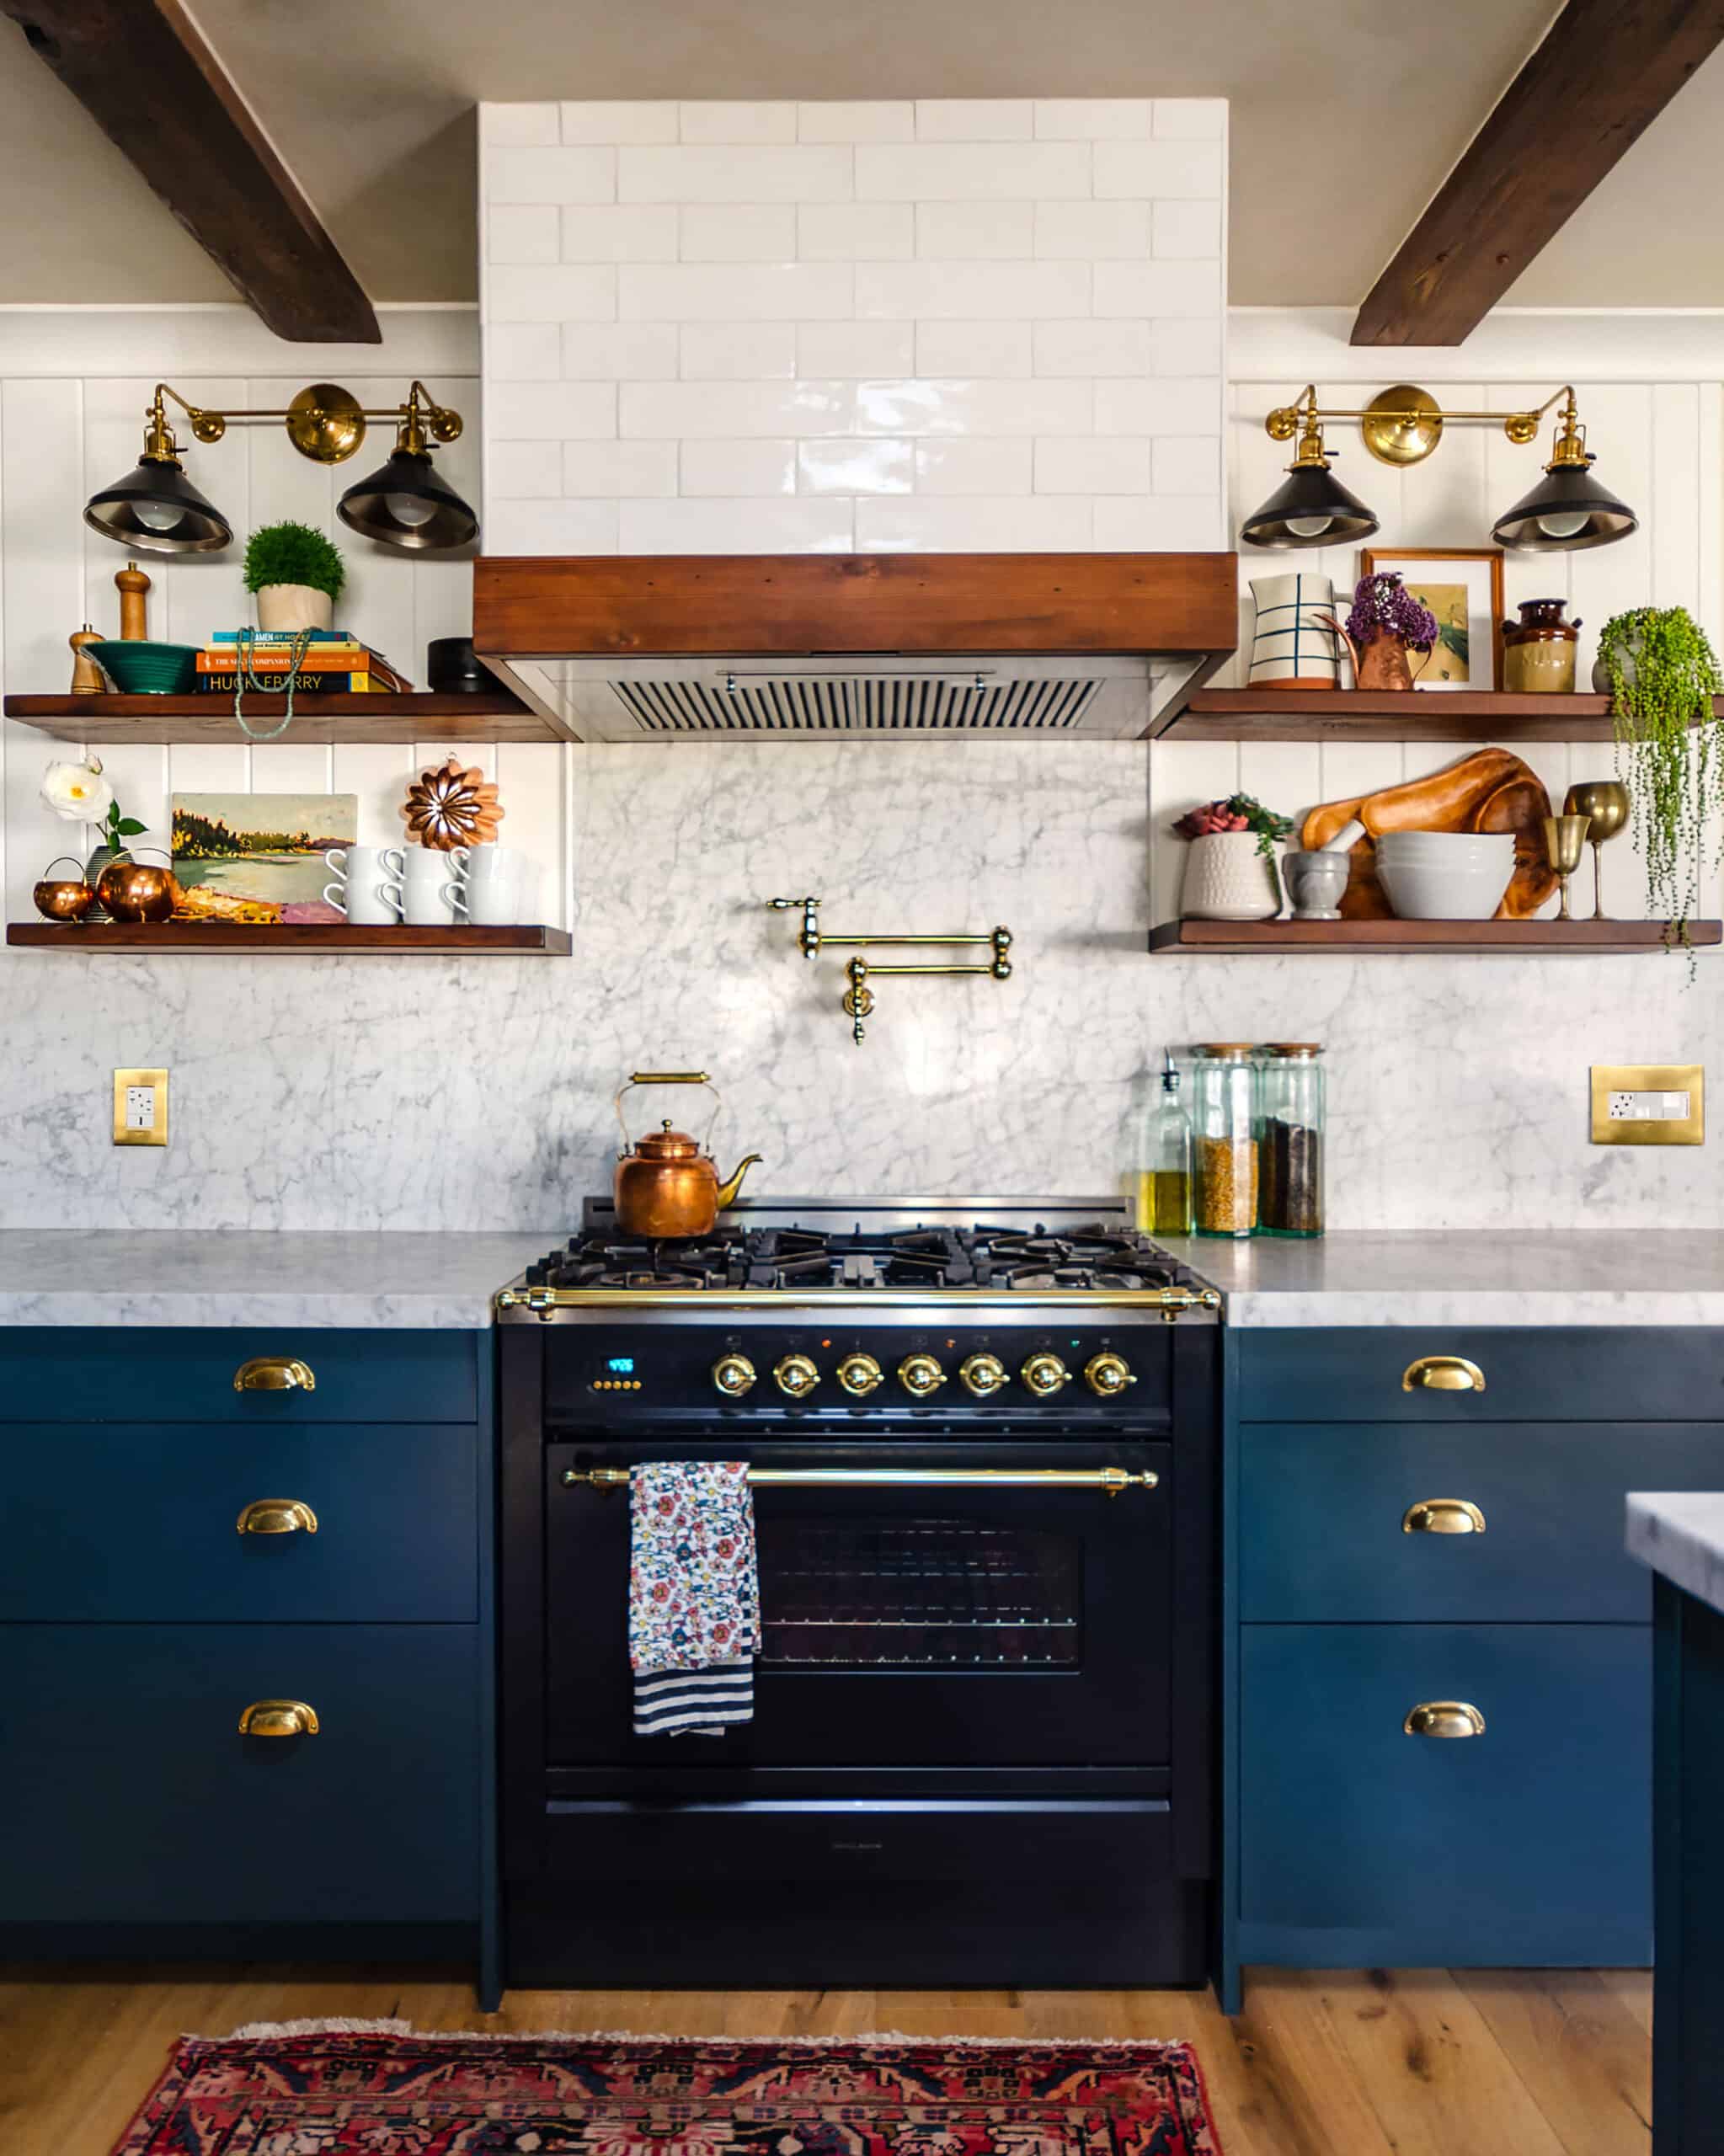
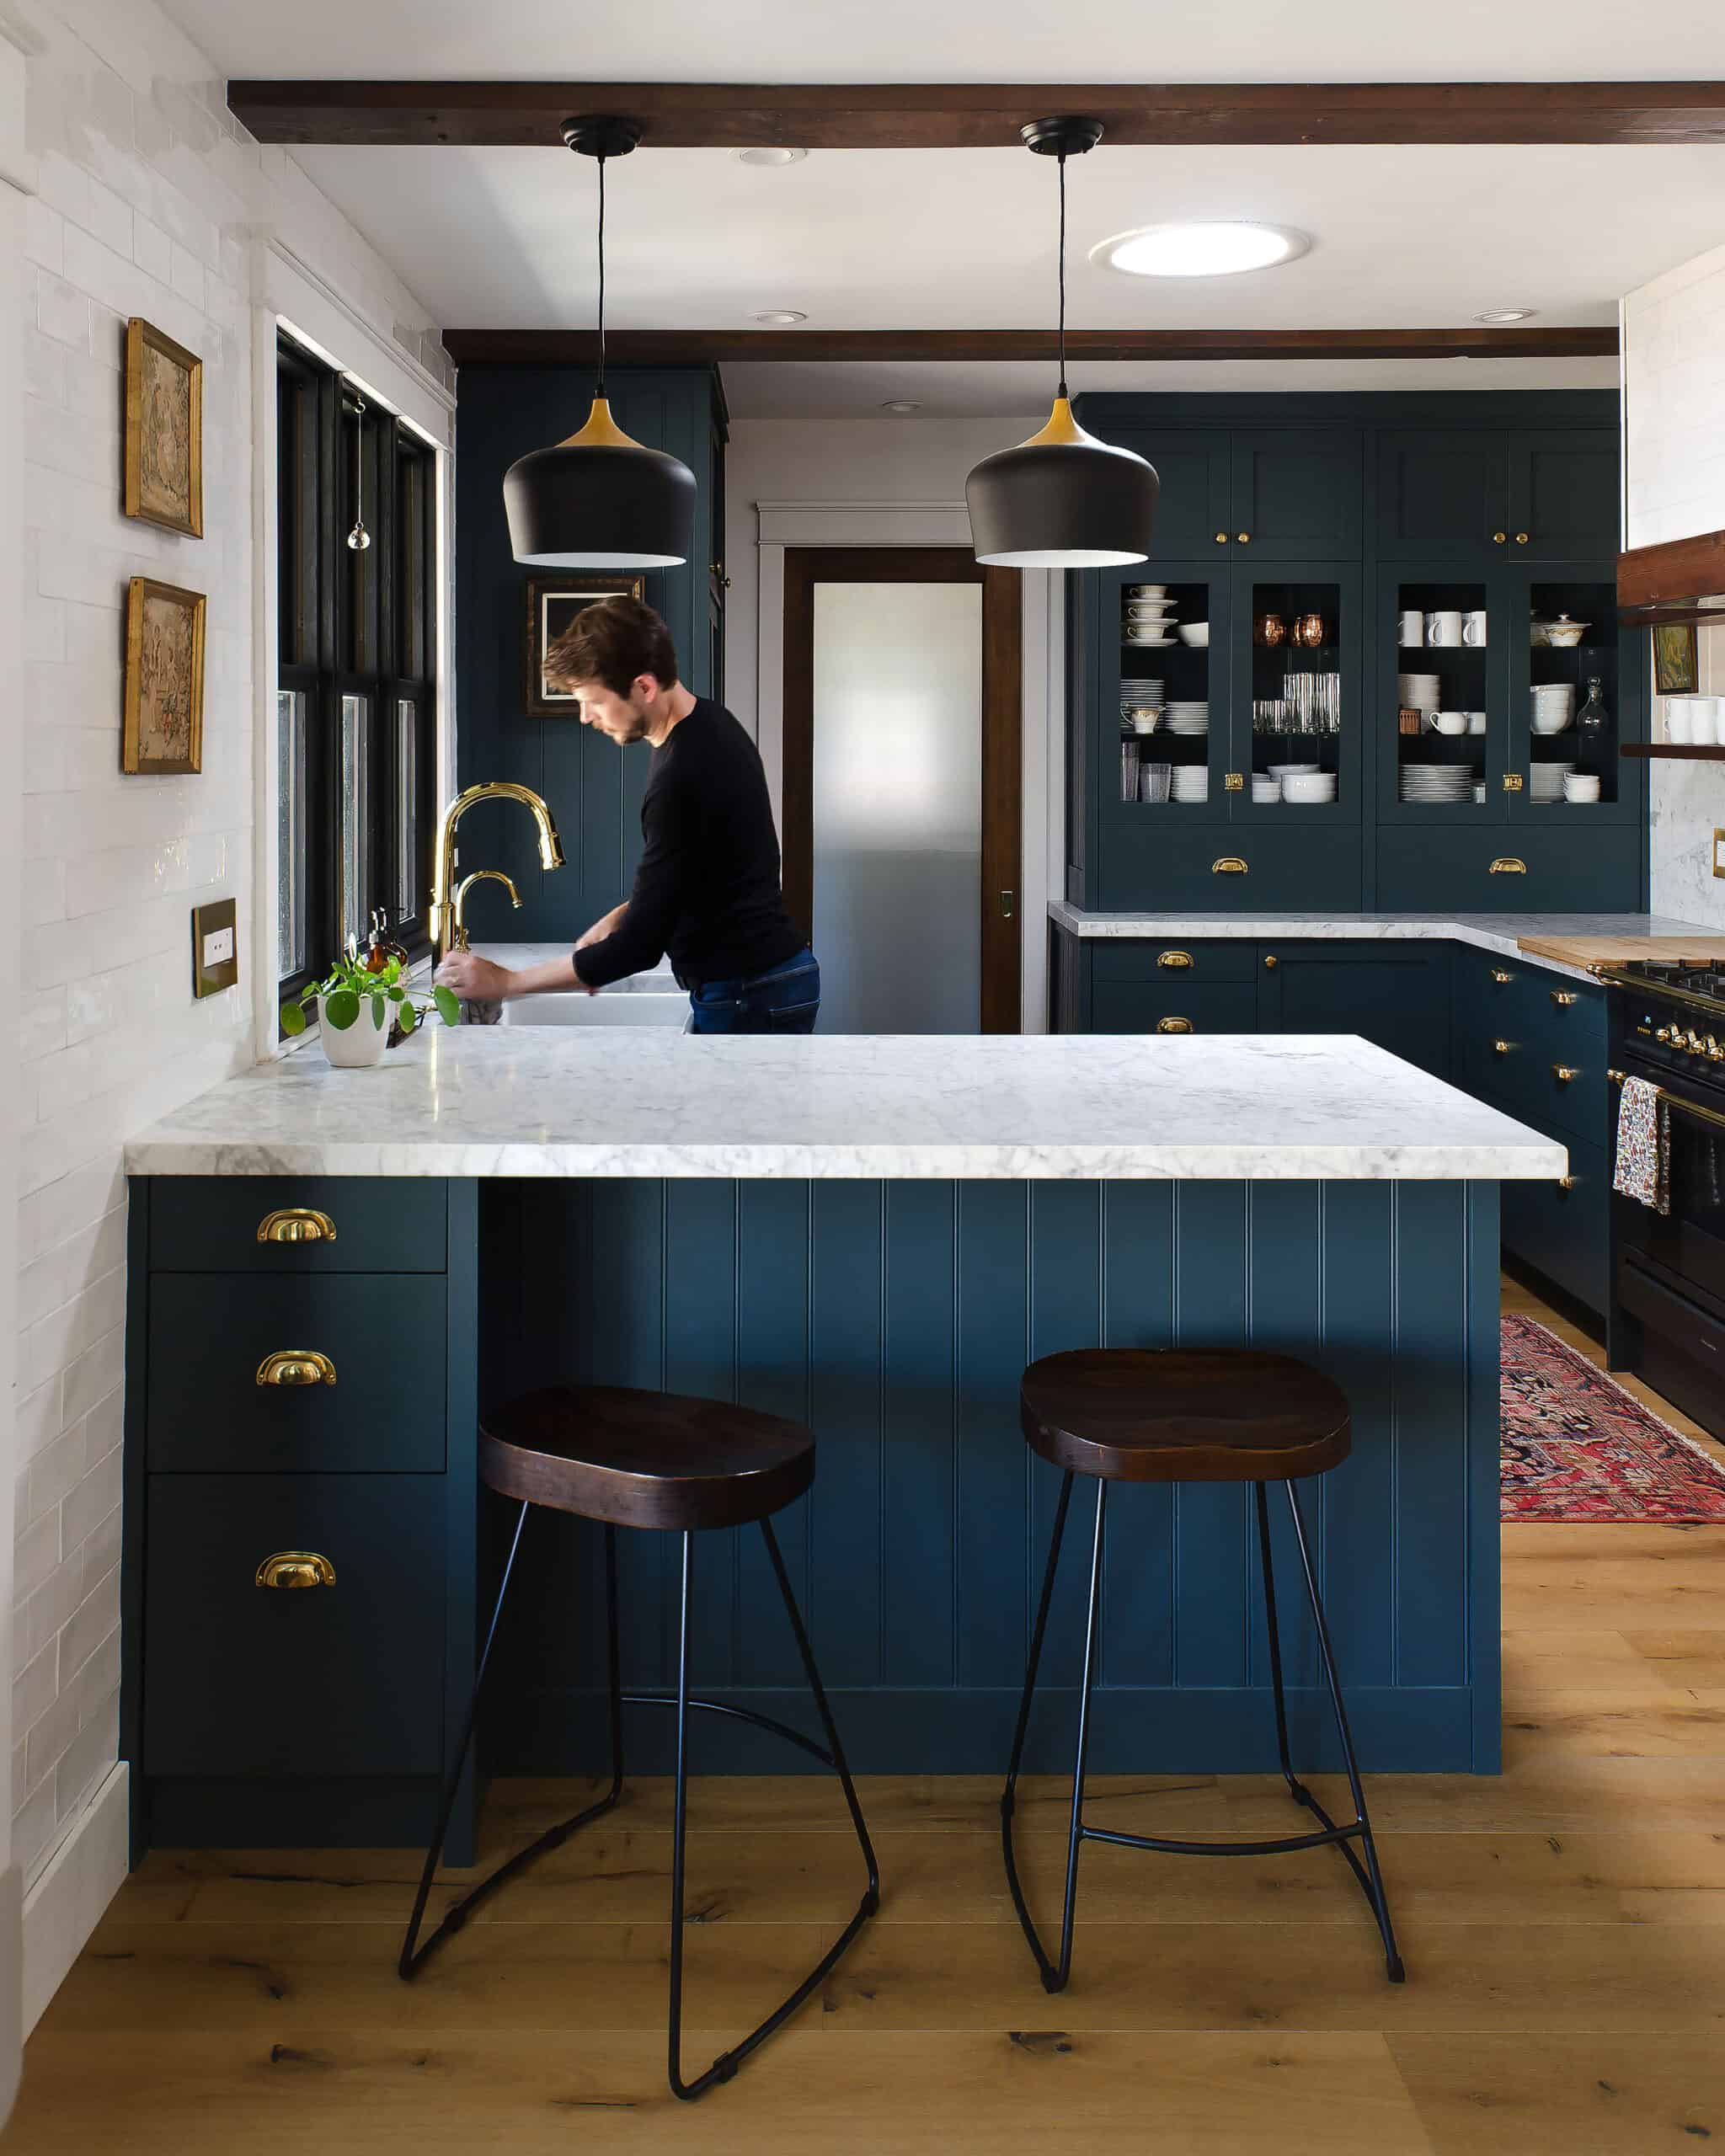
I always knew I wanted dark, so it was a question of whether we would go black or navy! Originally, I had planned for two-toned, white uppers and dark lowers as I did in the kitchen update. Very similar to Emily’s kitchen in the Glendale house! I do particularly like dark lowers and light uppers, especially when the uppers are painted the same color as the ceiling, as the dark lowers are grounding and the light uppers are lifting, creating the illusion of a taller space.
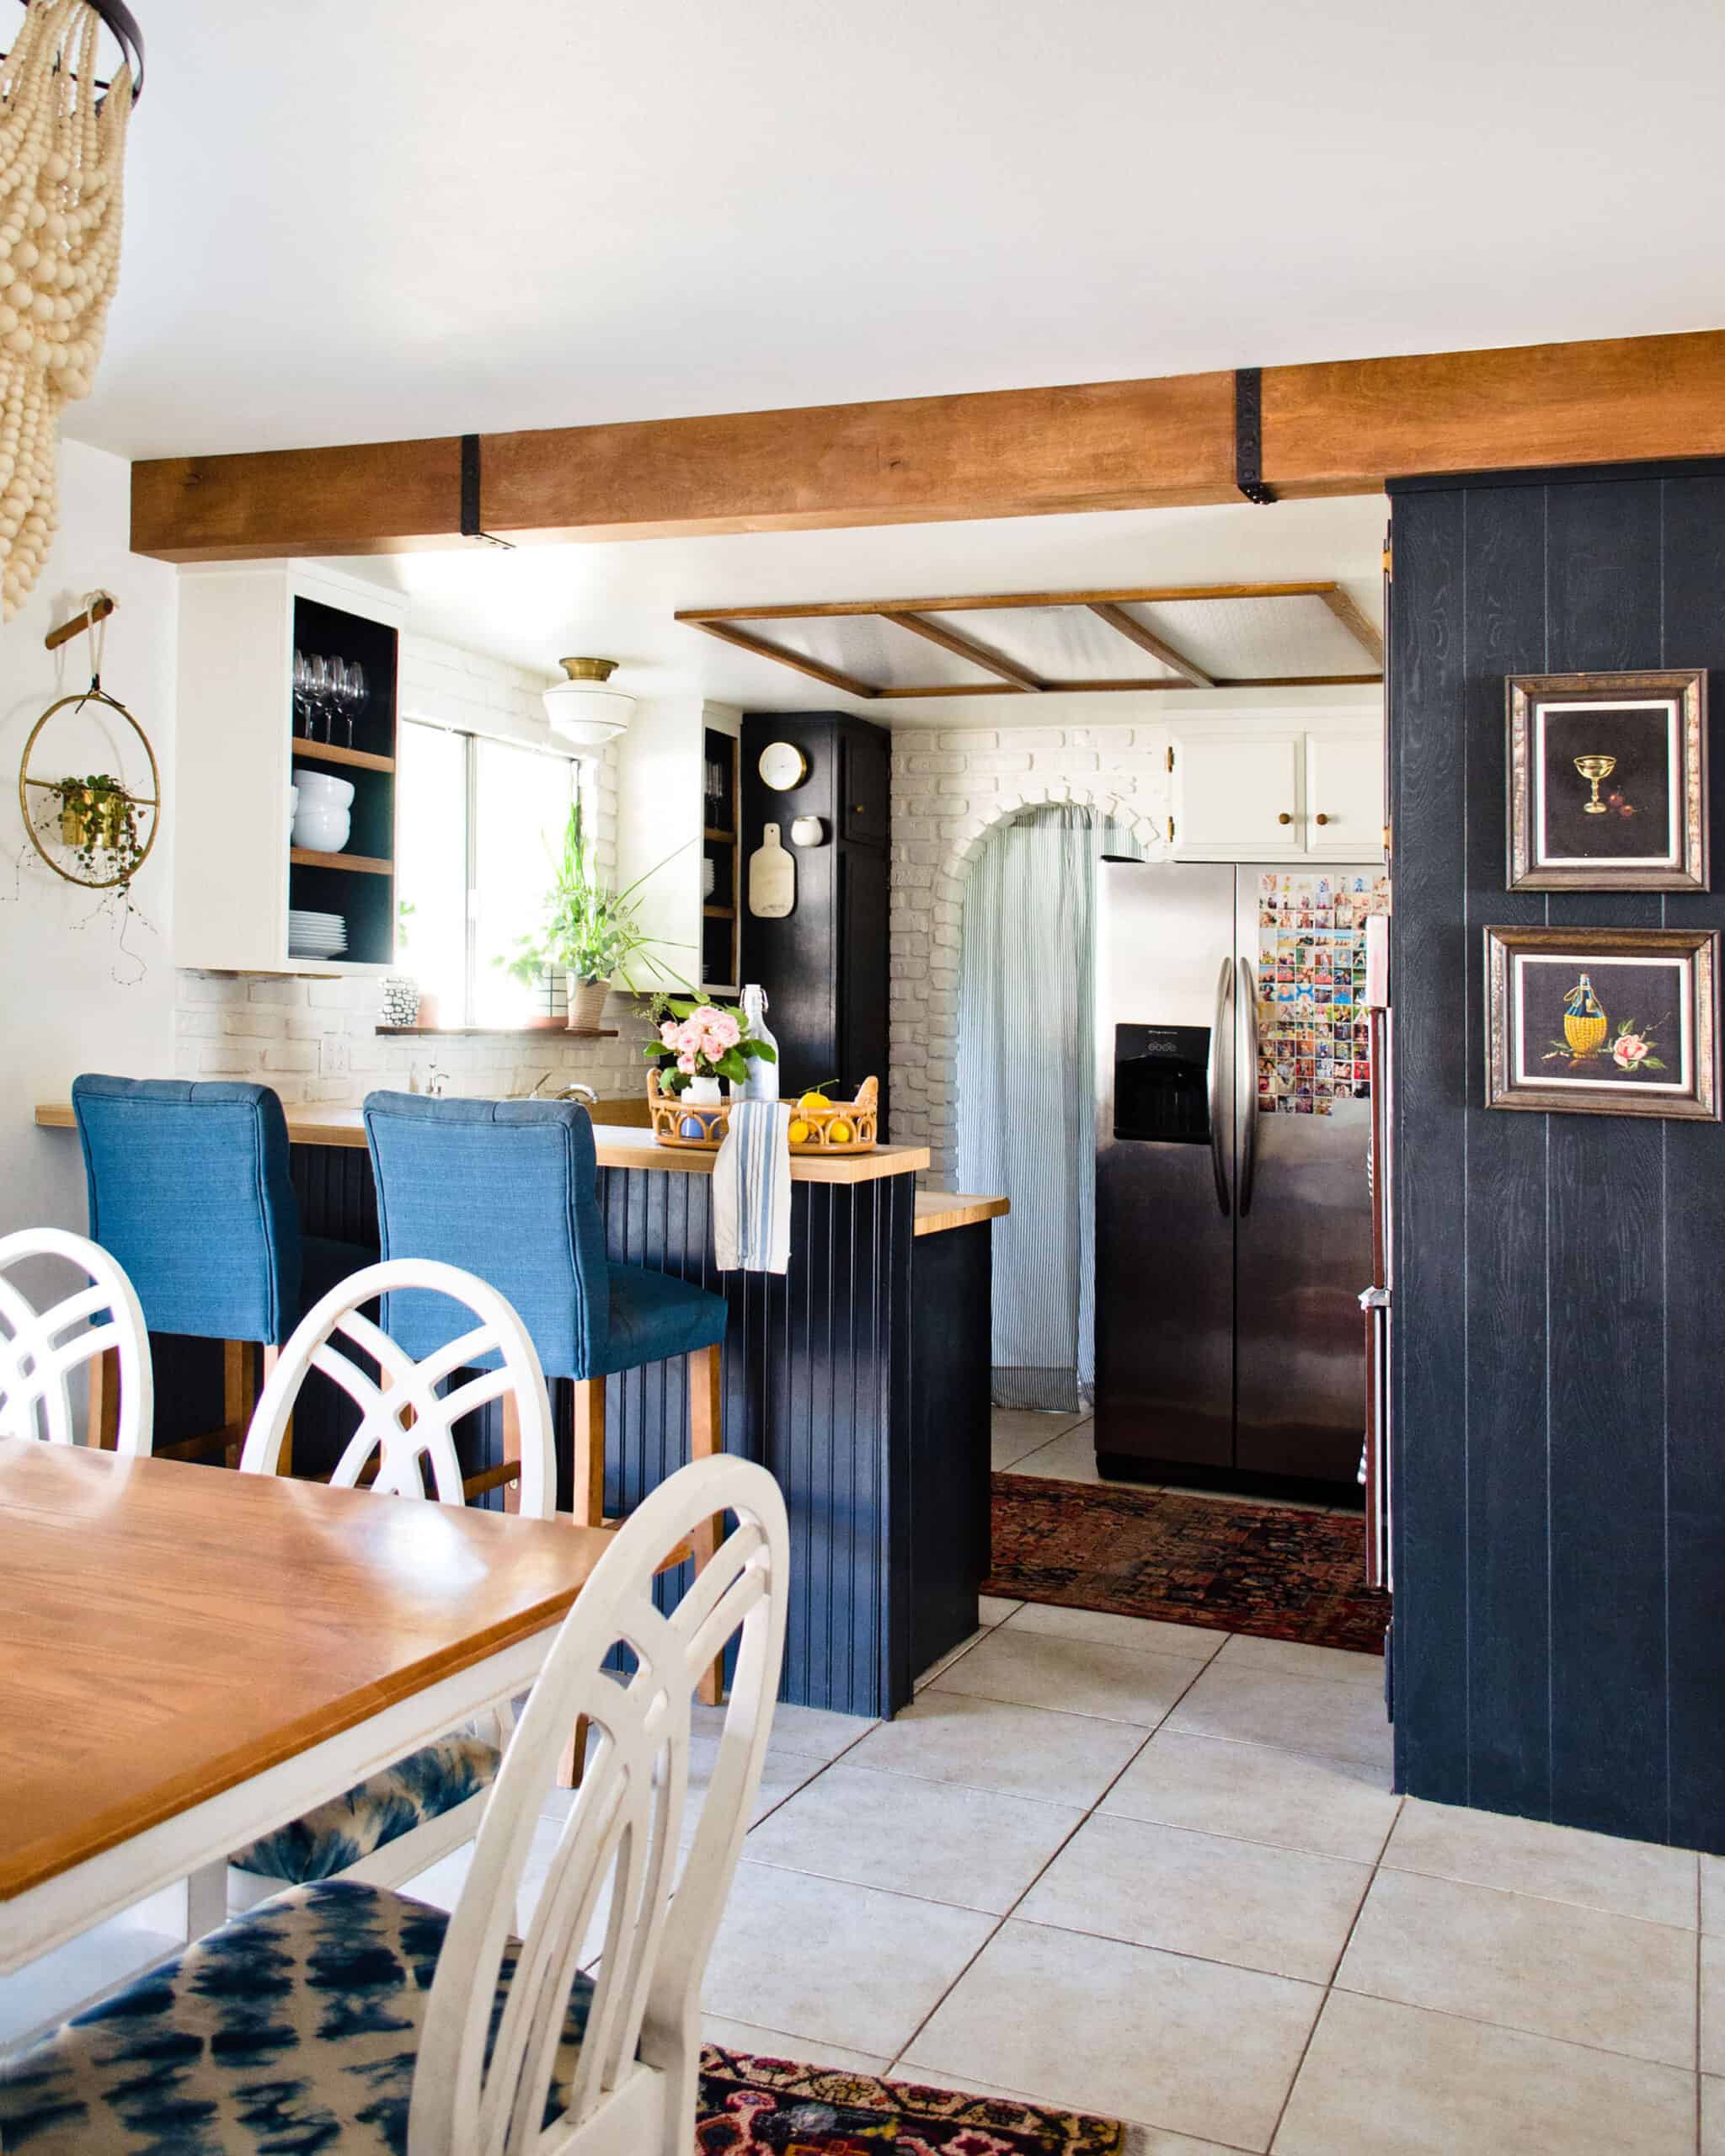
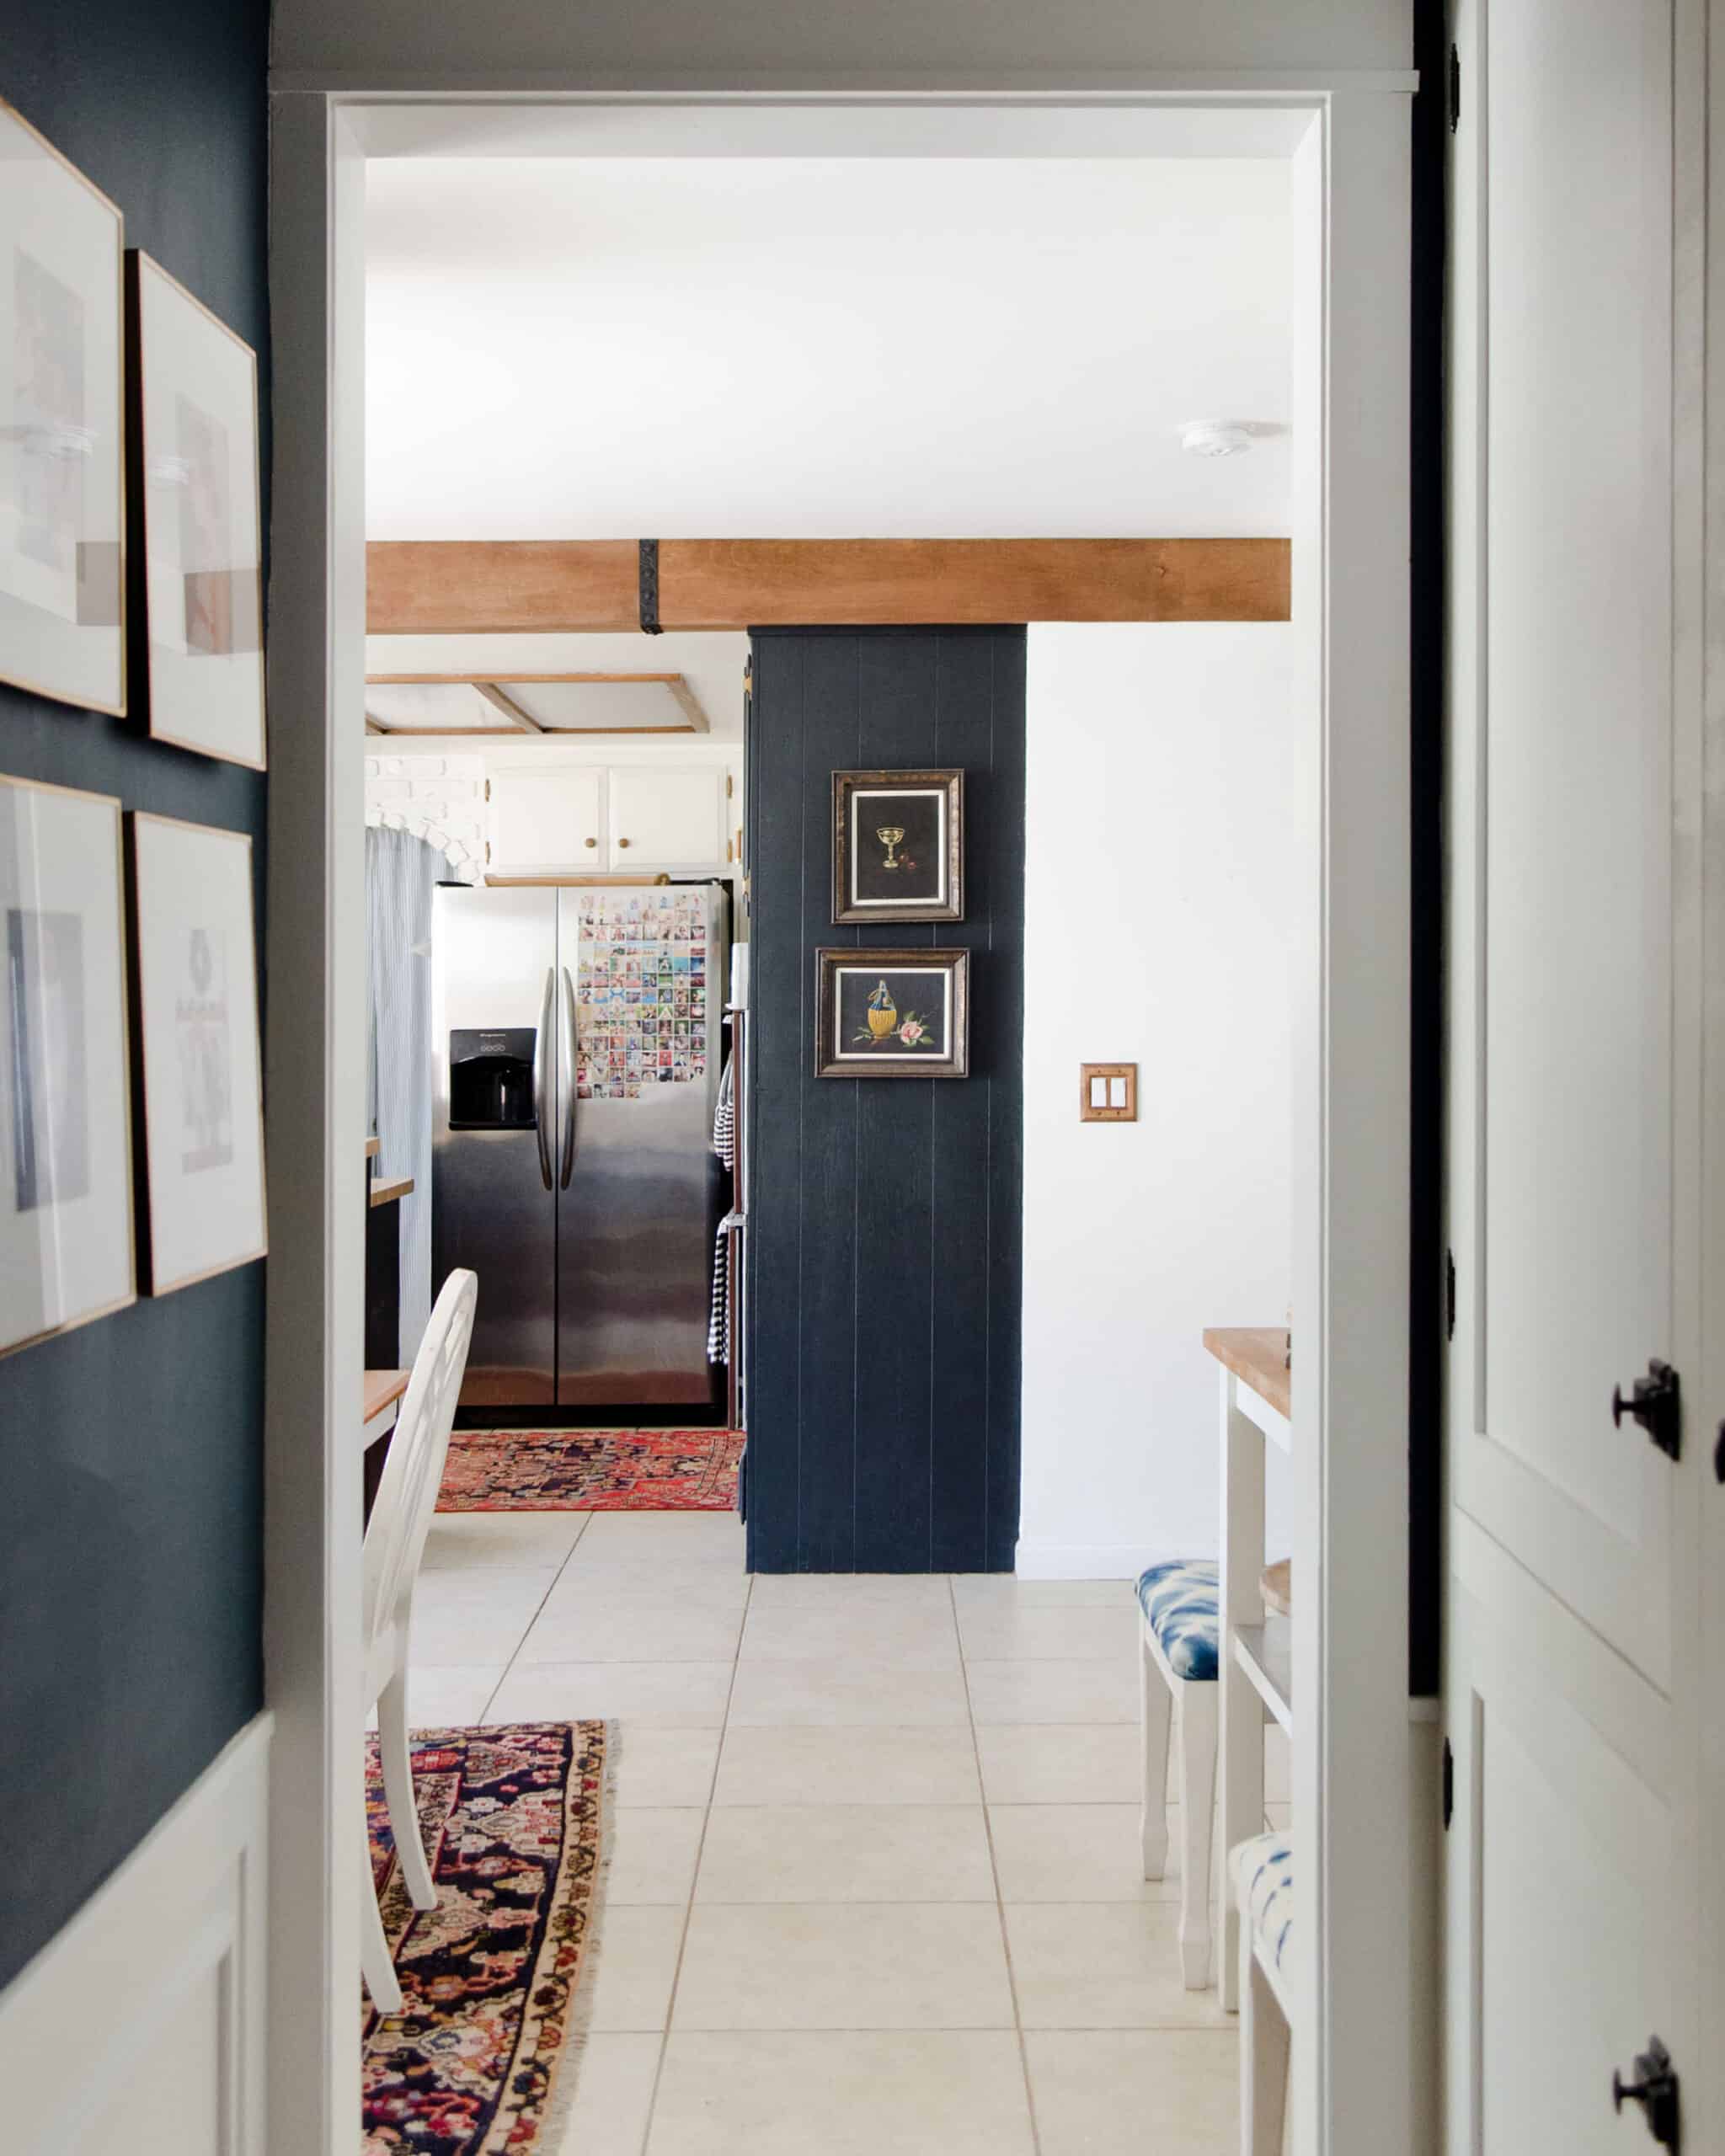
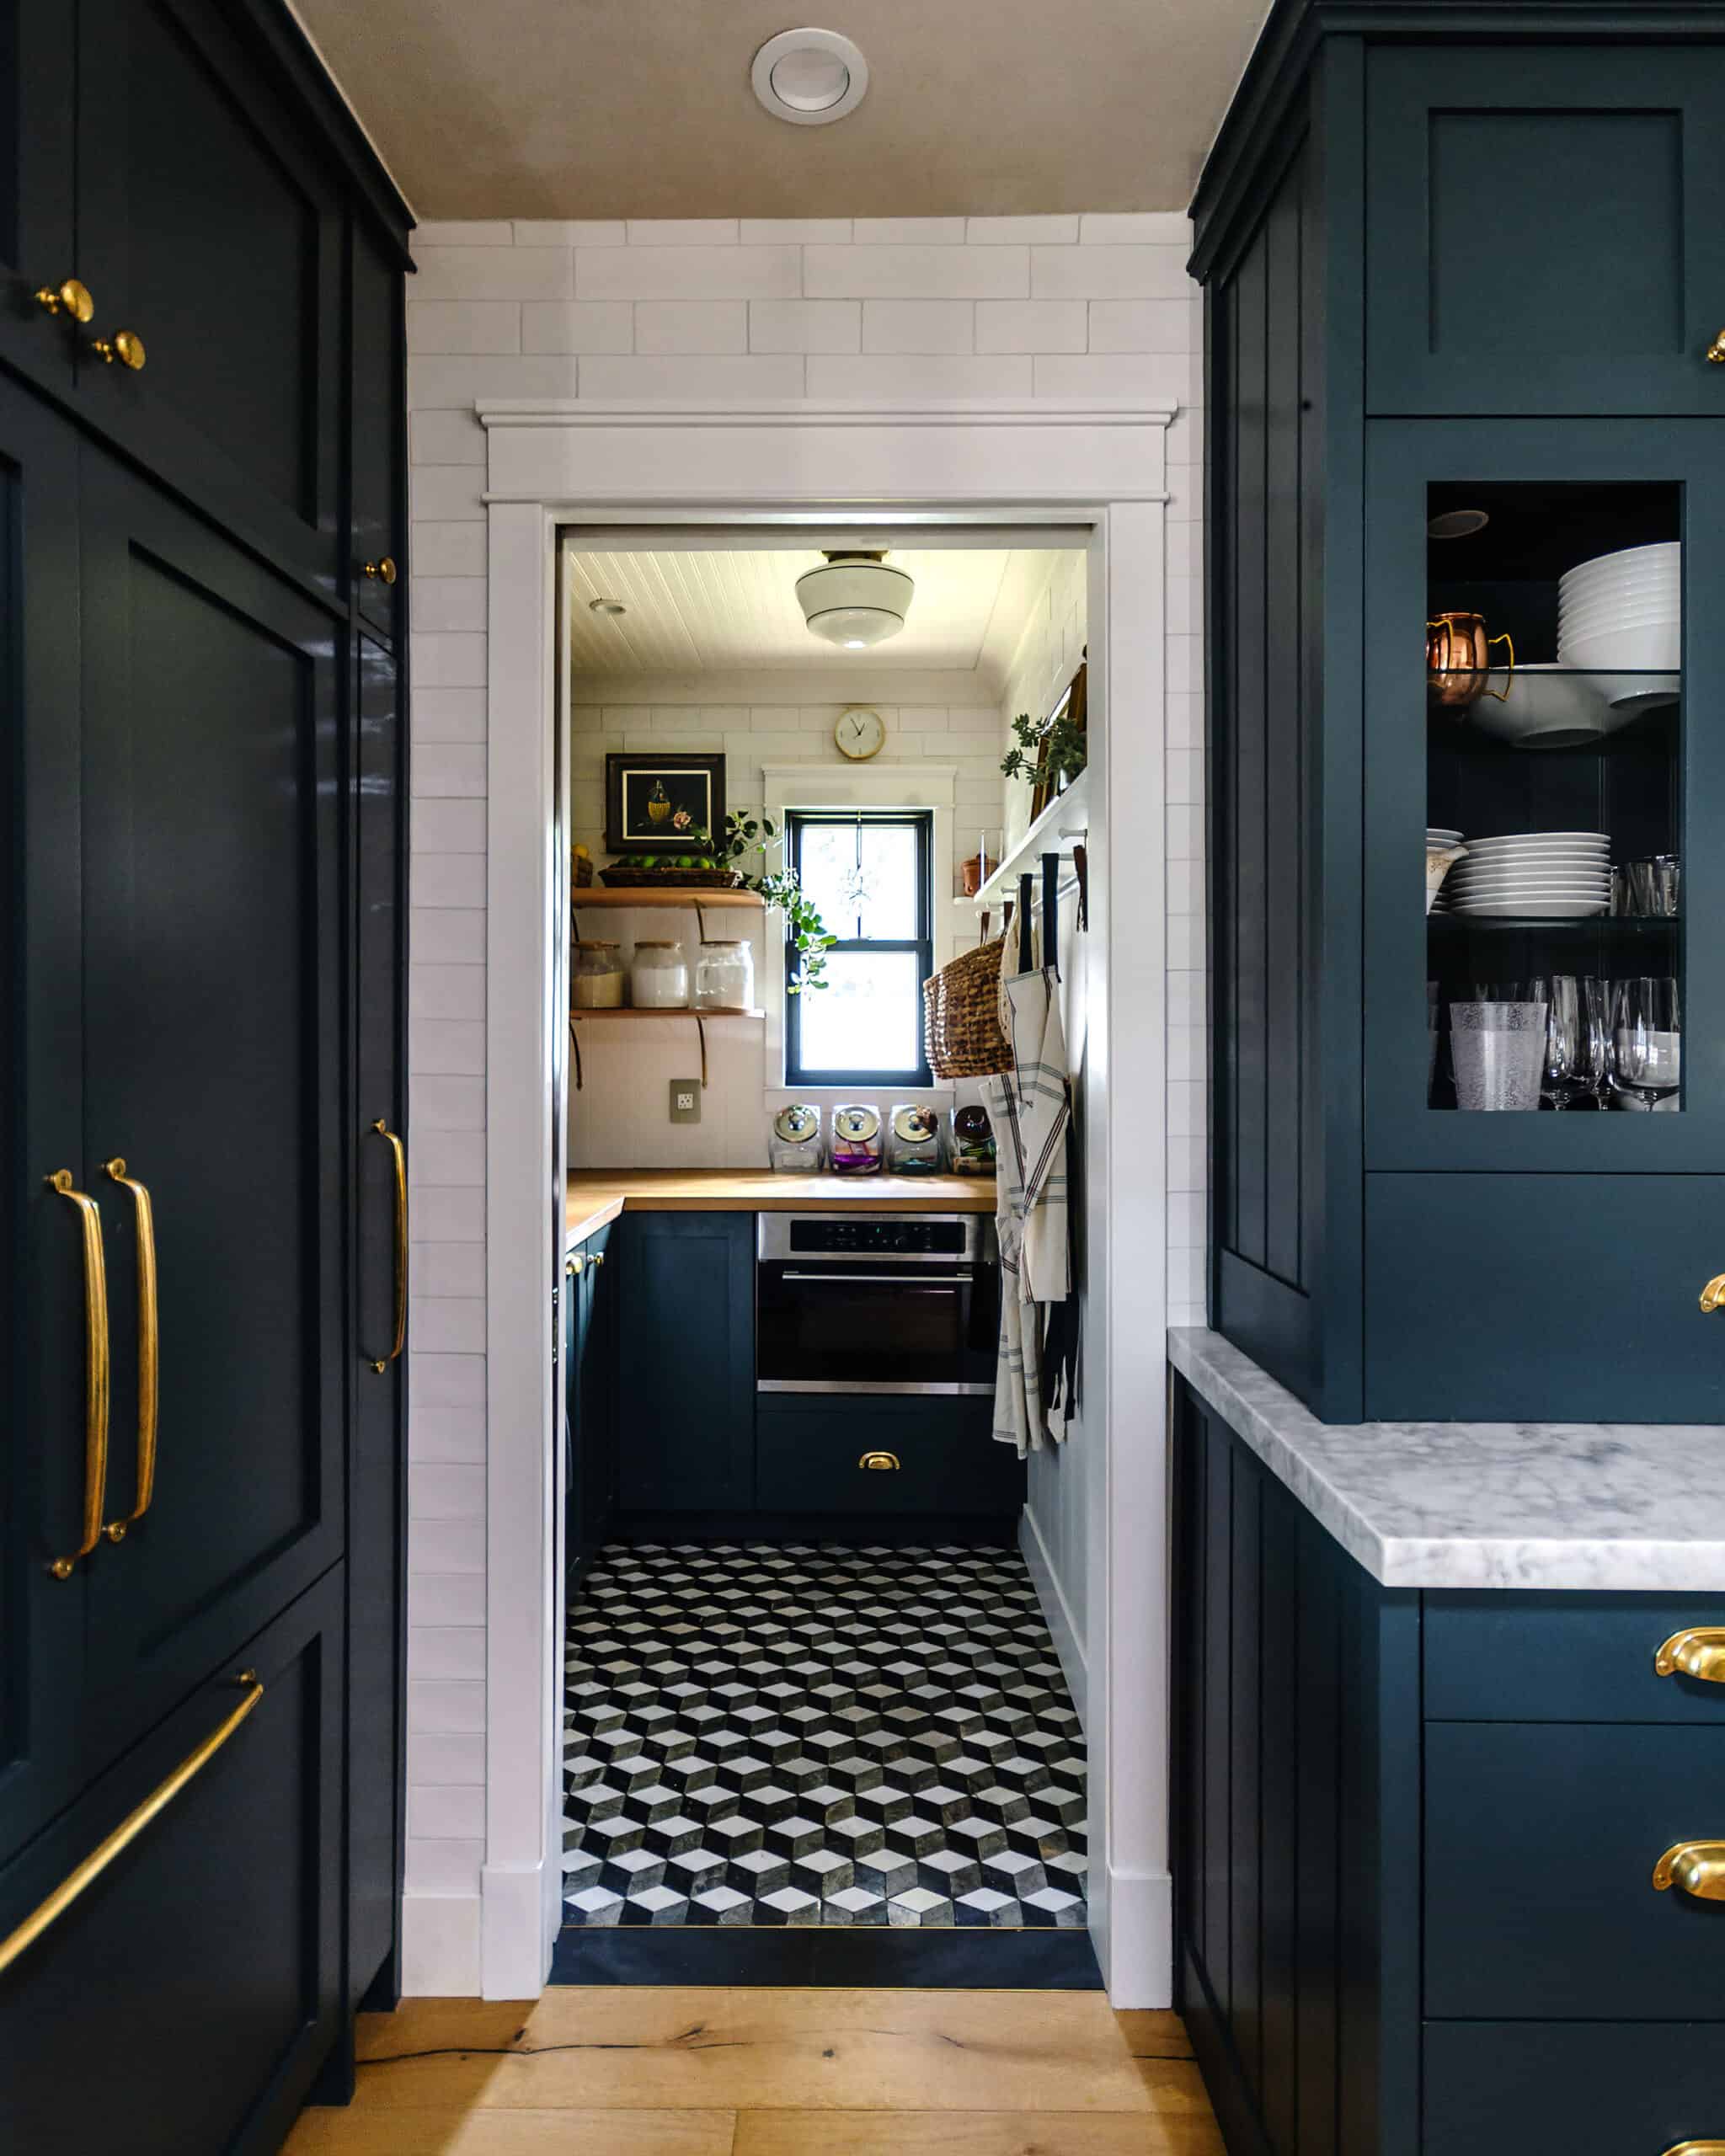
Ultimately, however, I decided to go with one color, after realizing I was going to have to make some awkward paint choices when it came to my integrated fridge; there were no defined lines on where to start and stop each color. And I ended up nixing black, and chose a dark color that still had enough contrast with my stove to look like it was deliberately a different color. I also chose a color that was still a color, but also could read very neutral. I specifically wanted the color that you see in landscapes where it is still a saturated hue, but it’s right before it fades into a gray or a black in a body of water or a mountain or a cloud.
However, I INTENTIONALLY designed my kitchen to go “light” very easily. A couple of coats of paint on the cabinets and it would be a white kitchen.

I truly do not understand cabinets. How do you make them fit perfectly in a kitchen and decide what each drawer is going to do? It’s a giant puzzle.
Indeed, it is a giant puzzle! I am also very concerned about symmetry in my kitchen designs, so that adds another layer of complication to cabinetry layout. This means that I won’t just put a bunch of differently sized drawers, doors and cabinets along a wall just because they fit — does that make sense? A sense of balance is needed in order to have the finished space feel comfortable and less chaotic. This becomes more of an issue the larger a space gets, but typically there are options for symmetry even in small kitchens to give it a nice sense of presence.

To understand what you have to work with as far as cabinetry symmetry goes, you need to establish where the main appliances of the kitchen are going; fridge, stove, sink, and, usually, dishwasher. I particularly like to go with a custom paneled dishwasher especially, because it gives you more options to play with when it comes to cabinetry, and also I personally am not a fan of a giant slab of stainless steel in the middle of my beautiful cabinetry. Some people love the industrial look of that and that’s just fine, but I think its good to remember that the option to integrate the dishwasher into your cabinetry to help balance the room is an option. I also think that a trash & recycling drawer is something not to be overlooked. Indeed, it is my favorite feature of my kitchen! It’s great not having to put our trash or recycling in whatever standing space we can find. I also love our spice drawer… which leads us to how to decide what goes in what drawers.
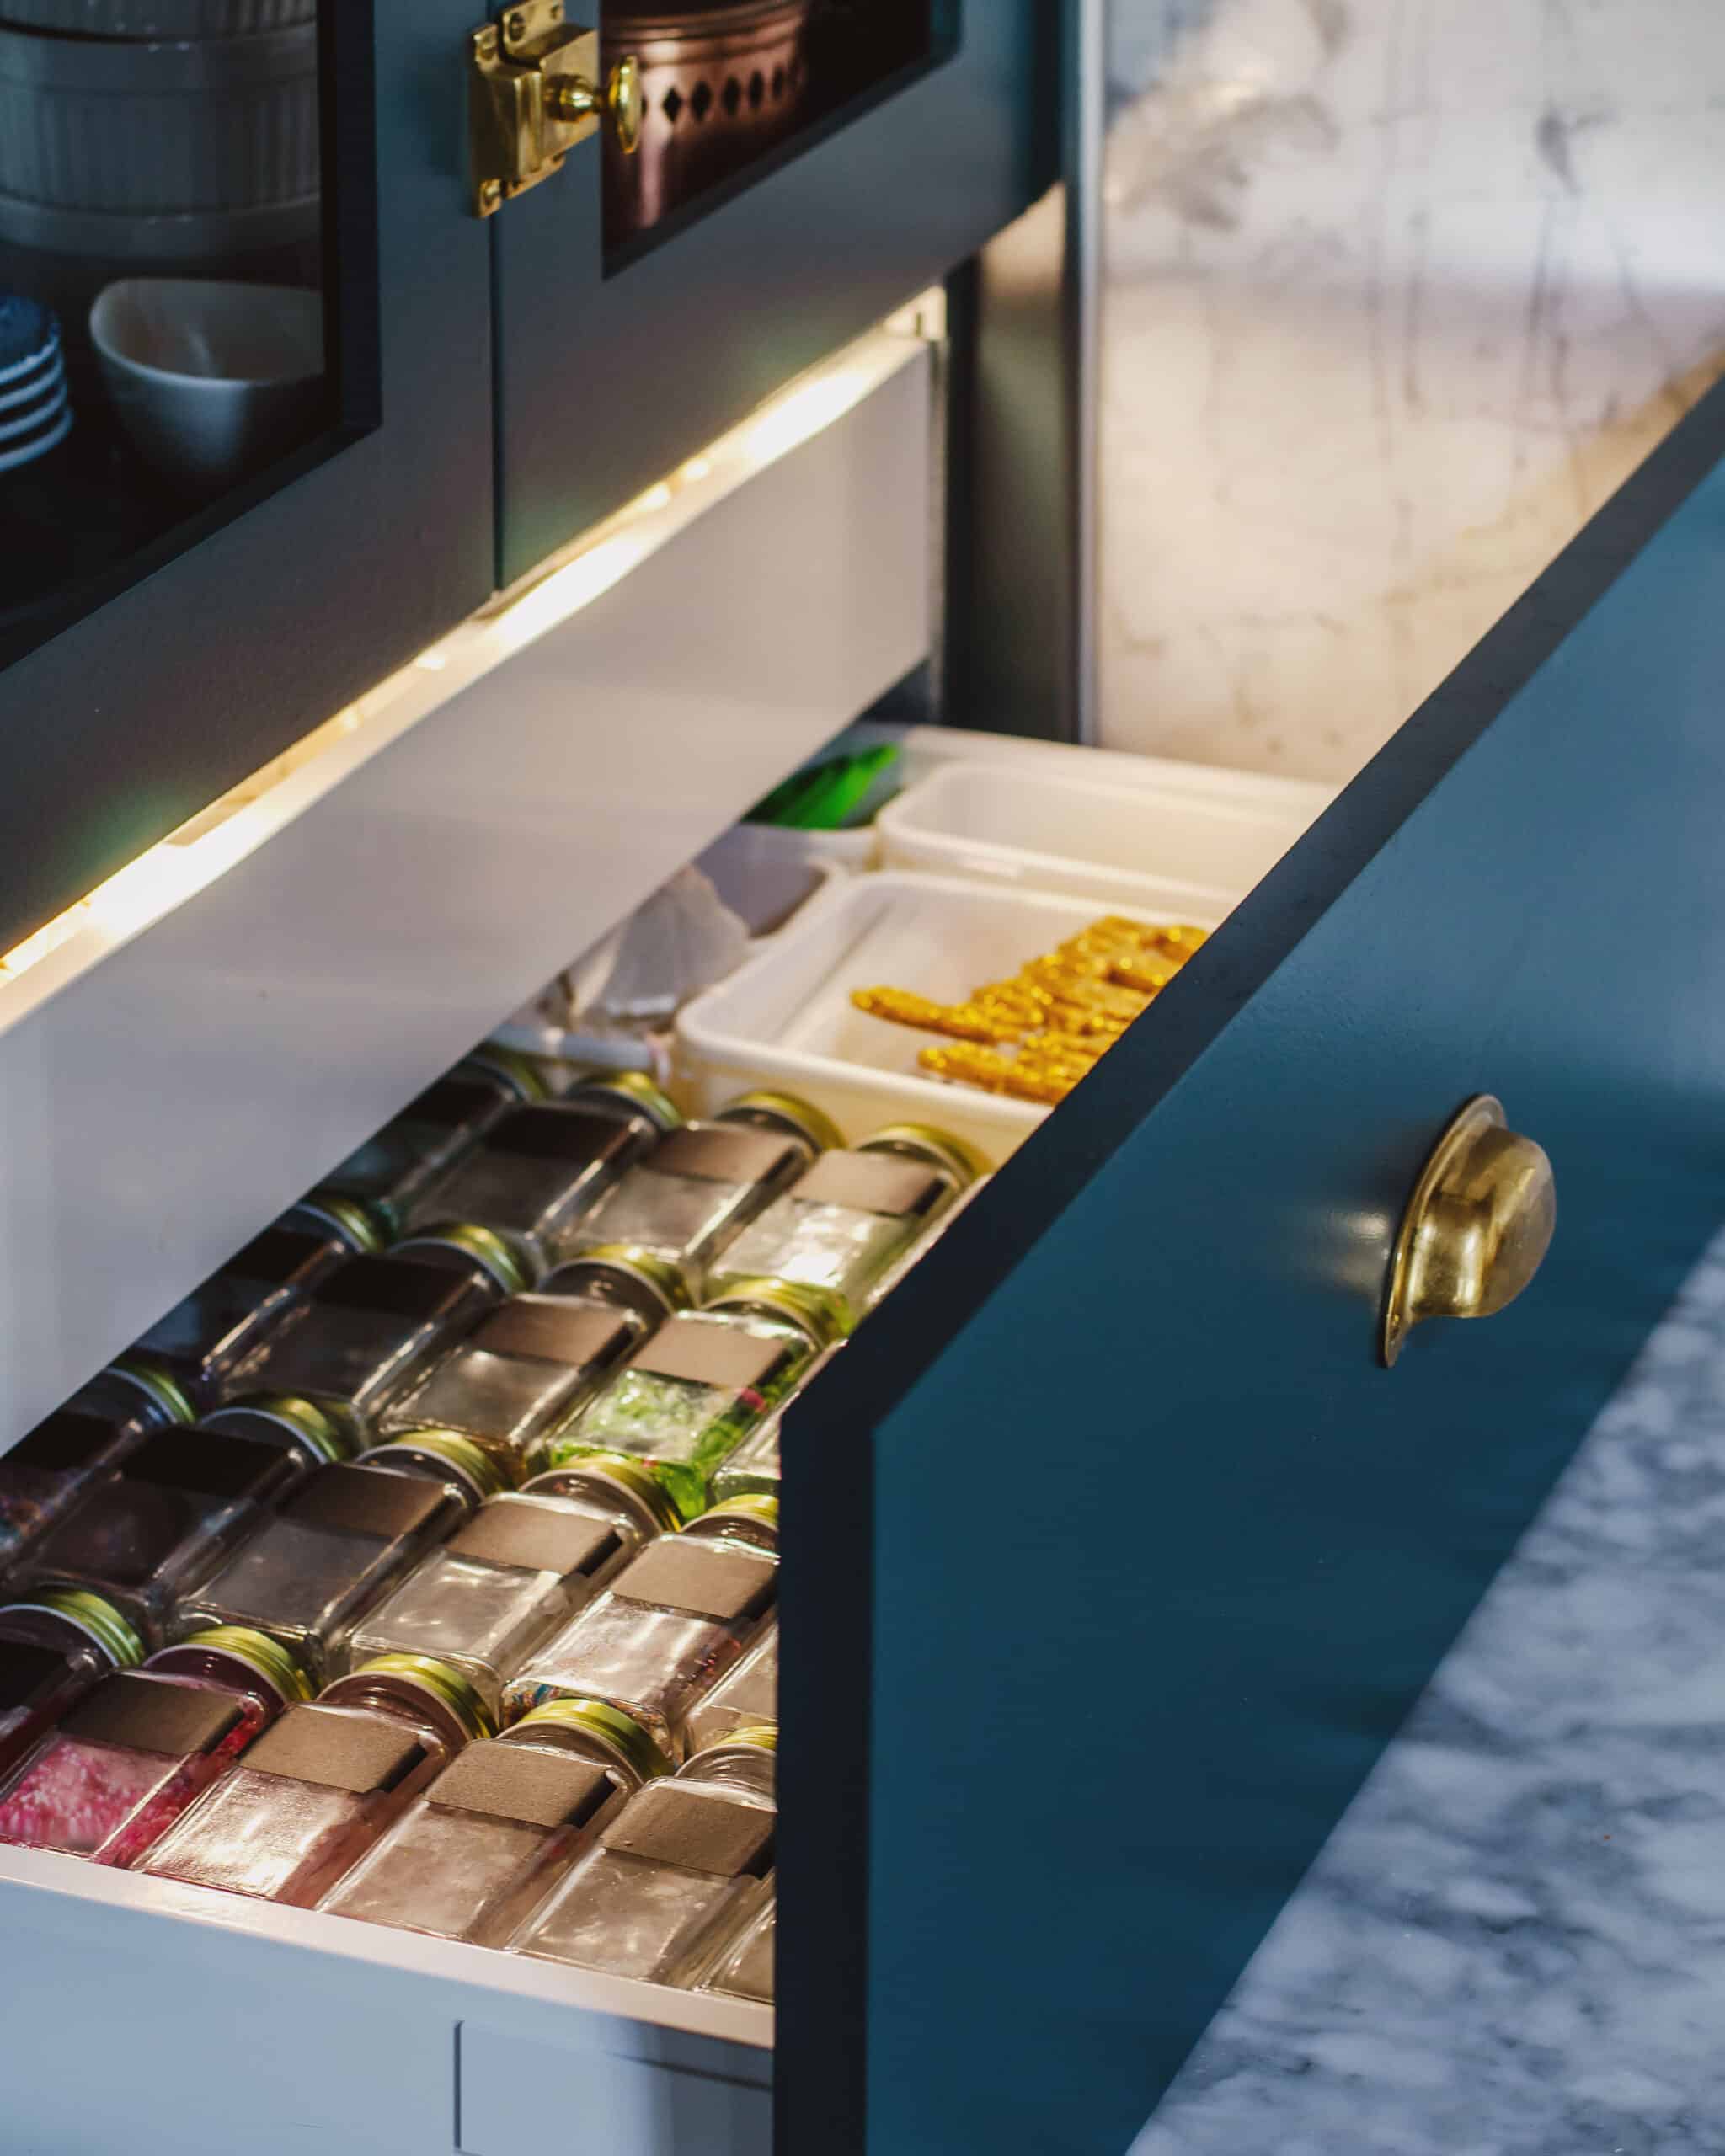

After deciding on the main placement of each major appliance, I considered the items that we wanted to store. For instance, you know you need a place for eating utensils and serving utensils, pots and pans, etc. Tyler and I made an exhaustive list of items that we needed to store in our kitchen, labeled them out on paper, and assigned them letters. Then, we printed out the cabinet layout I had settled on, and labeled each cabinet with the letter corresponding to the contents we wanted to put in that cabinet. When we discovered that we didn’t have a good place for something we could re-arrange accordingly. We also realized we wanted an uneven amount of shallow drawers. This led to us deciding to do utilize my favorite kitchen cabinet secret; the hidden drawer. The result of this was that I settled on the slim 5″ upper drawer, 10″ middle drawer, and 15″ lower drawer on ALL of my cabinets with drawers. But then behind some of those medium and large drawers I have a shallow hidden drawer behind it. In fact, two of my cabinet boxes LOOK like 3 drawers, but are in fact FIVE! 
My mind is blown. I . . . did not do that when I was designing my cabinetry layout, haha. What cabinets do you get so that they don’t chip?
I am not sure that I am an expert here, but in my experience, I have never had a kitchen that didn’t show some wear in some way over time. Any cabinetry made out of melamine/laminate/foil-wrapped inevitably would begin to peel apart at the seams (usually at the tops or bottoms of the fronts), and leave no easy method of repair (these are repairable, just not what I consider an easy, guaranteed method of repair in the same way paint is). And while a painted cabinet front will also show wear at the tops and bottoms of drawers, it’s an incredibly easy fix–just touch it up with some new paint. This was another reason I chose Semihandmade’s DIY line; I wanted to be able to make small, easy repairs to my kitchen as time wore on, instead of just having to dispose of a foil-wrapped door.
How did you choose what countertop material to go with? I want something beautiful, but also acid-proof, waterproof, AND heatproof so I can set down a baking tray wherever I want to. I want the superwoman of kitchen counters, haha.
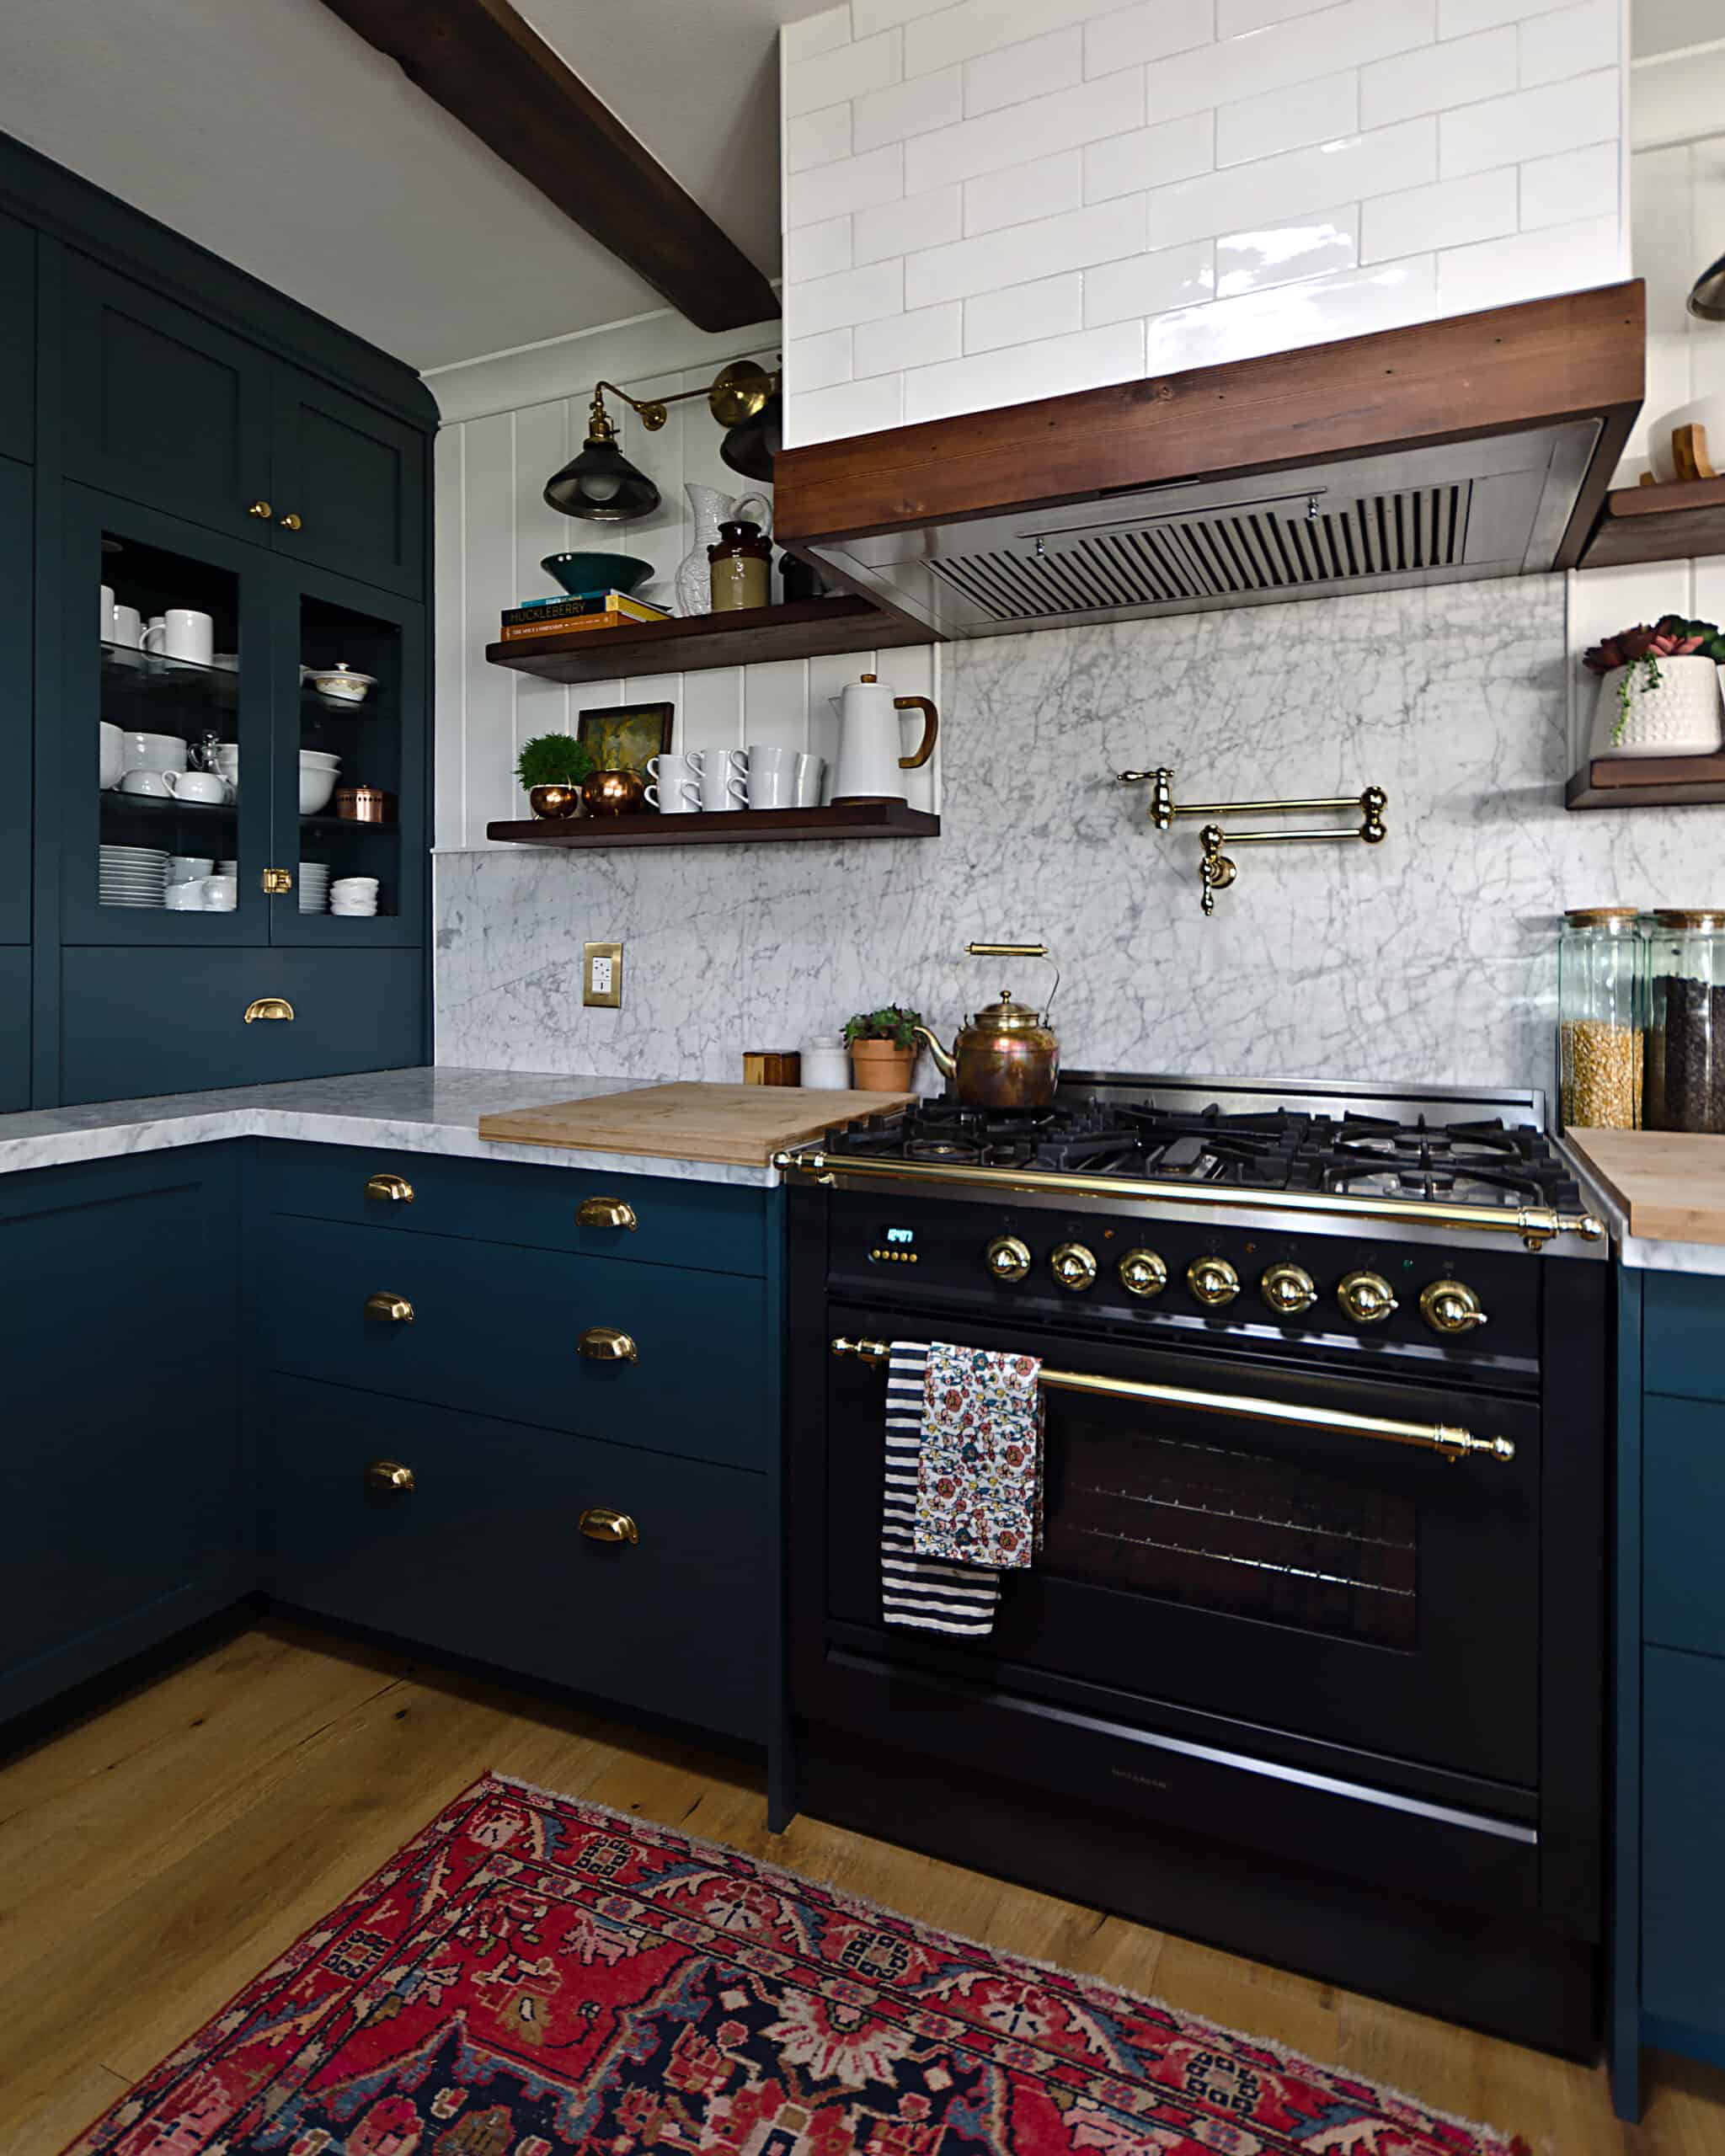
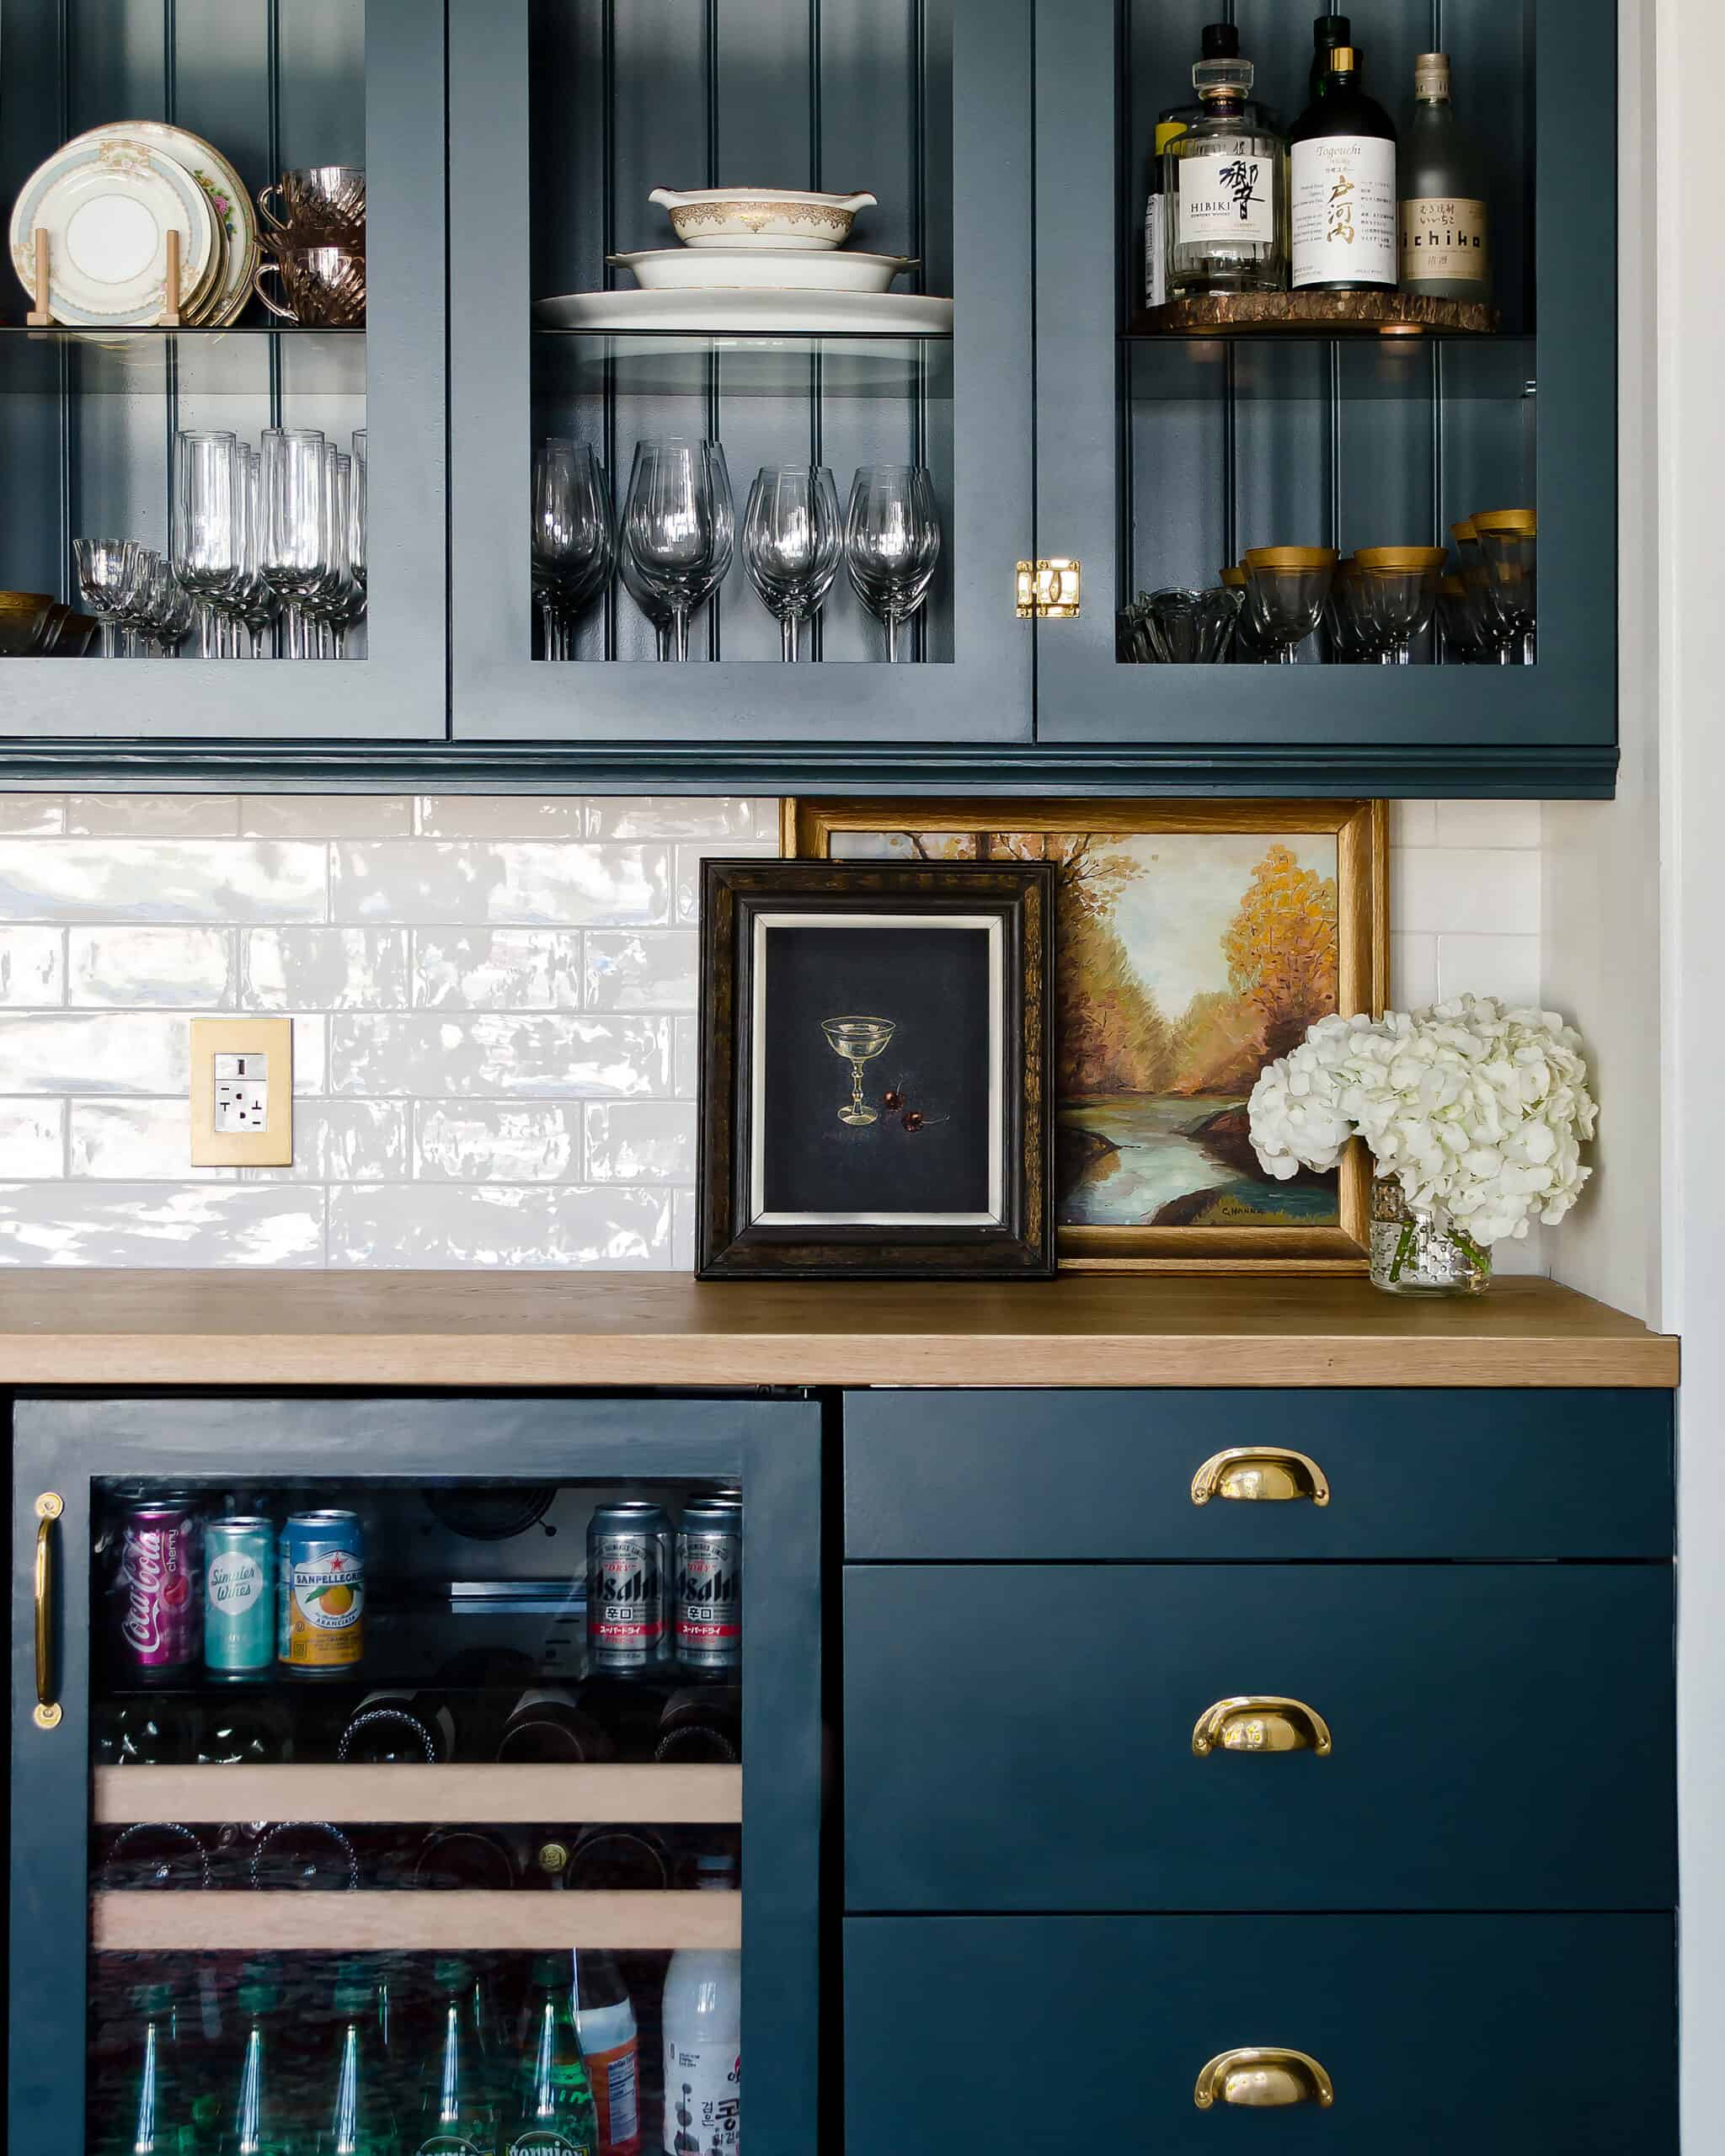
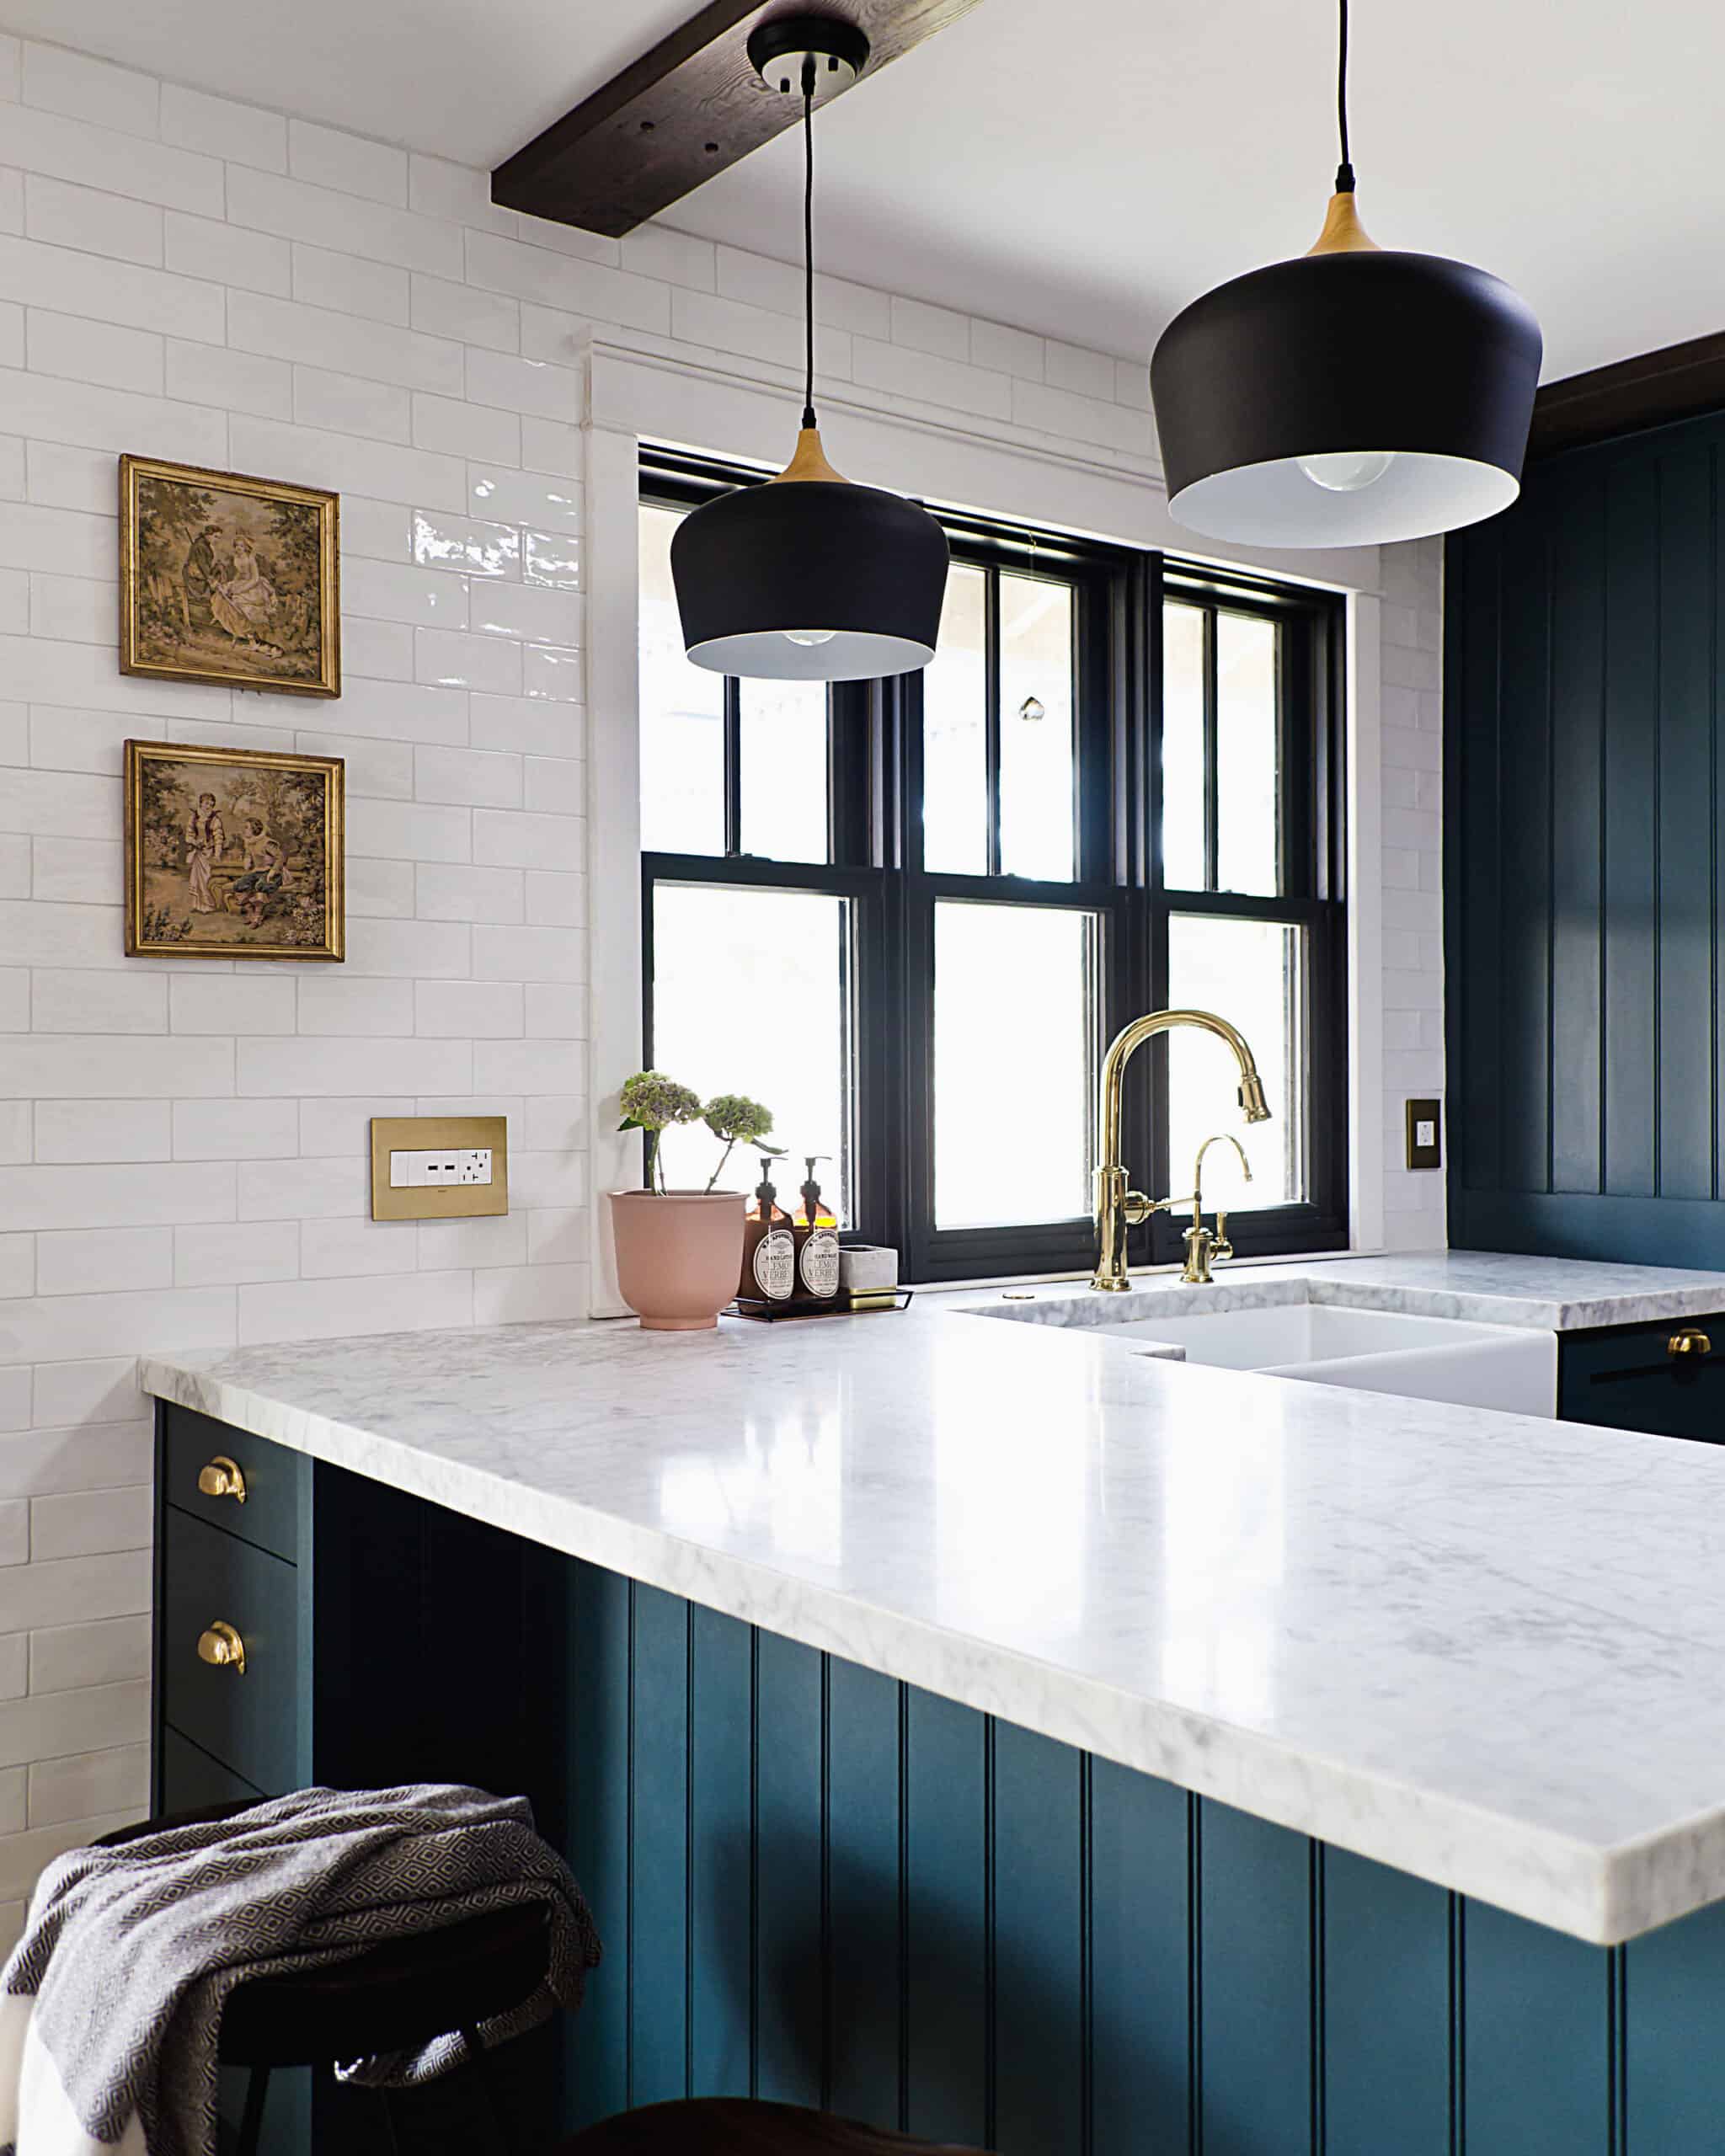
I decided long ago that I wanted Carrara marble and have never bought into the idea that they are any less pretty because they have a scratch or stain and etching here or there. I love the way the sunlight literally lights up my counters each morning. Meaning you can SEE the sunlight through an inch of the marble on the corners. It’s an amazing marvel of nature I can witness every day. There are marble counters in the world that are 500 years old. They are certainly strong and resistant to erosion and cracking. To be clear, you CAN put a baking tray down wherever you want on them, but you may or may not mark them, or any stone for that matter. We use our counters HARD and are not precious with them, other than the fact that I keep two very large cutting boards with a mitered corner on either side of our stove, which are the default place where we set things we’re working within the kitchen. We roll out dough and pasta and I shape bread directly on our marble counters multiple times a week. Bonus is that Carrara marble is typically the least expensive natural stone counter option, with some man-made counters even being more expensive.

I think the more important question is, which of those things is more important TO YOU? For me, the timeless beauty, hand feel, majestic quality, and baking utility of marble won out over any fear of it scratching and staining easily. However, some people would qualify a scratch or a stain as “ruining” a surface. If you feel that way, then marble is definitely not for you. But you will not find its like as far as luminosity goes in a man-made quartz. Quartz is a perfectly fine and practical material for a kitchen, and you can find very pretty slabs that photograph very well! However, I have always found it rather flat in person, but I have been spoiled by comparing it to real marble.
Quartzite is one potential material that could satisfy all of these demands, that is still a natural stone, but is generally one of the more expensive materials to use as a countertop. Of course, granite is an option too!
If anyone wants more info on stone countertops I’m just gonna plug our blog post all about it right here.
What was the most challenging obstacle you faced with your kitchen renovation? I’m excited, but scared and would love to know the most painful part of the process (just so I’m ready).
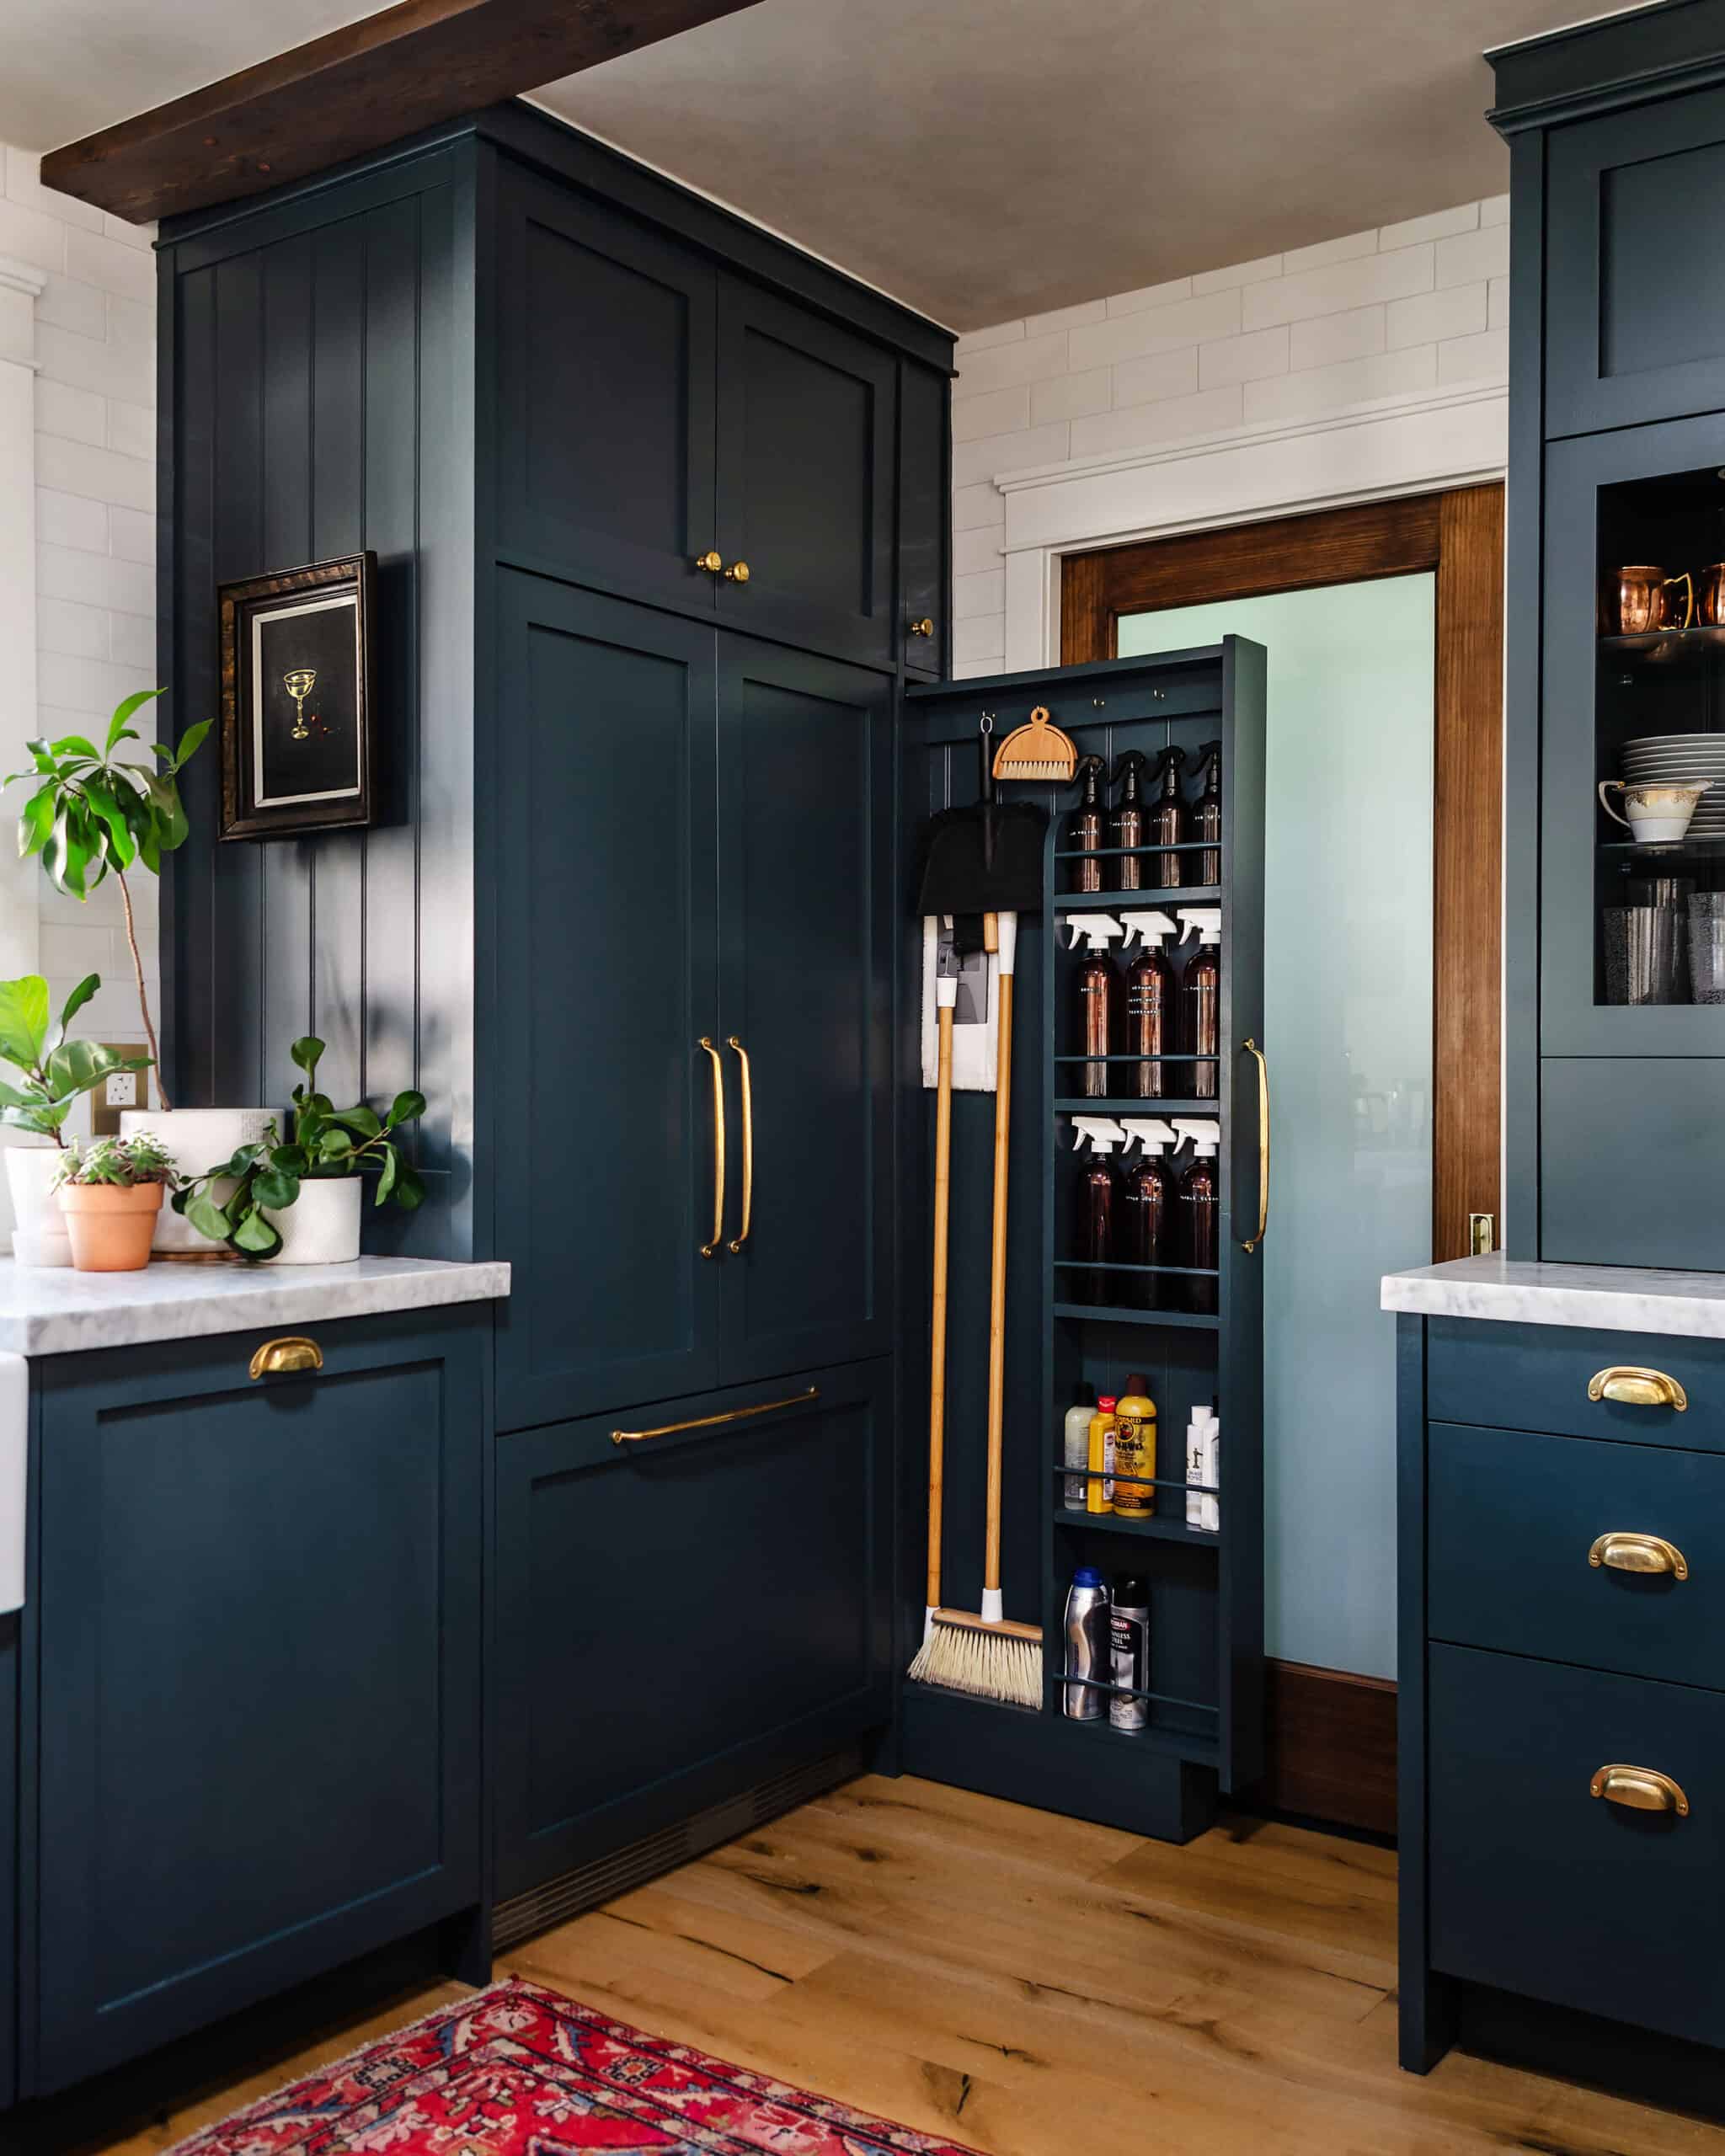
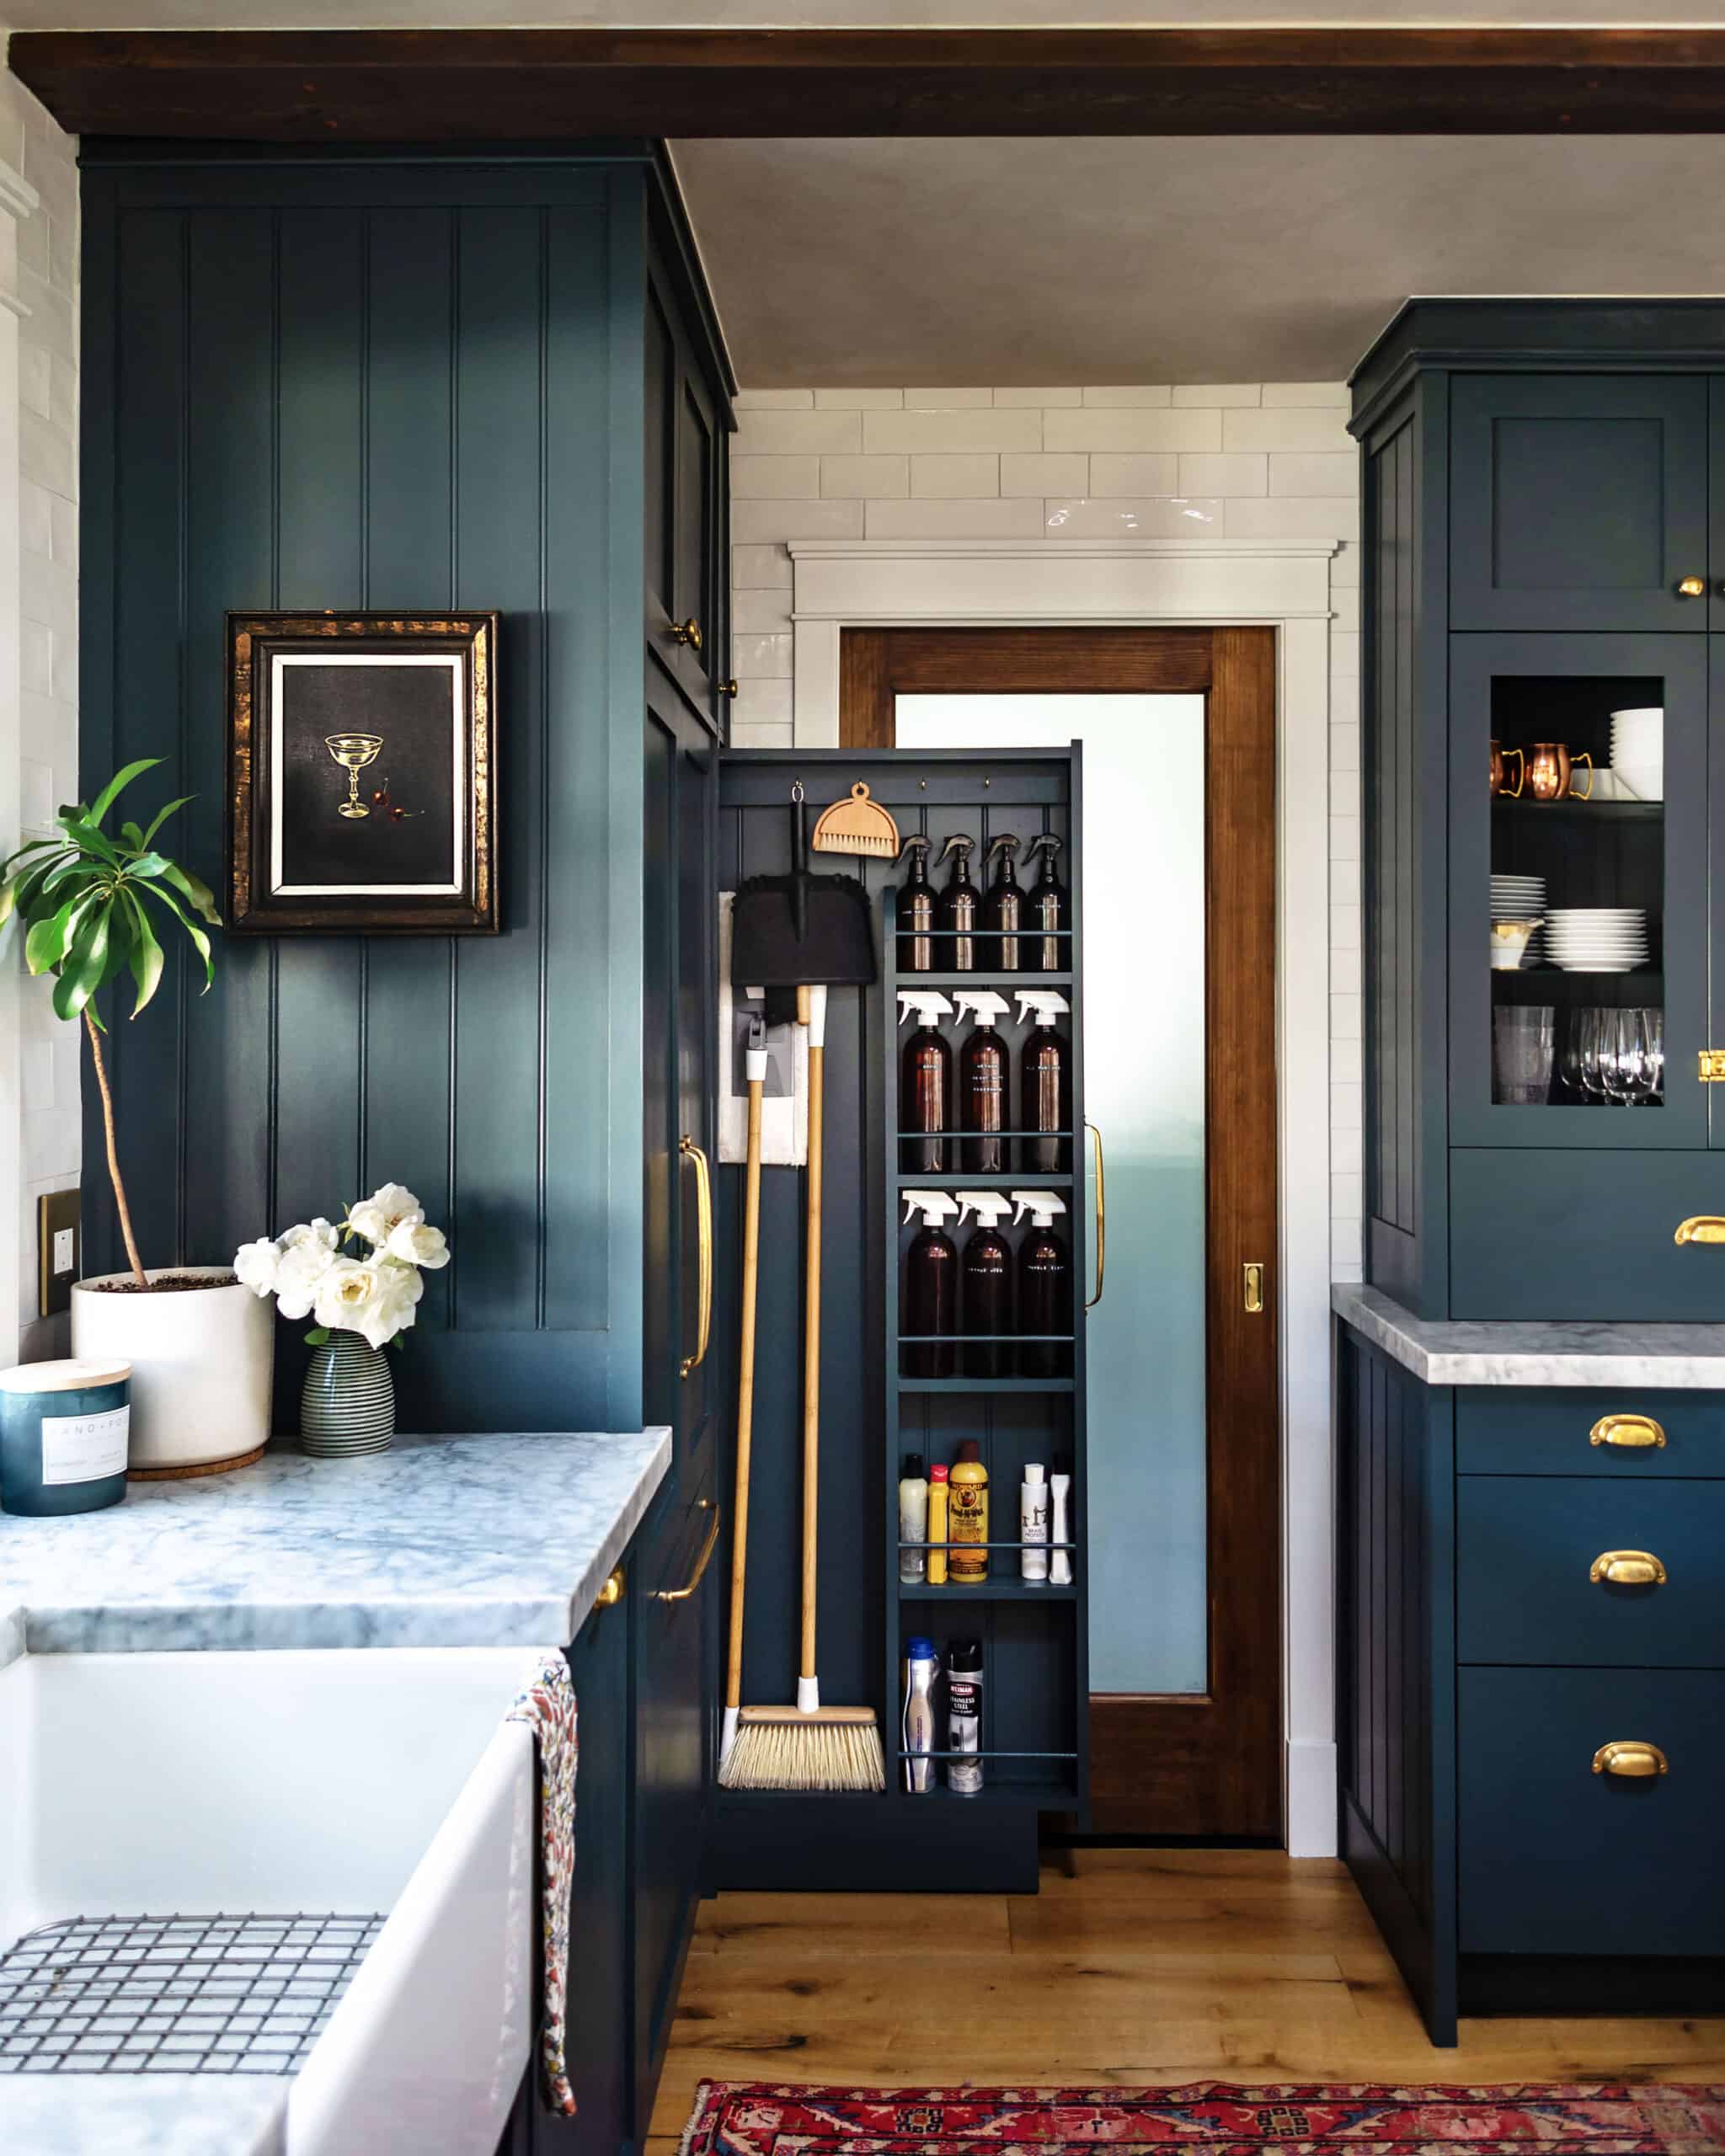
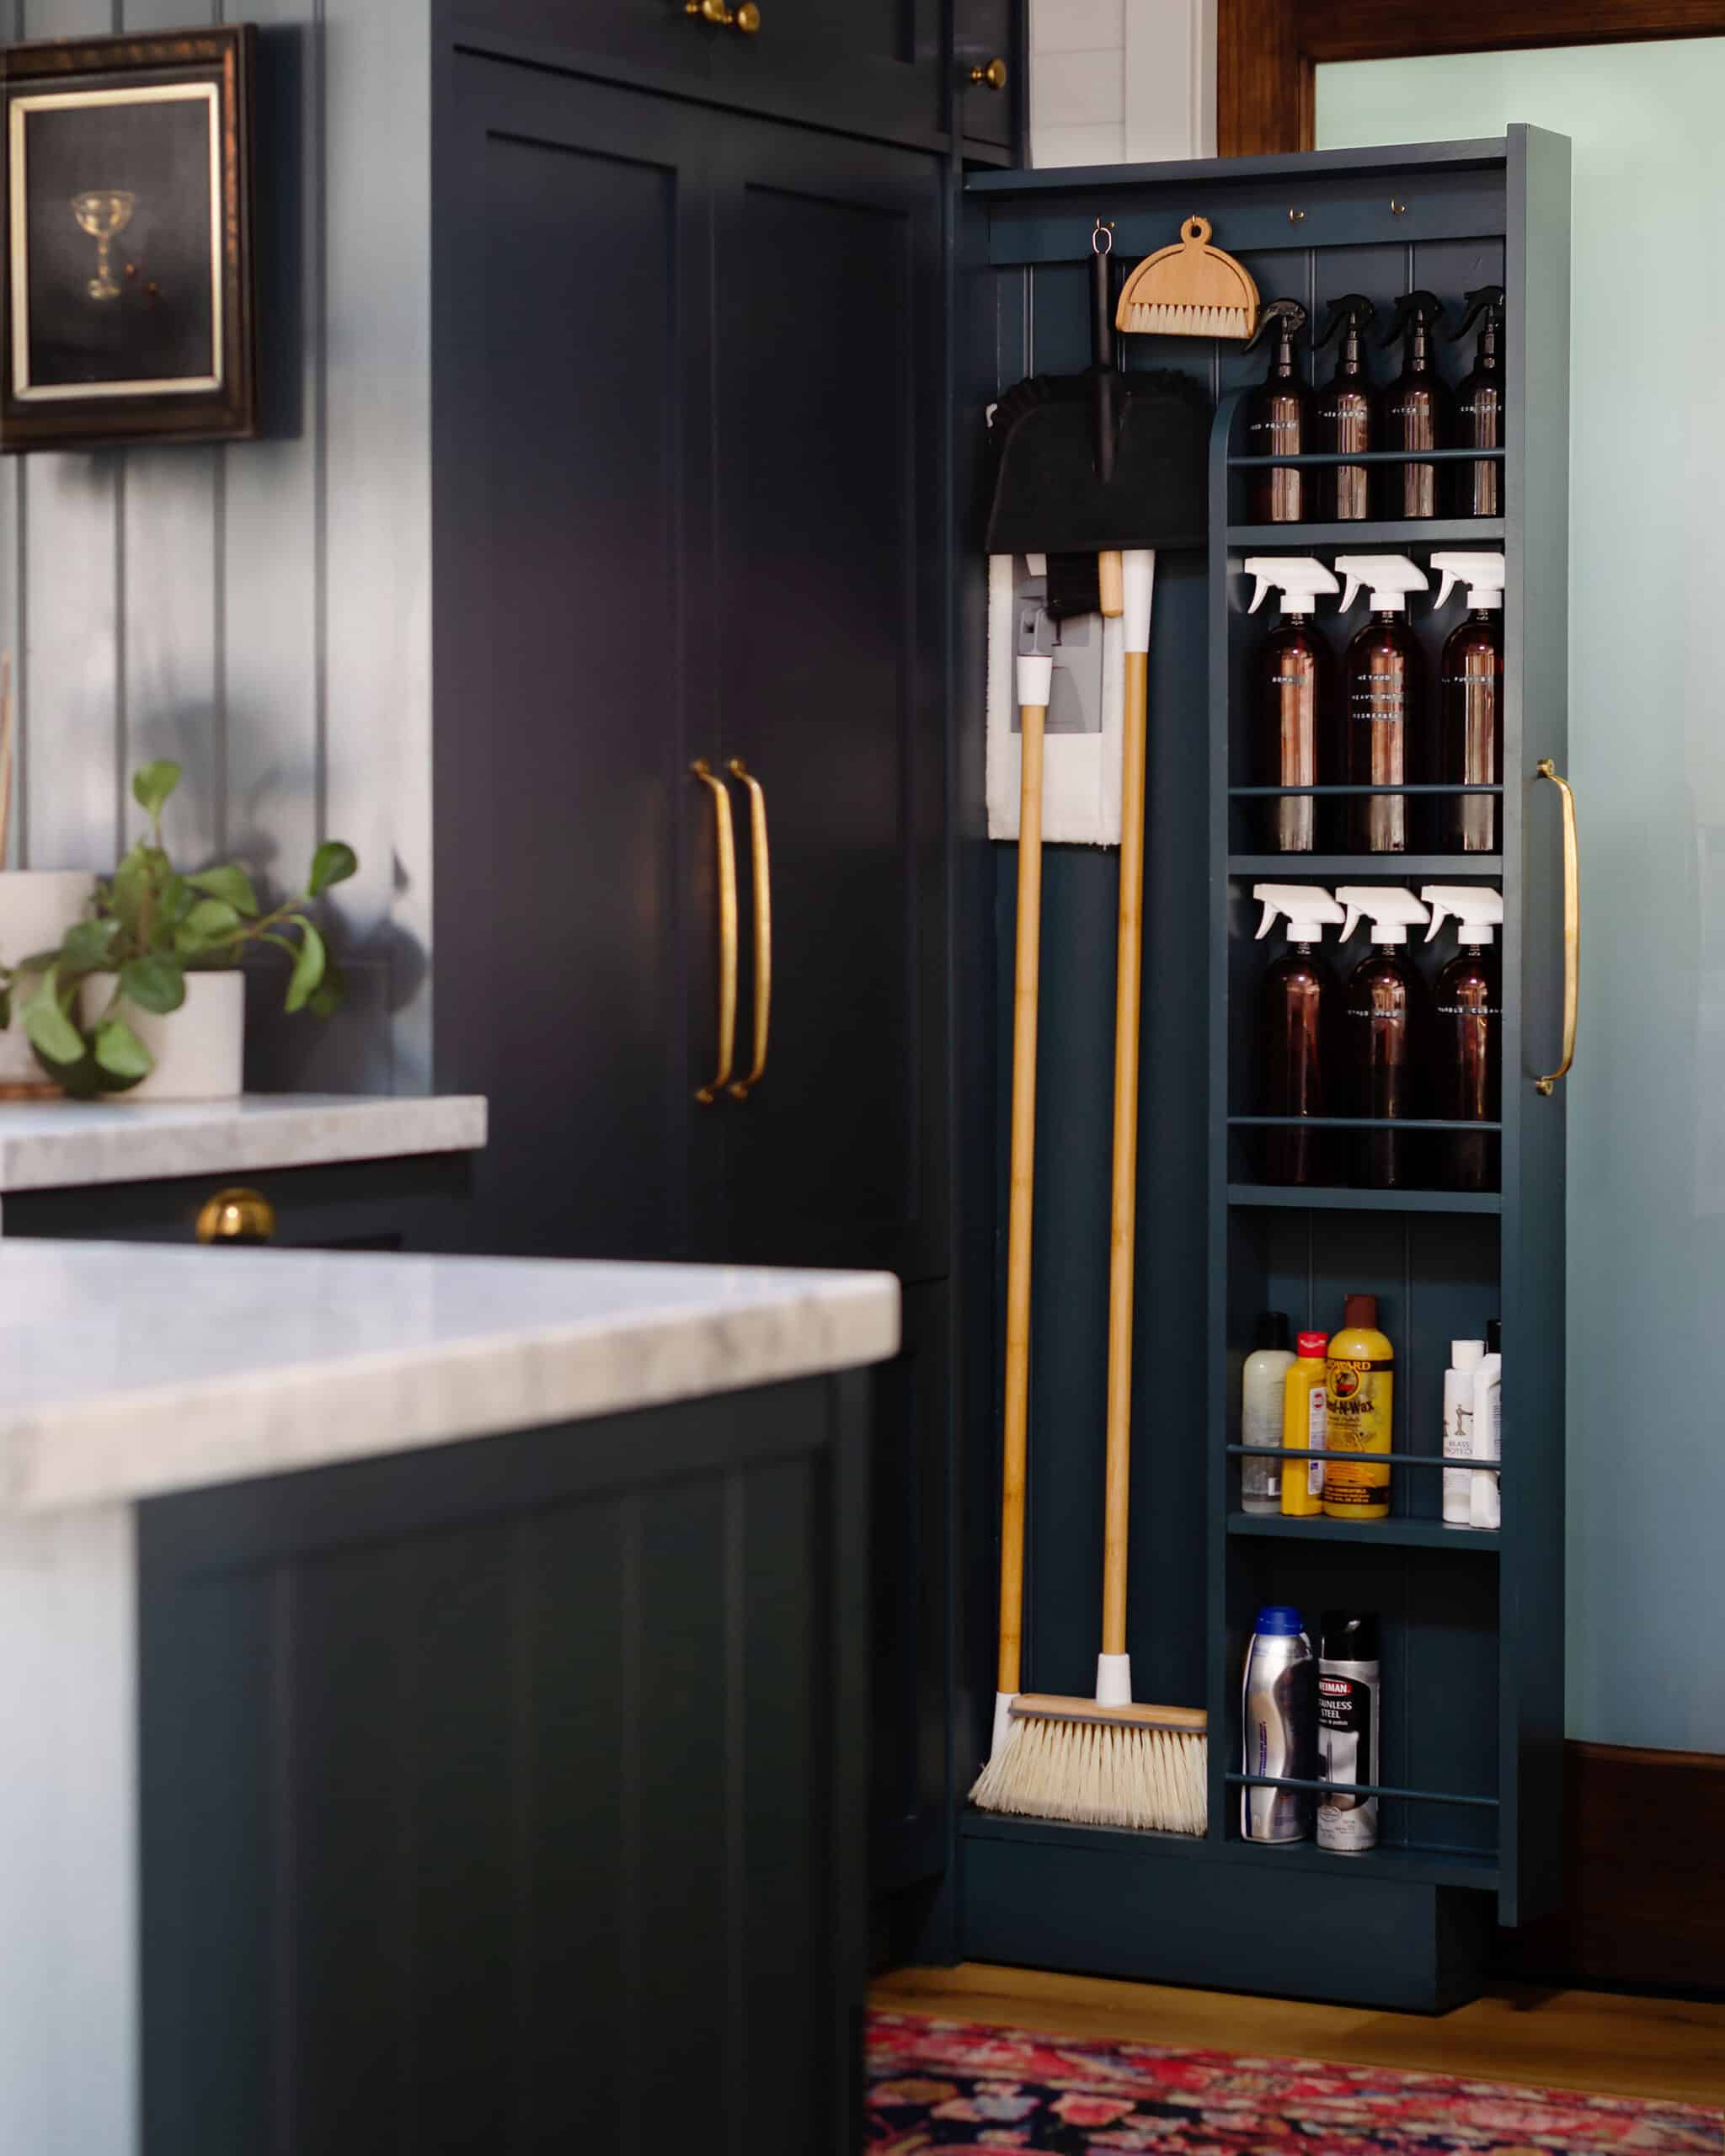
The hardest thing to figure out and build was our broom cupboard by far. Everything else came together with little to no issue, but it took a month to figure out how to get our broom cupboard to slide out and stay up! We ended up with both drawer sliders AND rollers disguised behind the “toe-kick”.
And the most challenging daily obstacle of the renovation was not having our kitchen sink, and having to wash dishes in the bathroom. That was the worst, and the thing I would least look forward too if presented with living through another kitchen renovation.

Was there a part of the process that you thought would be really difficult but turned out to be smooth sailing? I’m hoping you’re going to say “the entire process!”
I planned and worried about everything going terribly wrong, and in turn, was pleasantly surprised that everything went very well. The whole family was resolved that we were going to do nothing but work on the kitchen until the sink was back, and so even the kids became adept at putting together an IKEA SEKTION cabinet. Working in SketchUp allowed me to predict where we were going to have fit issues, and come up with solutions to try when we got to the installation process. It also allowed me to work out spacing in a way that helped me to avoid collision issues (i.e. “oh no the drawer can’t open because it hits door trim” etc.). So, for us, everything I could PLAN for was pretty much smooth sailing. But of course there were a few things and events we couldn’t plan for, and we just had to roll with them.
You mentioned living without a kitchen sink, which is a current reality for us and it SUCKS. Tell me more about this – What is it really like living without a kitchen during a renovation, and how long did that last for?
Yea, a lack of a kitchen sink was the worst part. The rest of it was actually quite doable, however. We used an old Billy bookcase as our pantry, an old rolling IKEA island we had from our apartment for a counter, and we had that equipped with a two-burner hot plate, and a rather large toaster oven. We managed to still cook most meals at home, as is our preference; We could make eggs and french press coffee every morning like we usually did, and I even baked a few batches of cookies!
It took four weeks from the demo of the old kitchen to finished and primed drywall, ready for cabinet hanging. After that, it took about a month and a half to get our kitchen sink back, which was 11 weeks total. We had all the end panels and toe-kicks in after about 3 months. The smaller or more finishing details–the tile, beams, cabinet crown, wall paneling, and open shelving all trickled in over the next year.
The real question EVERYONE always wants to know – how much did it cost you?
NOT including the new windows/doors and the new framing because it is too hard to sparse those out from the rest of the remodel (which included the entry, office and a bathroom), the total cost seems to be about $32k, broken down as follows:
- IKEA cabinets, lighting, and butch block counters – $3,613.65
- Semihandmade fronts (15% off sale) – $2,905.30
- Marble counters & backsplash (including fabrication & install) – $4,850
- Wall Tile – $1,173.48
- Hardware (20% off sale) – $540
- Lighting & sun tunnel (using employee discount and products on sale) – $1,401
- Sink & garbage disposal – $853
- Faucets & install – $1,084
- Pocket door – $456
- Appliances – $9,000
- Paneling & trim – $315
- Paint – $330
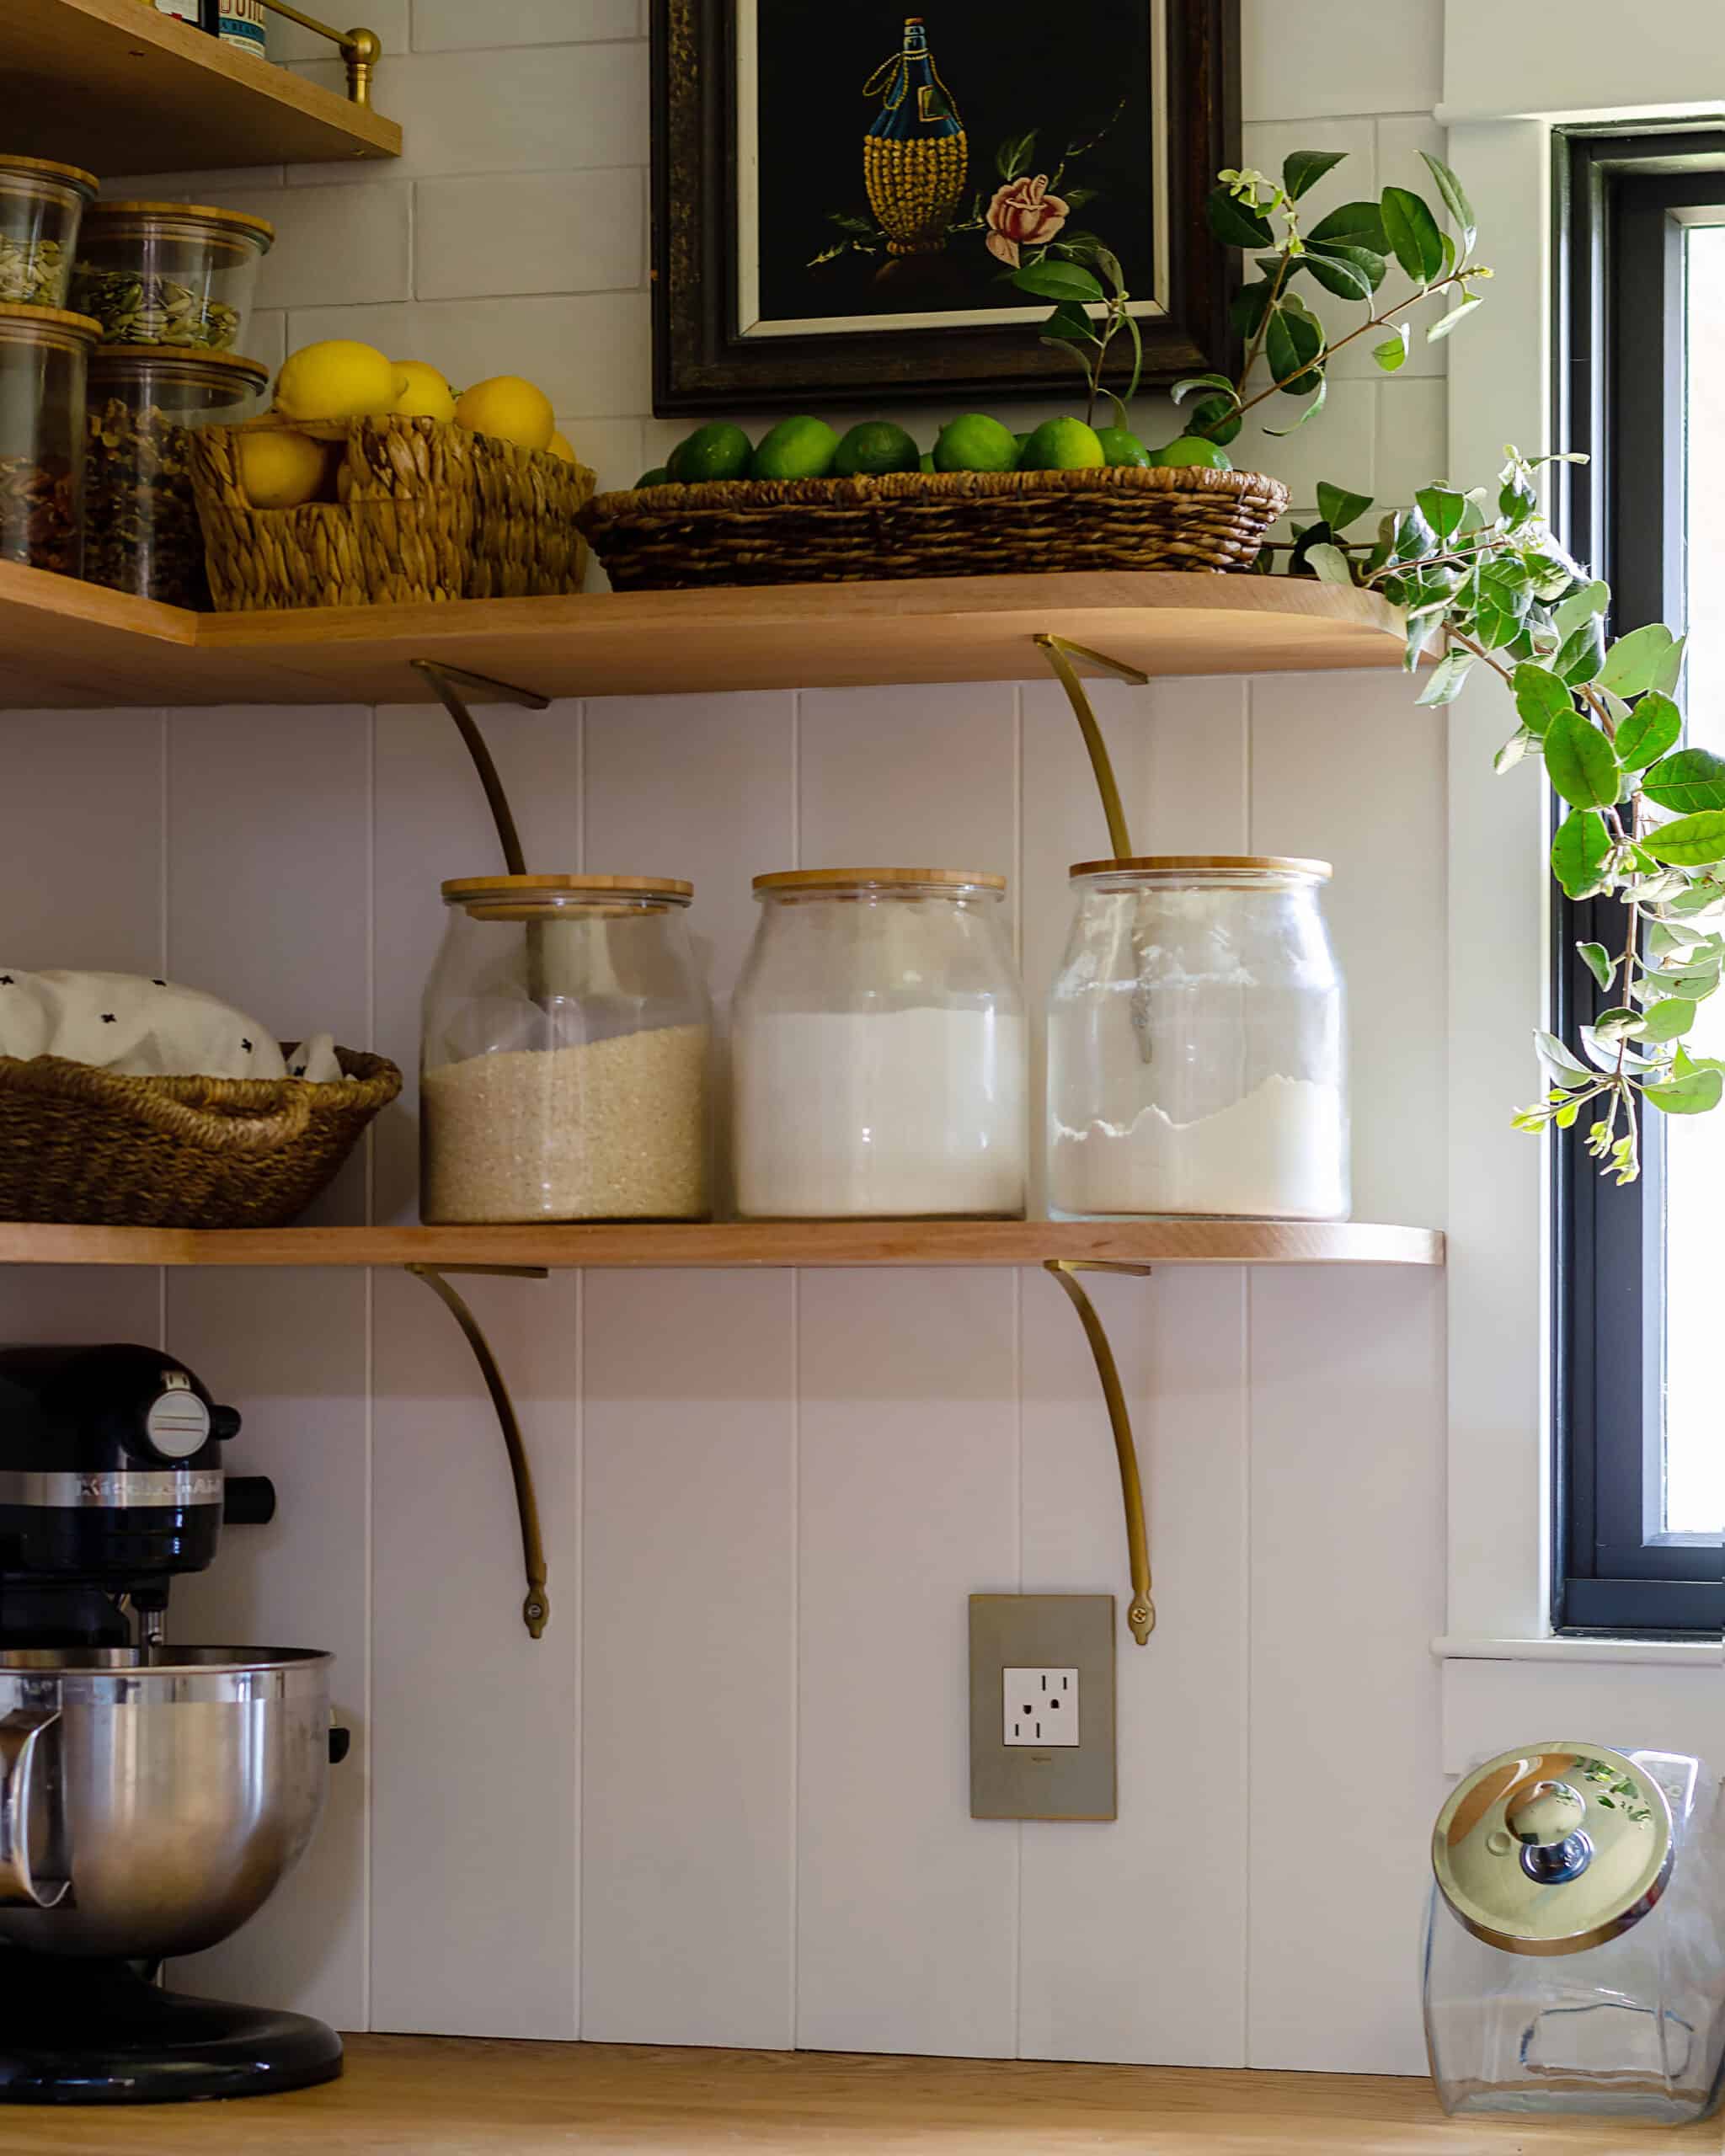
- Open shelving – $1,888
- Wood flooring – $605
- Tile flooring in pantry – $385
- Outlets – $385
- Plumber labor – $2,500

Any money-saving tips that you found along the way that you could pass on?
Because we were less willing to skimp on materials, we decided to save on labor costs and did everything ourselves that we could. I assembled every cabinet and drawer and installed every piece of hardware. Brass screws are notoriously tricky, and so I didn’t trust the job to anyone else once I figured out how to do it correctly (after breaking 8 screws and calling Rejuvenation in literal tears). I painted every last side of every cabinet front (each front has 6 sides!). I was pretty much completely in charge of everything to do with the kitchen cabinets. Tyler took over everything else; he laid the floors, built the custom cabinetry (the cutting board cubby, the broom pullout, the toe kicks, the end panels), did all of the trim/millwork and did the electrical (not something I would recommend, but he felt comfortable doing it, and I trust him and his engineer’s brain to do it safely. When he was studying electrical he mused about “what a beautiful binary language it is” haha). My dad did the tile. We only hired out for plumbing!
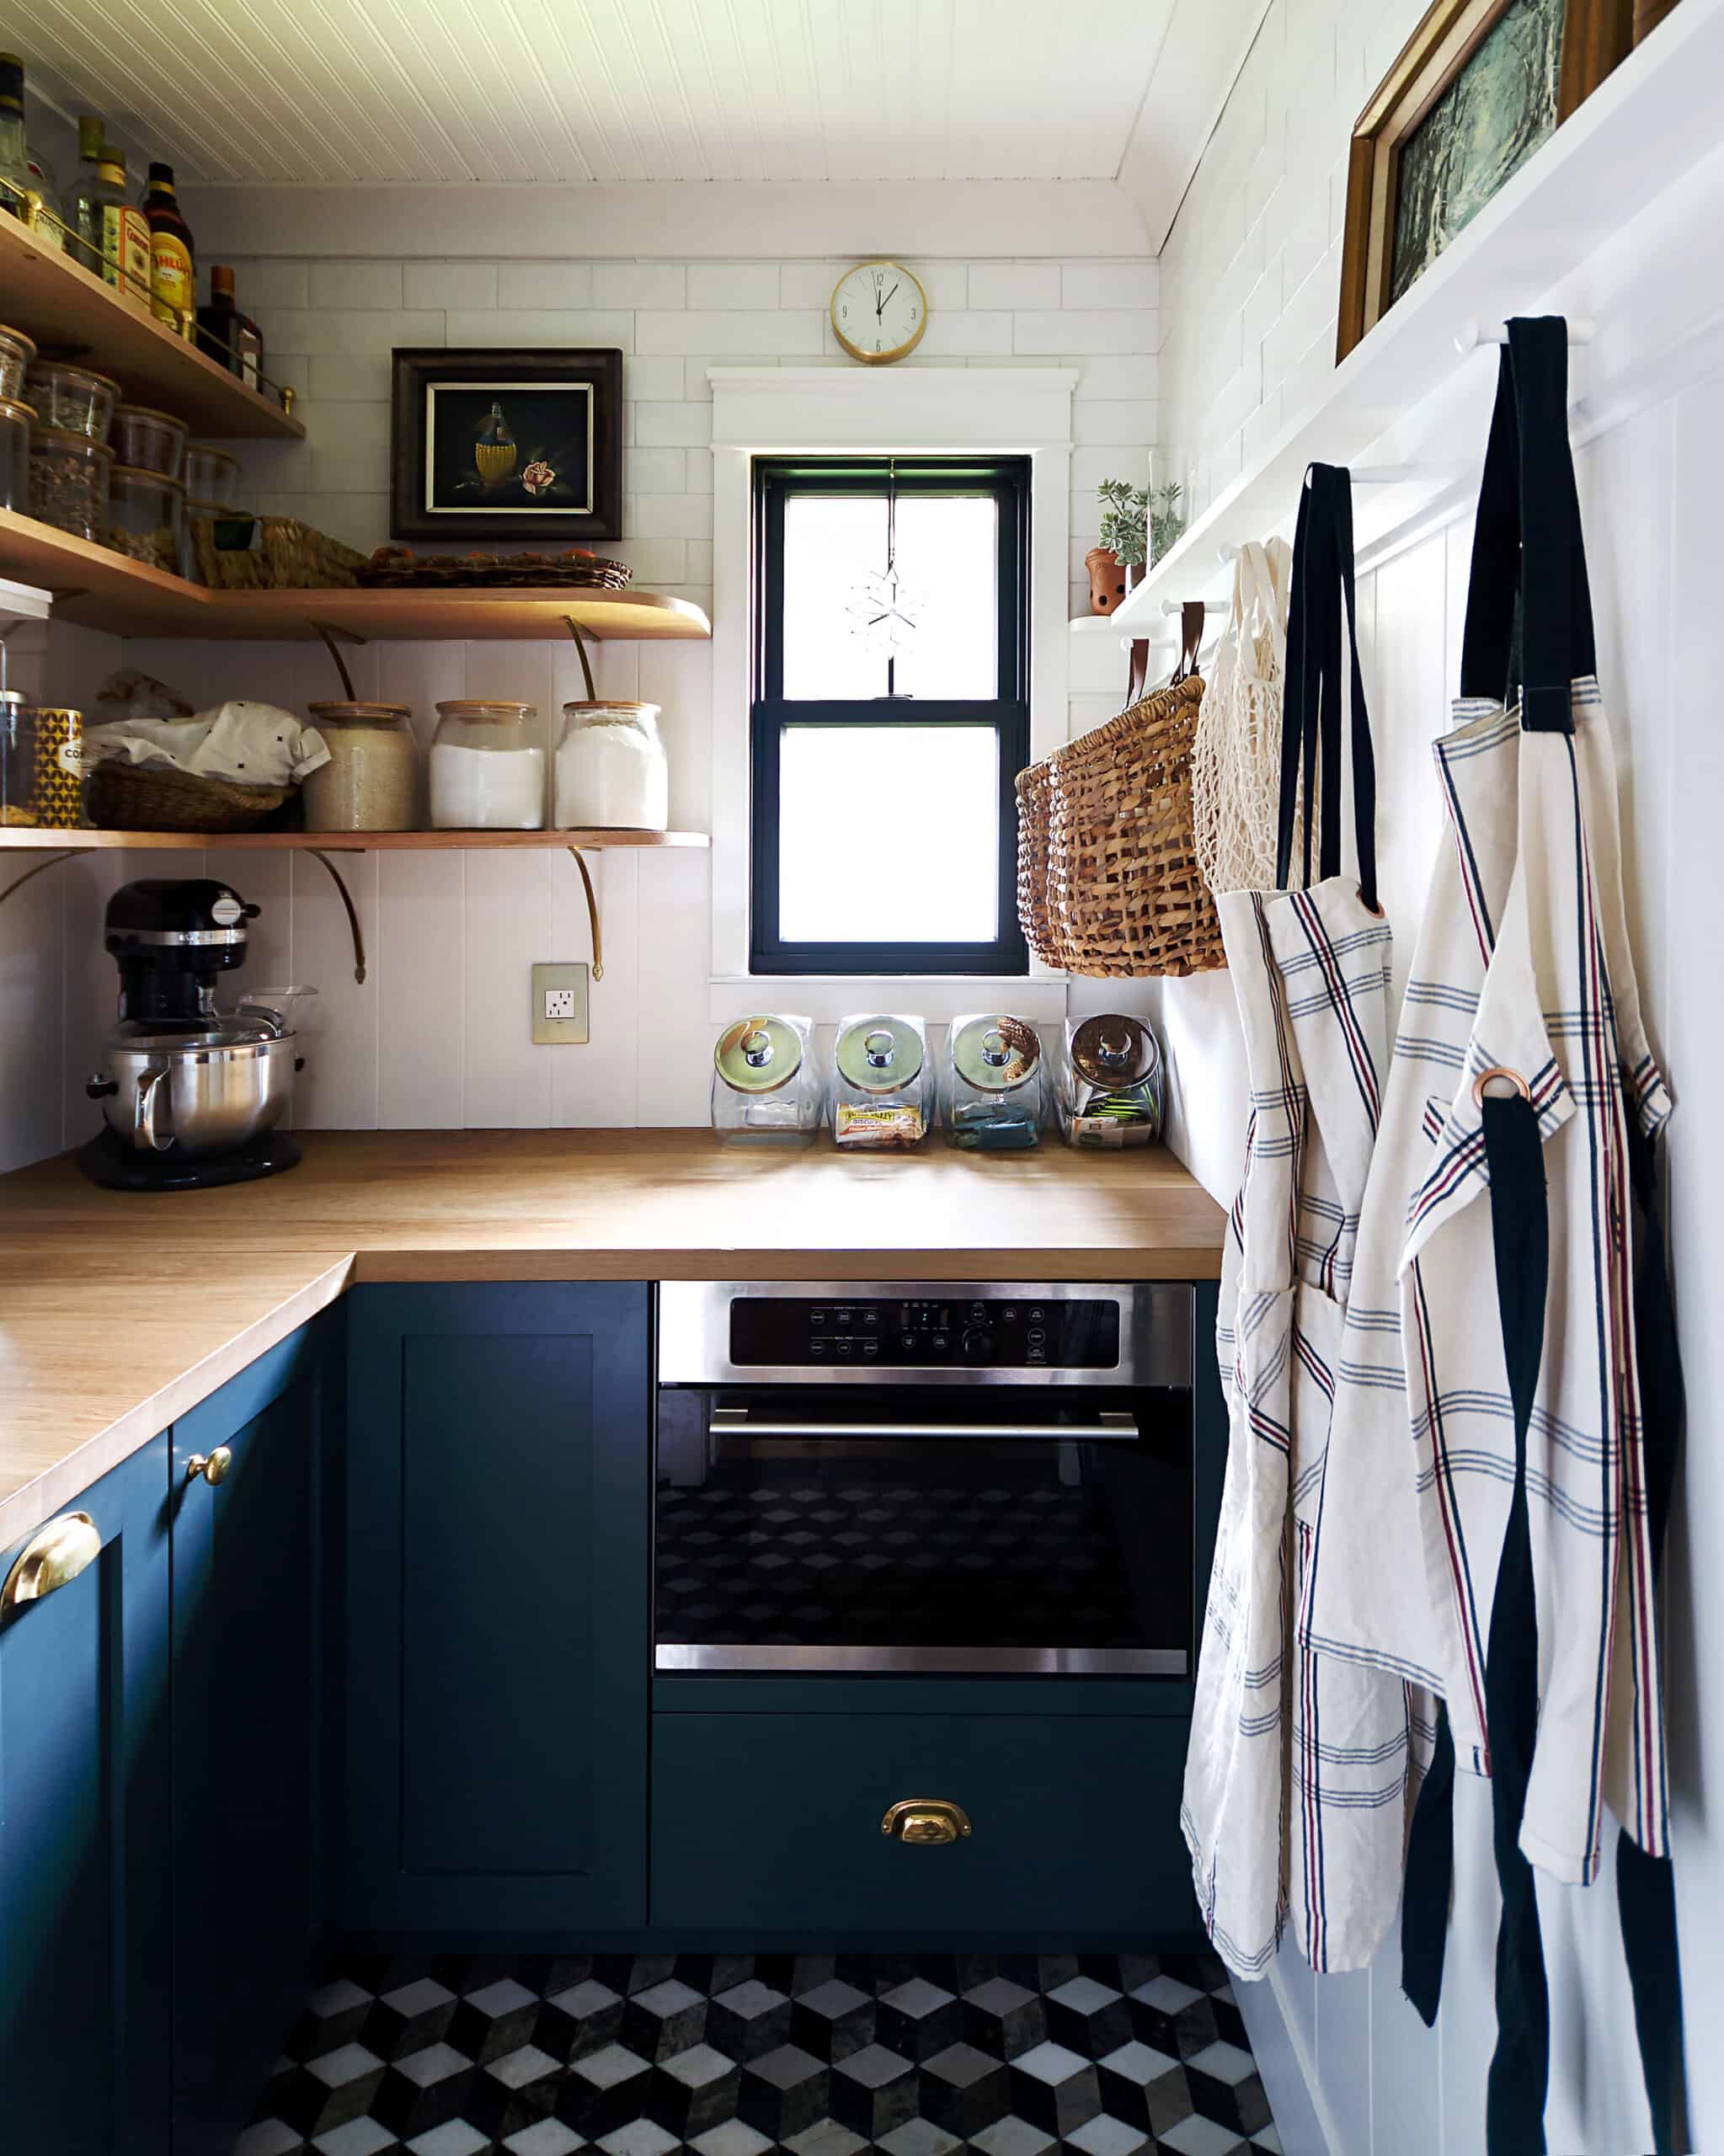
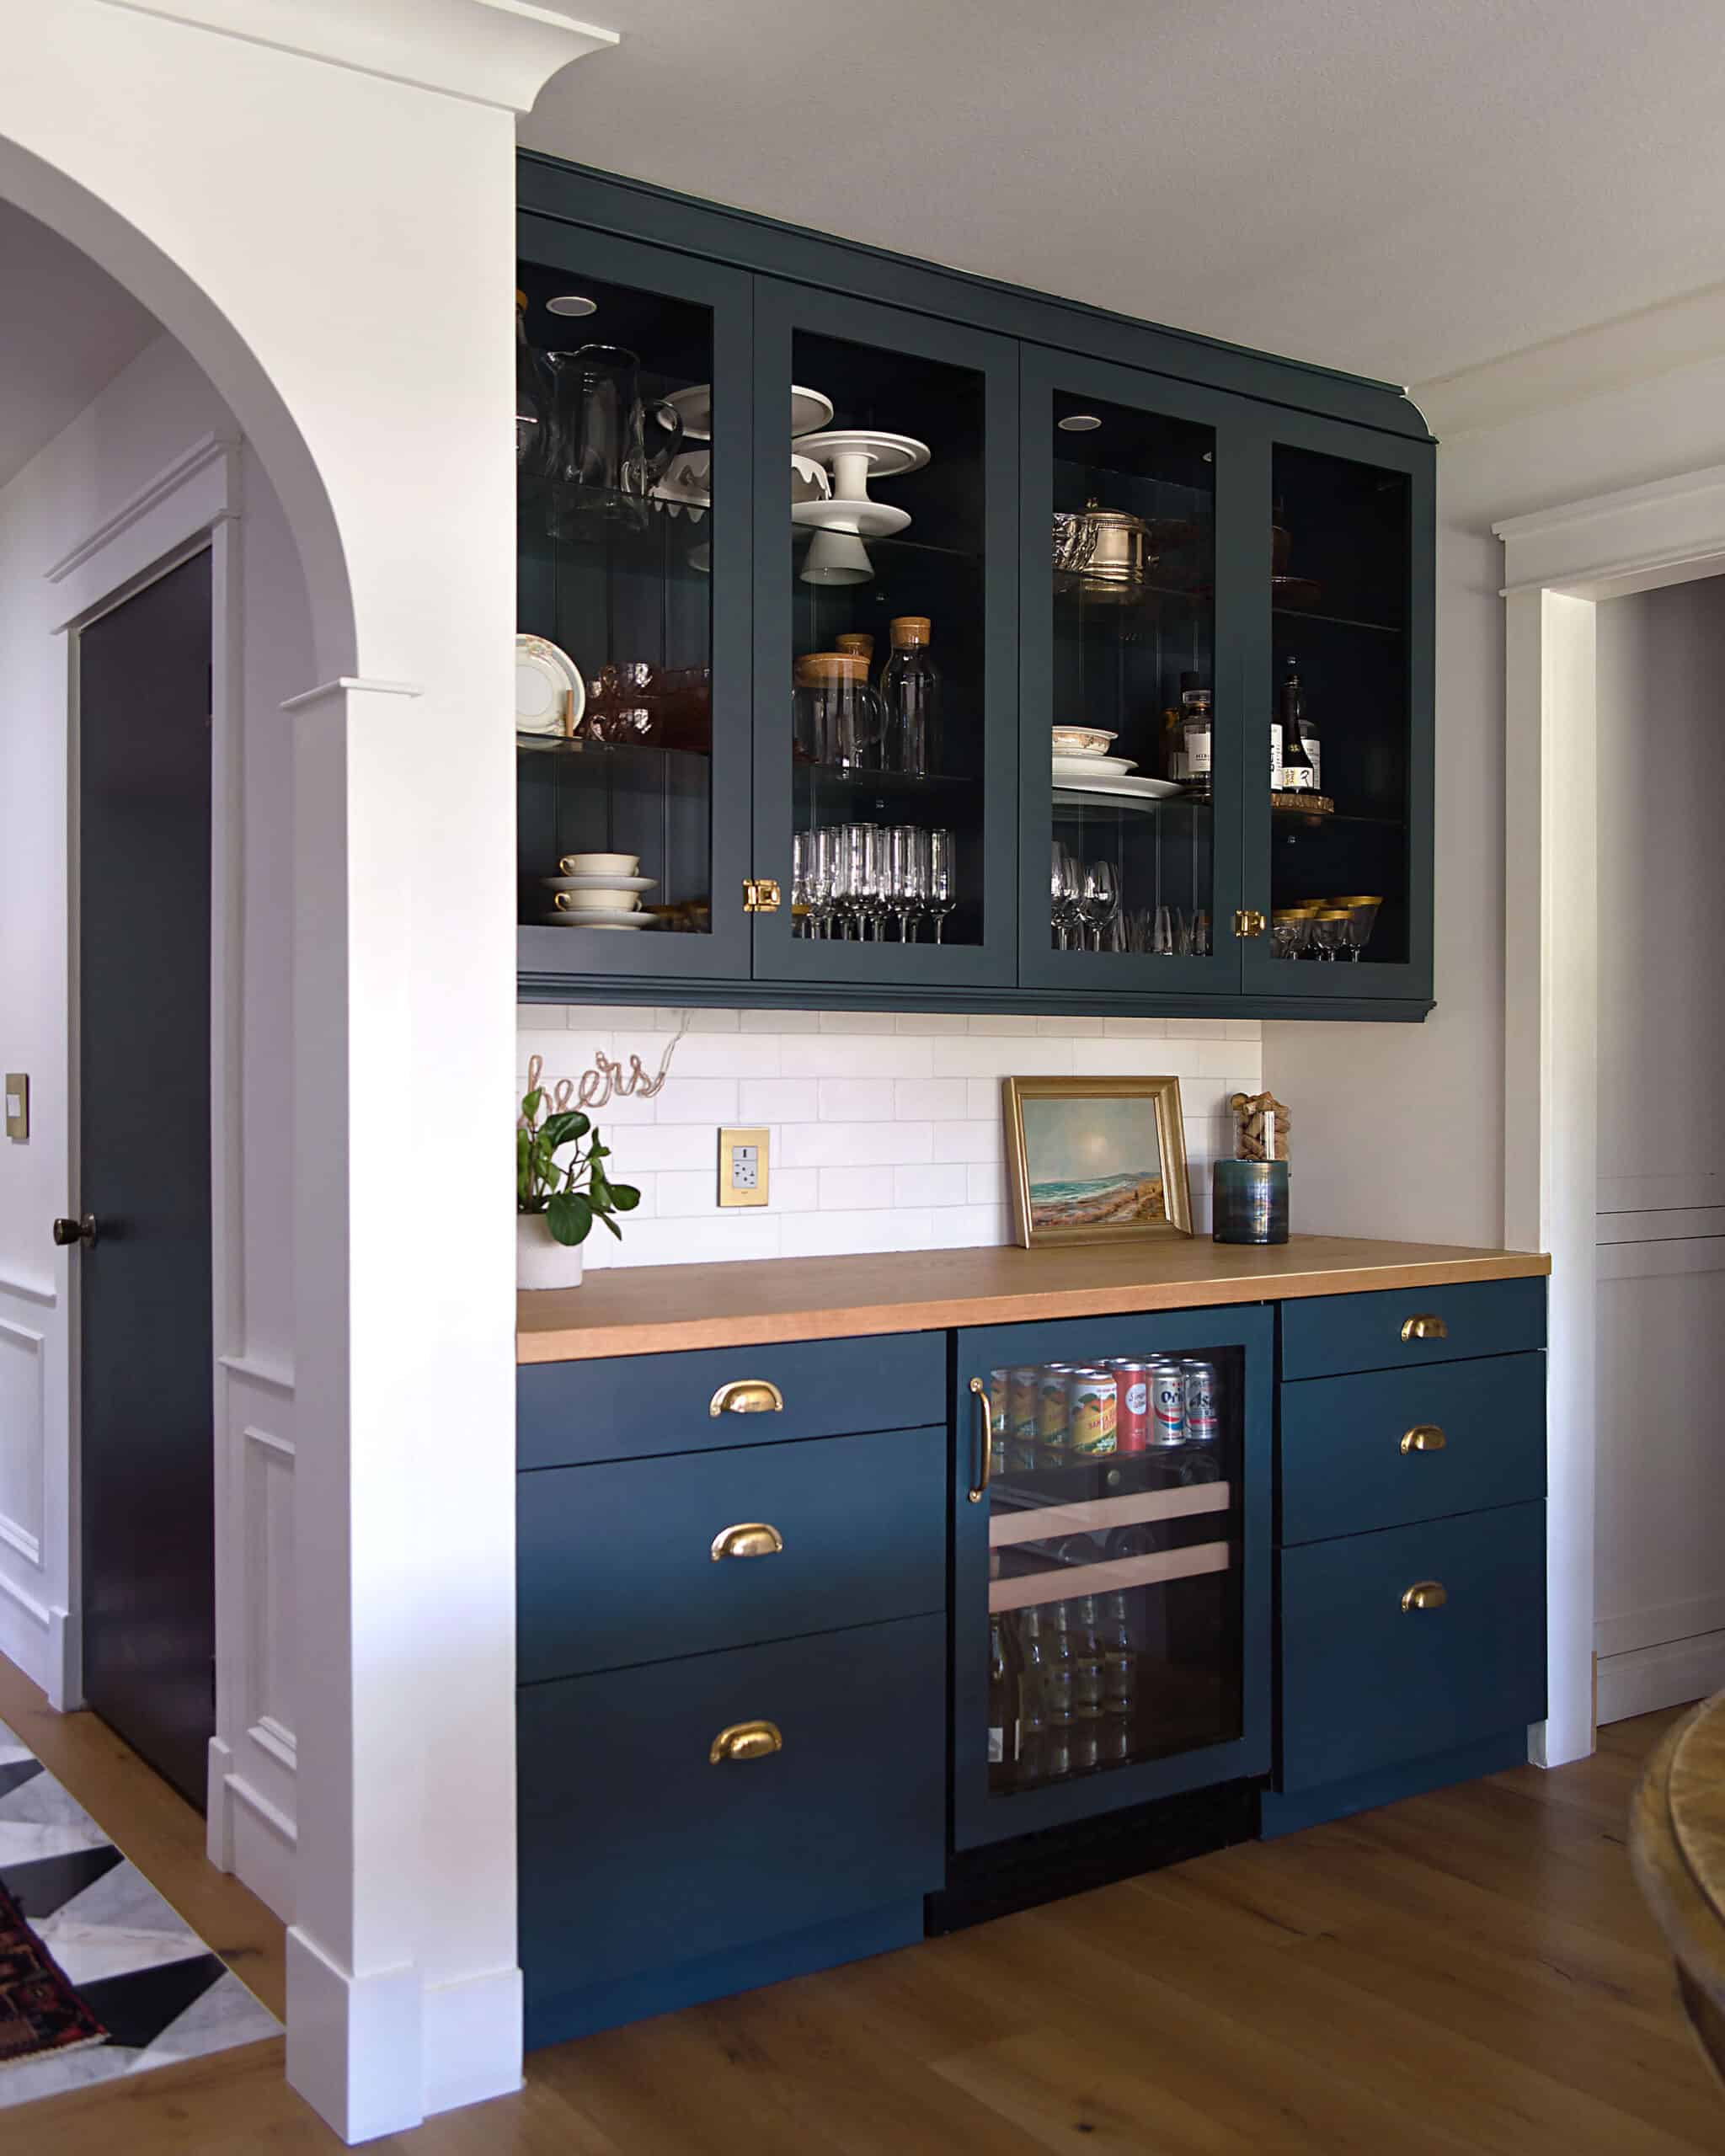
More practically, we did a bit of splurge vs. save one a few things; I originally planned to have marble at the bar and in the pantry, but when I decided on a slab backsplash, I knew I needed to cut back somewhere else. Hence, we went with the IKEA butcher block counters in the bar and pantry! The added benefit of this was that Tyler could install them! We also made sure we bought everything we could during a sale or with a discount.
I also designed this kitchen for longevity, with the idea that it could last at least 30 years, instead of 10. In that sense, it is more of a long term savings. The previous kitchen lasted almost 55 years!

What’s your favorite part of the finished kitchen?
The trash pullout and the spice drawer. Also my broom cupboard. That everything has a space! That I have at least 4 areas to prep from, instead of just one like I did before! The way our sun tunnel lays a heavenly light over the center of my kitchen so everything has a subtle glow. I can’t pick, haha.
Lastly, is there anything you’d change, now that you’ve been functionally using it?
Nope. Not a thing.
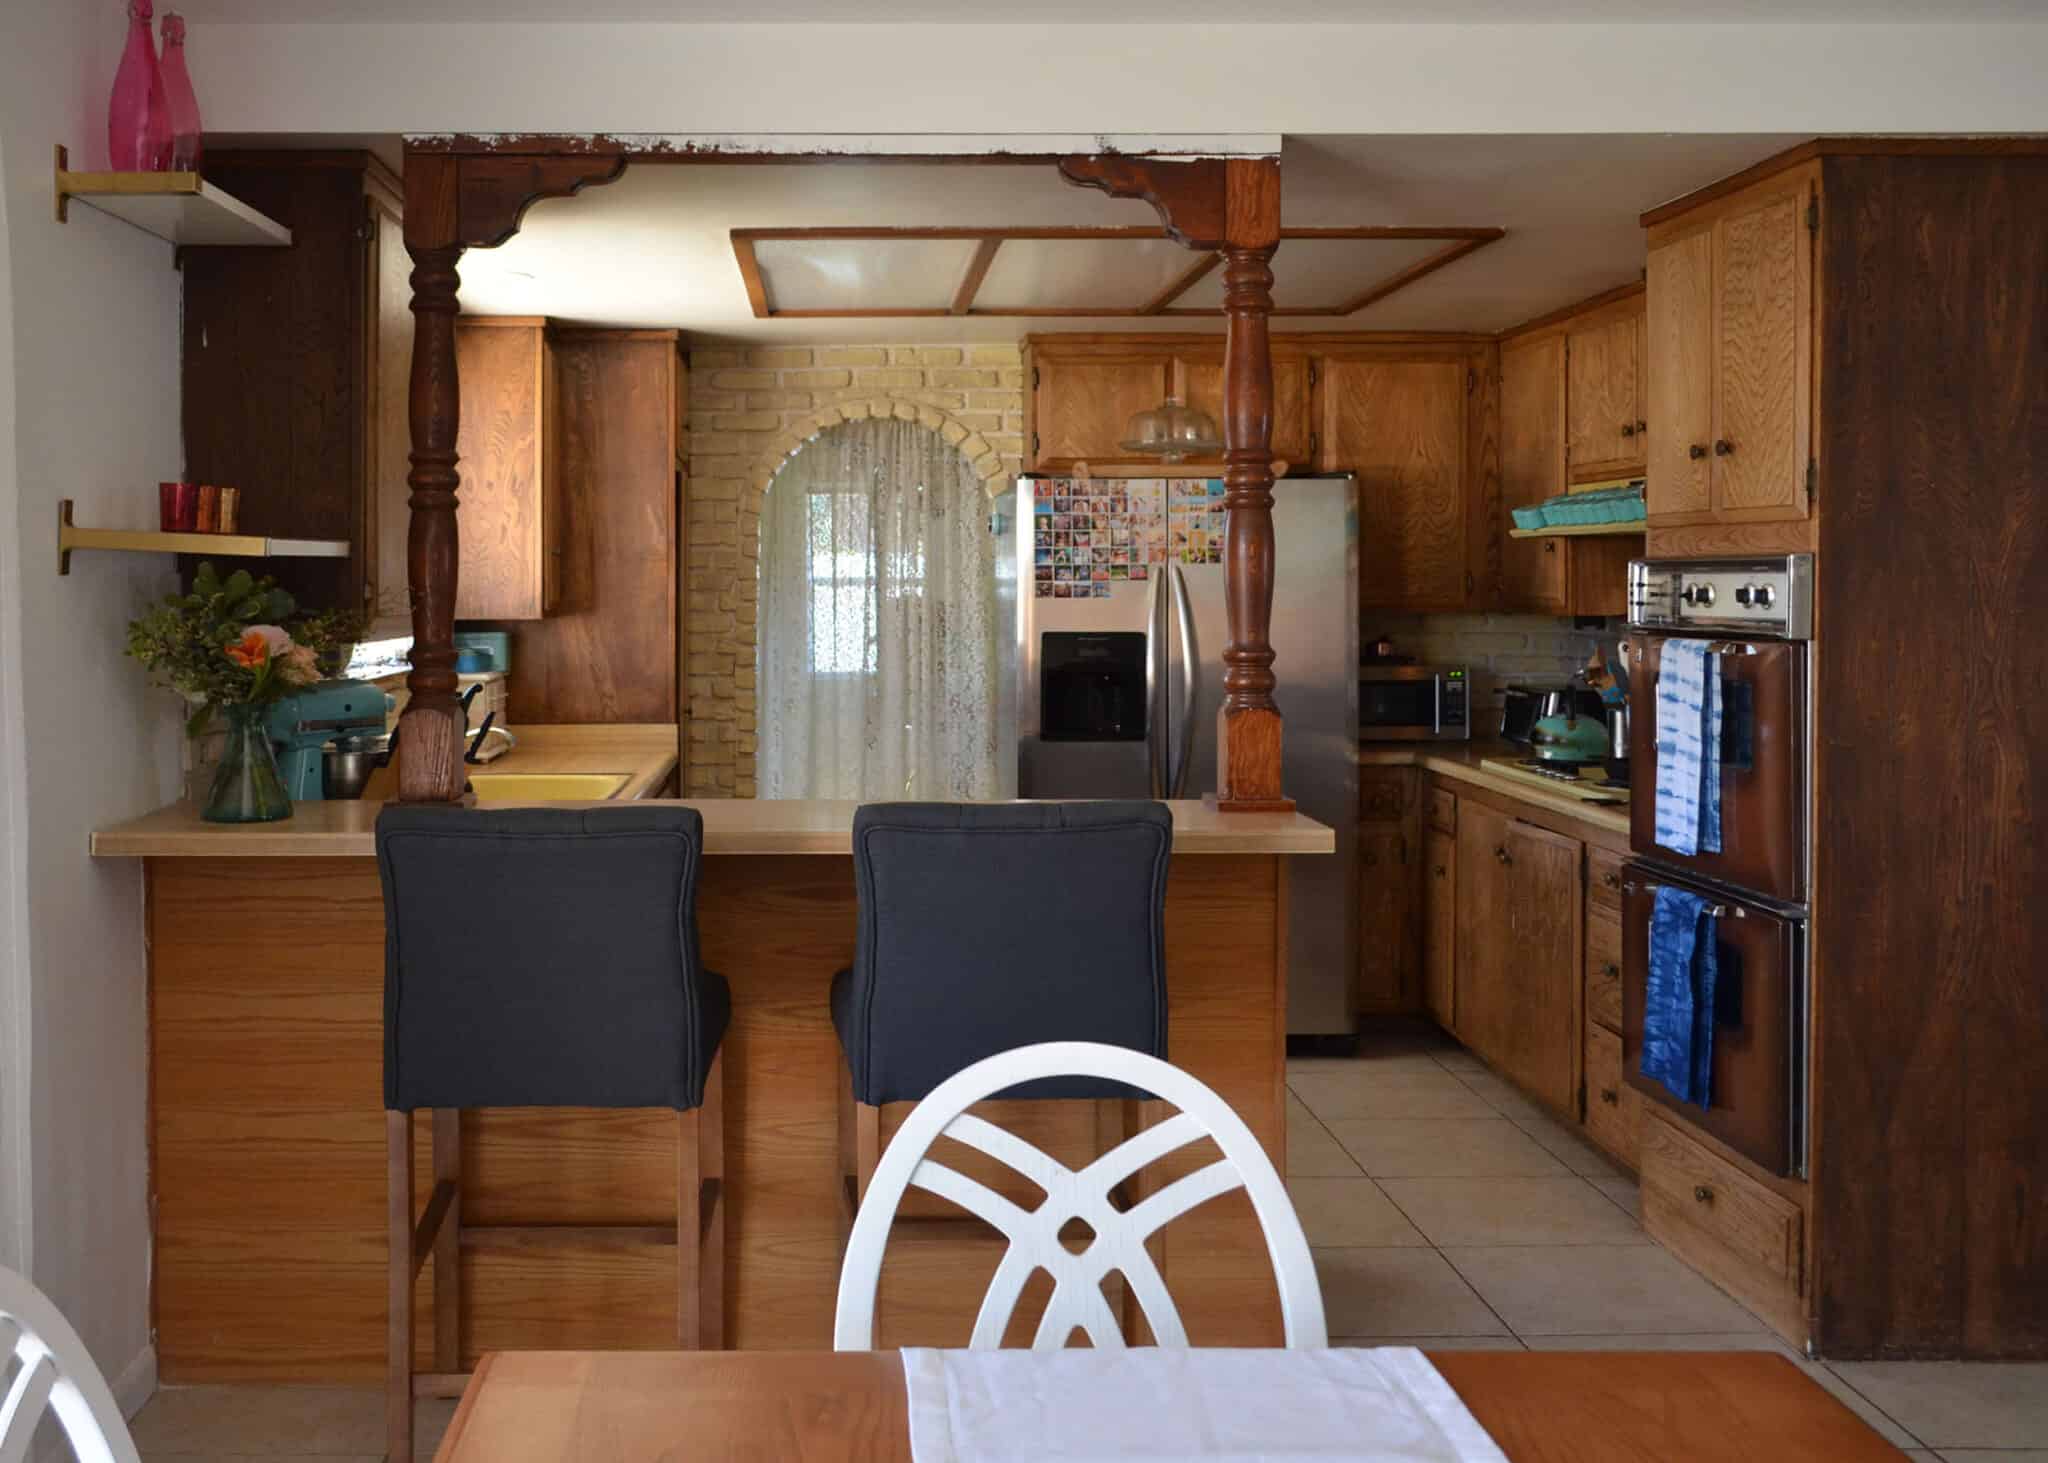
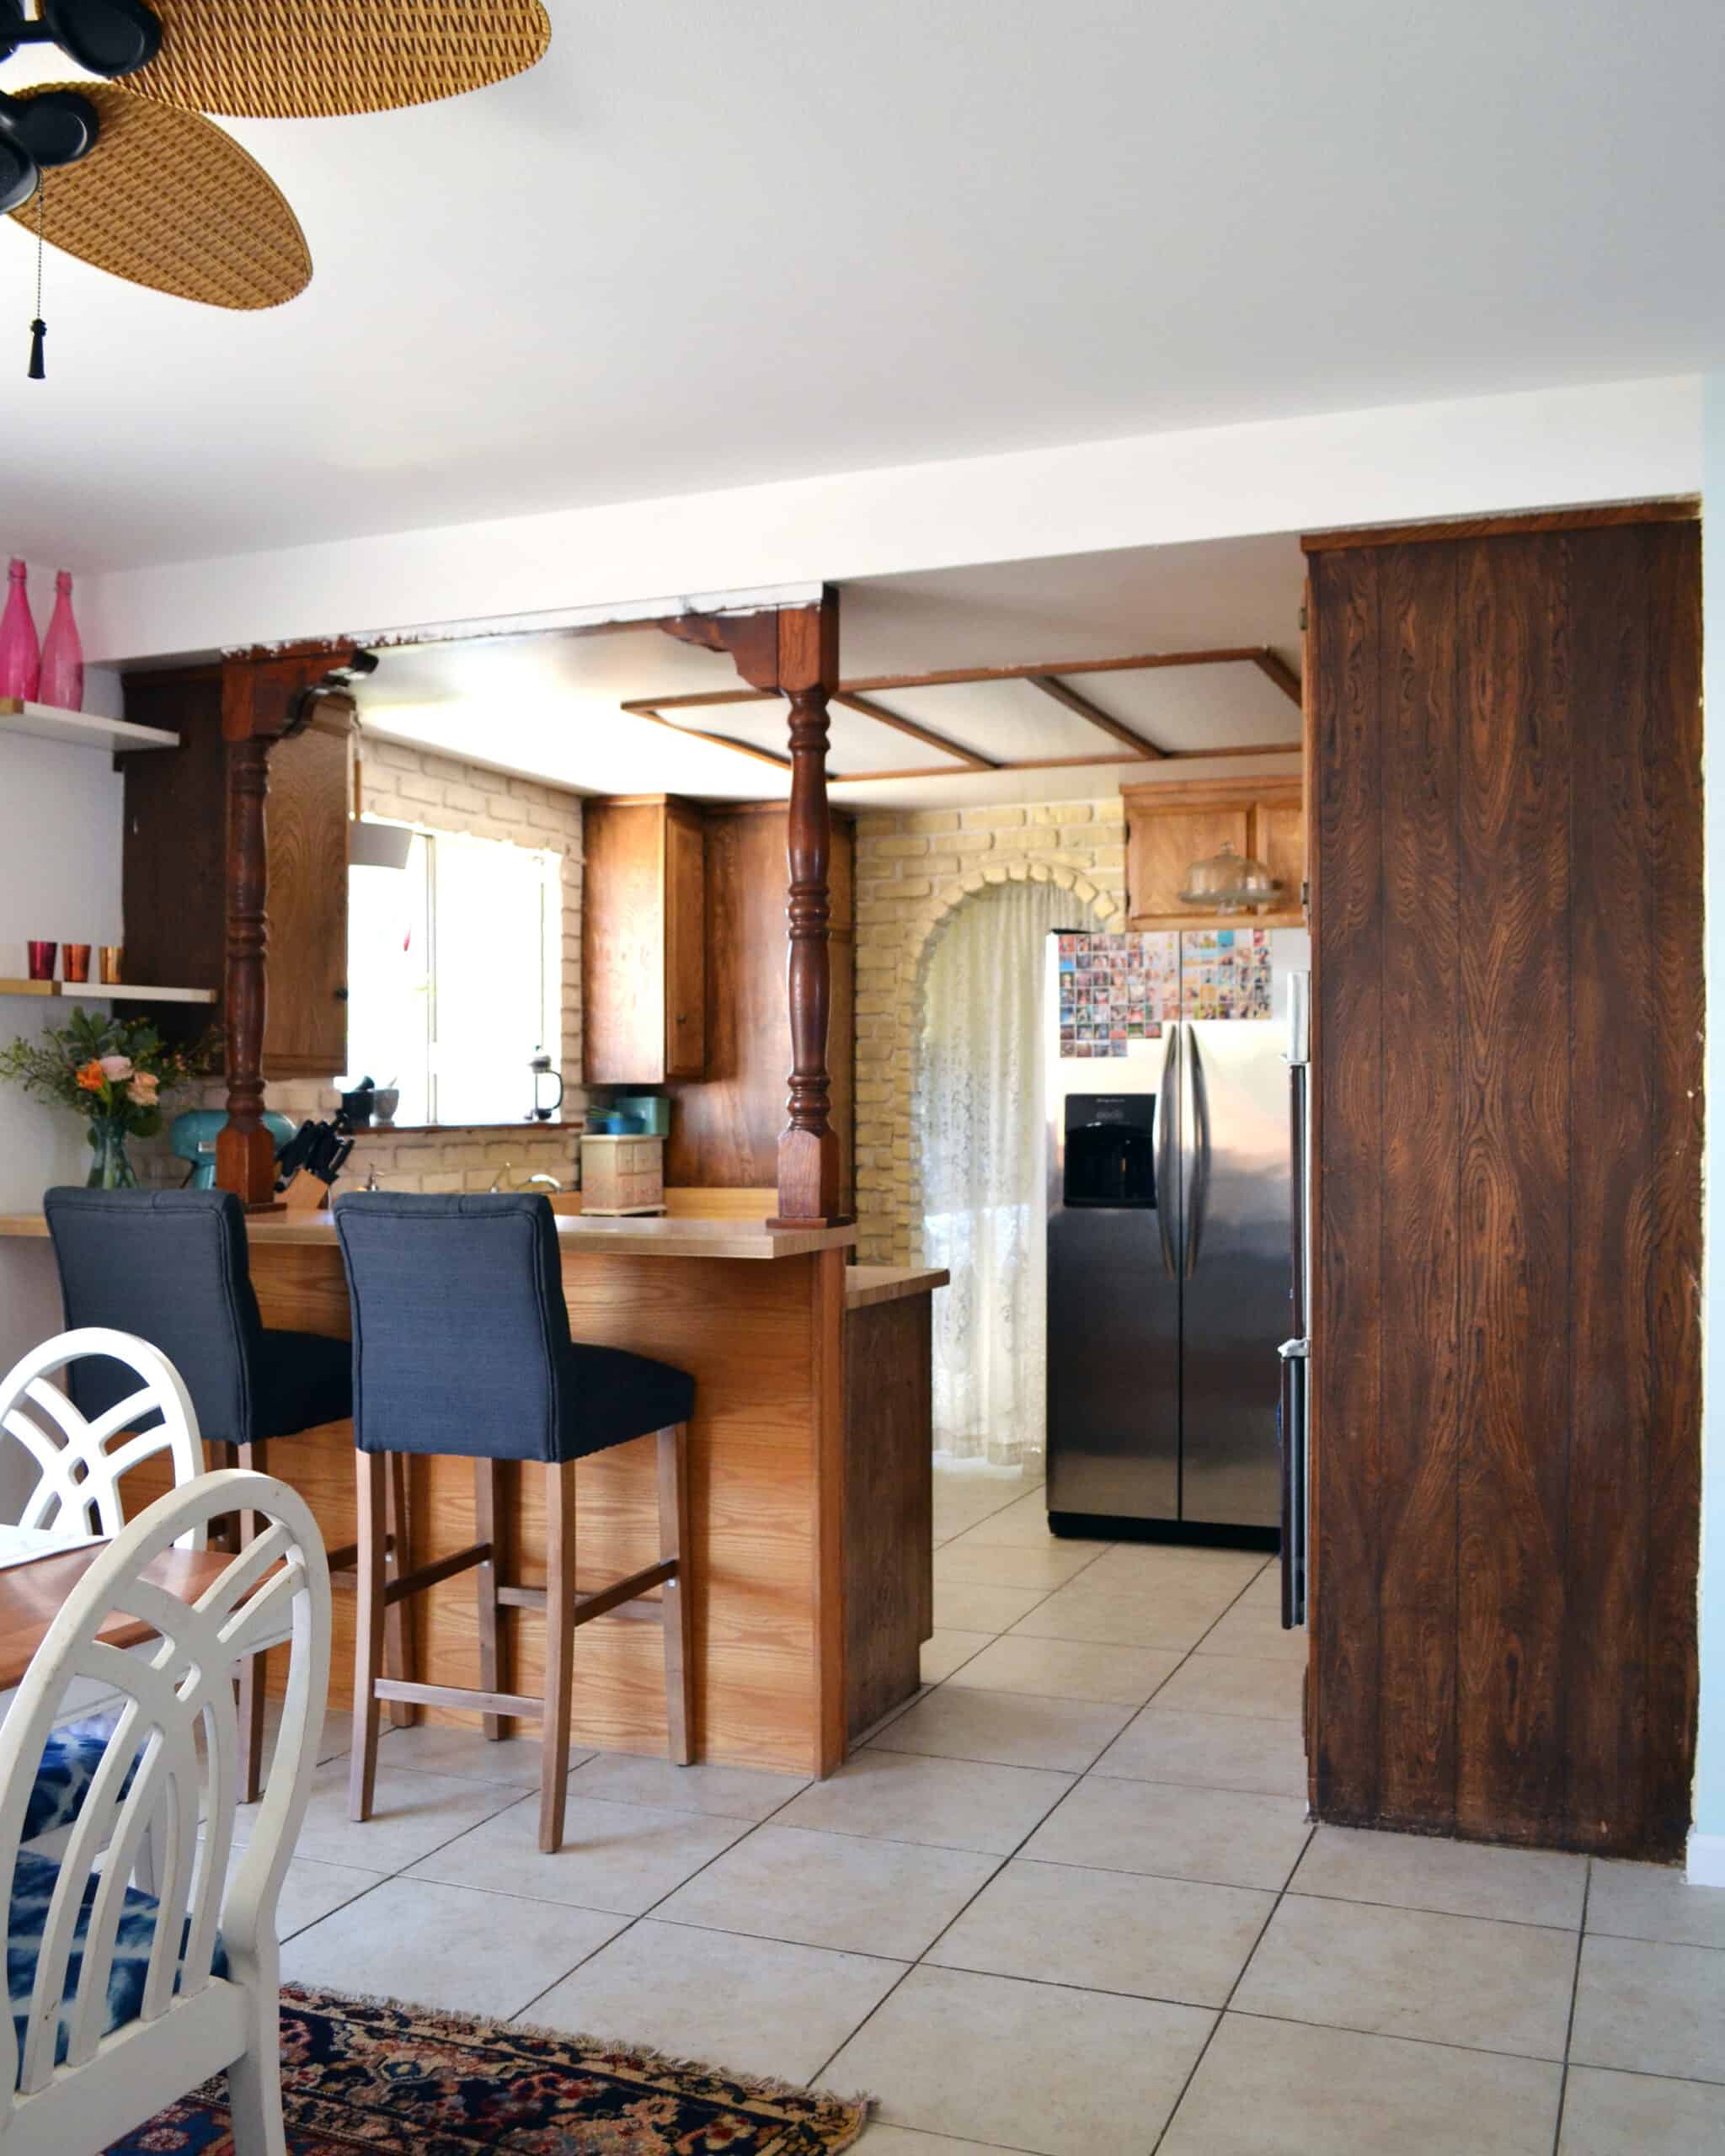
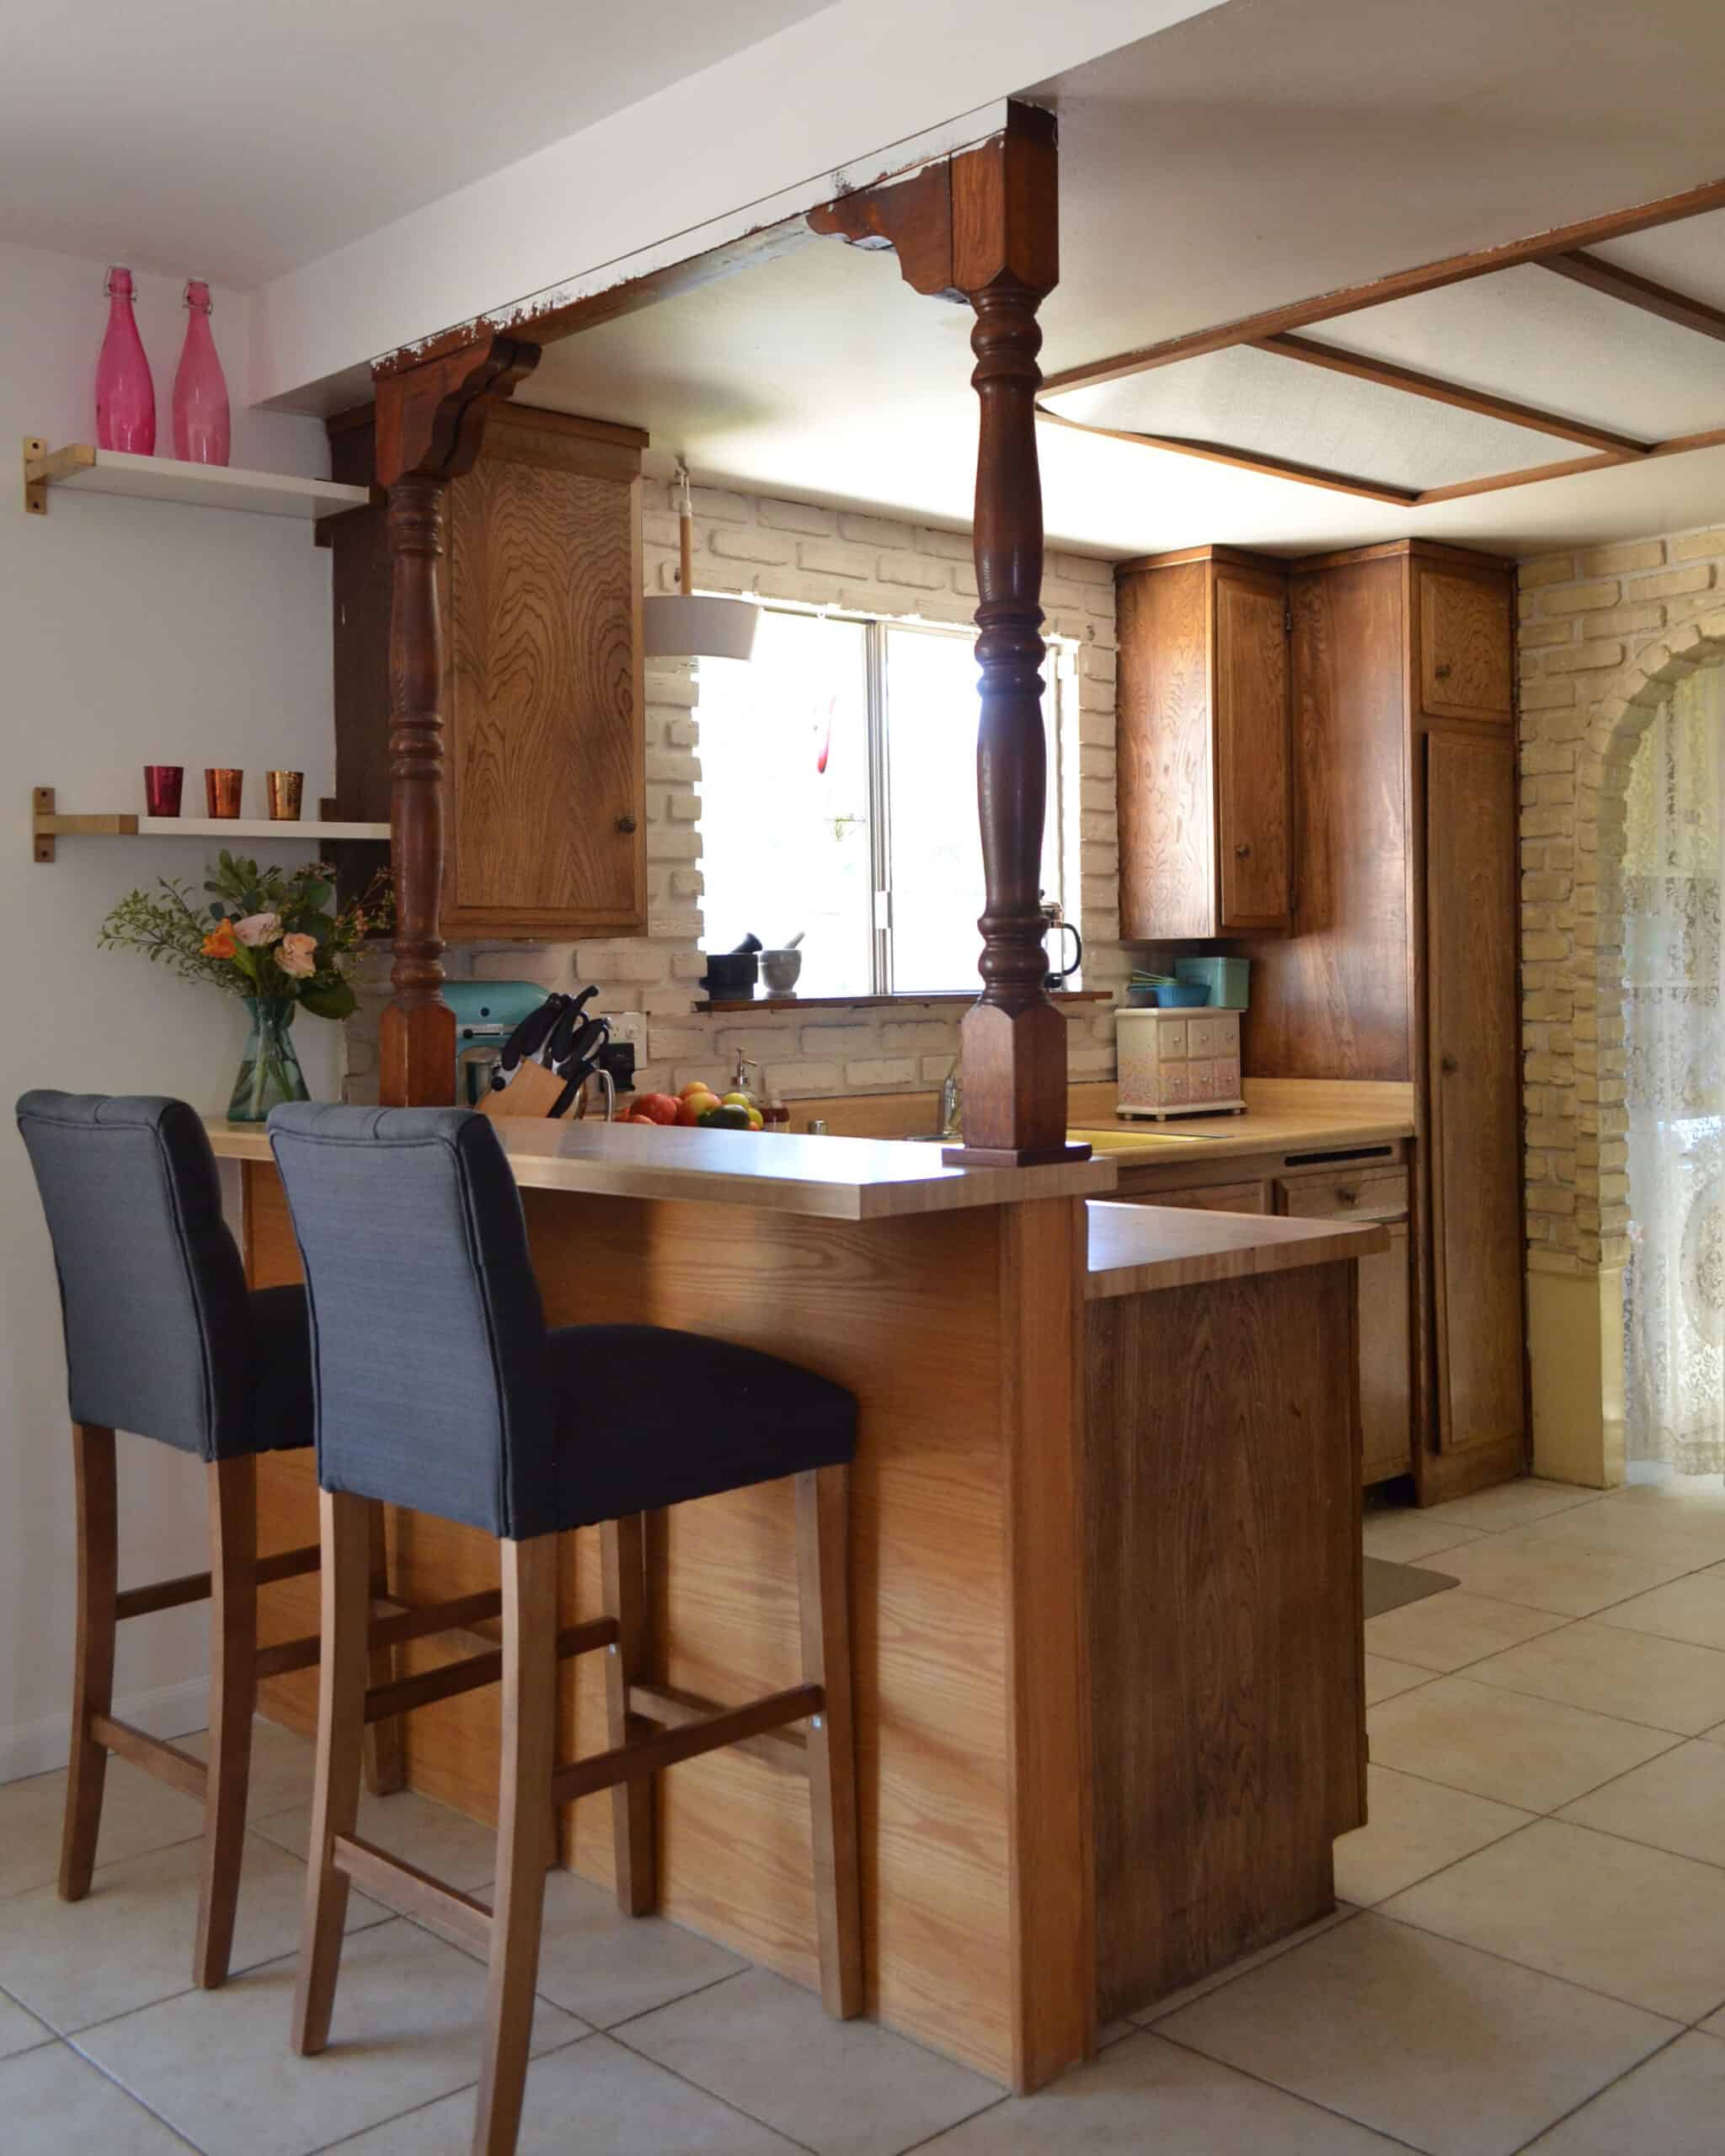
WHAT?! That’s amazing. And now for some extremely satisfying before & afters . . .


Huge thank you to Jessica for chatting with me, and a BIG congratulations to both her and Tyler on a kitchen well done. This truly gives me hope and inspiration for my own DIY kitchen renovation.

Credits: Design by Jess and Tyler Marés | Photography by Jess Marés
The post A DIY Kitchen Renovation In Two Parts (Plus A Reno Pep Talk) appeared first on Emily Henderson.