
5 Kitchen Design Details that Matter; Before & After
Reader Kitchen Design Project
Hi Maria & team,Finishing up our kitchen facelift and wanted to thank you for all the advice on your blog and in your [eBooks]! I’m just thrilled with how our kitchen came out. It’s my absolute favorite. Still need to choose wall colors (blue) and decorate, but it is SUCH an improvement! From blah to classic.We DIY’ed the stacked uppers (with help from ShelfHelp, Cabinet Doors Now, and a local glass shop), trim on the sides of the island and fridge, and backsplash. Counters are untreated soapstone and honed Carrara marble. Cabinets are painted (w/ conversion varnish) BM Oxford white. Our trim is Chantilly Lace but it felt a little too stark for the whole kitchen. Love the tiniest bit of warmth in Oxford White.Cheers!
5 Kitchen Design Details That Matter
1 | Commit to keeping your kitchen design simple
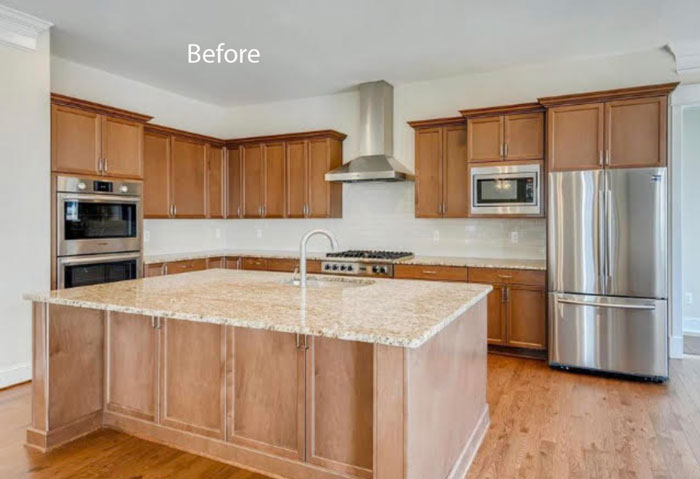
In her kitchen before, she had a standard cherry builder-grade kitchen with pink beige granite (below).
So many DIYers choose their new kitchen details in isolation – without a plan. And, big box stores make it easy for the average homeowner to choose more too many fussy detail like a busy or trendy backsplash that doesn’t relate to their countertops (for example) when refreshing a kitchen.
Read more: What Big Box Stores Don’t Tell You About Your Kitchen Finishes
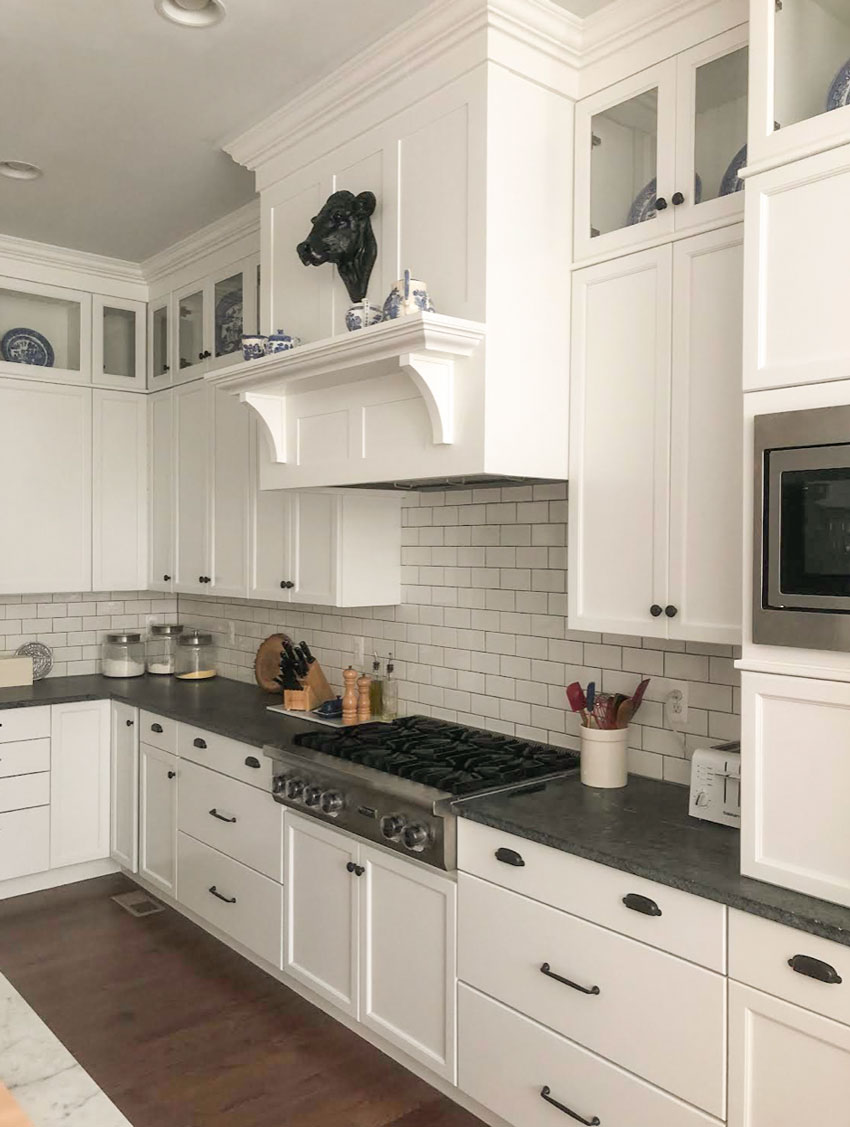
2 | Don’t Just Paint Your Cabinets; Box in the Gap
Remember, it’s the details that make a kitchen design work.
And this is one of those details that really make an impact. By boxing in the gap between the uppers and the ceiling, she kept this kitchen from looking like a “dated kitchen with white painted cabinets.”
Adding upper cabinets all painted a crisp true white with lovely moldings and glass doors for display, is a completely upscale new look! Also, I love the blue and white ceramics on display.
Simple right?
Read more: My Designer Secret for Updating Old Kitchen Cabinets
Again, the boxed in uppers and moldings, and the inspired choice to add glass doors for display are amazing… but what really elevates this kitchen design is the beautiful custom hood. It is SUCH a huge upgrade from the standard stainless chimney she had before.
3 | Choose Kitchen Hardware Wisely
The other kitchen design detail I applaud her for is that she avoided the common mistake of installing those generic black 4 or 6 inch black pulls on EVERY cabinet and drawer. Now that the black trend is in full throttle we see this mistake all of the time.
Instead, she opted for a mix with elegant small knobs on the cabinets and bin pulls on the drawers, which looks so much more clean and refined as a whole.
Read more: Less is More for Kitchen and Bath Hardware
Brass faucet | Black cup pull | Black knob
3 | Mix Metals to Provide Dimension and Interest
I also think this is a really great example of the simple principle of mixing metals. She’s pulled it off beautifully here. The black hardware is repeated in the soapstone countertop and the appliances, and she’s successfully layered in some gold in her pretty lanterns and faucet. In addition, she combined a black cup pull, a regular pull and a knob. Just lovely.
Read more: Is Brass Out? How to Mix Metals like a Pro
This kitchen design would have looked very flat and predictable if EVERY metal detail was black.
Let’s recap that tip because it is so key.
In order to mix metals successfully, make sure that each finish is repeated at least once.
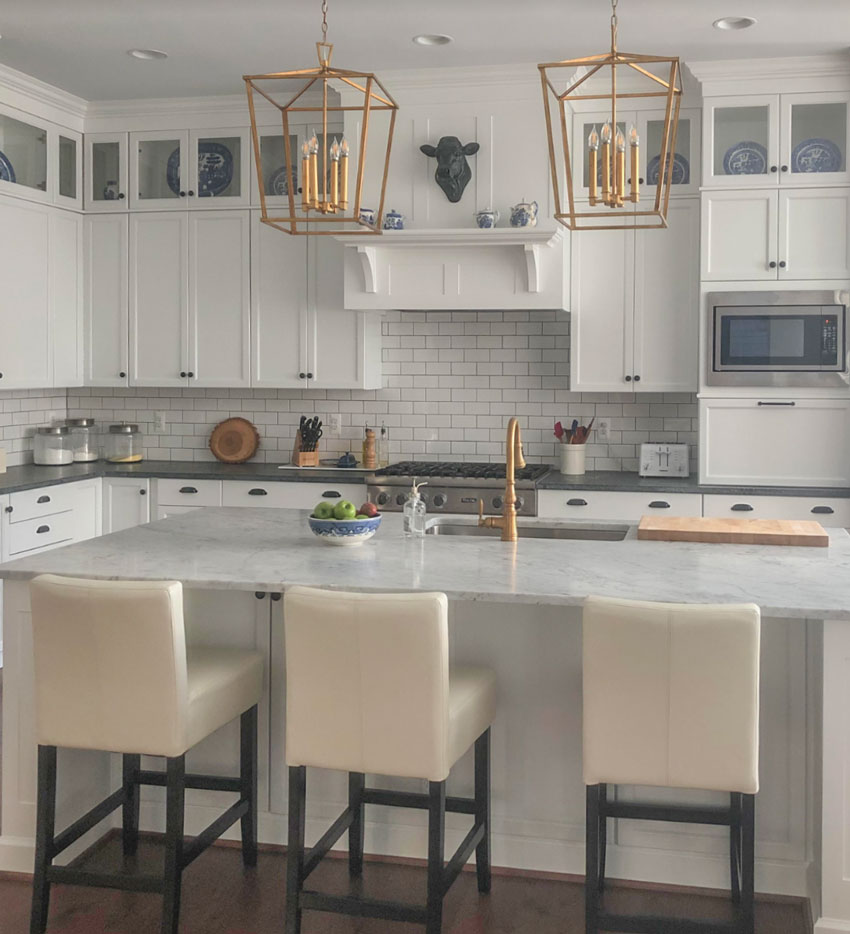
5 | Add Colour
You know what I would add to make this kitchen even more perfect? COLOUR, of course.
This really is the next level of kitchen design and one of those details that can be challenging for the DIY kitchen designer without my colour training. Learn to choose colour like I do.
My reader mentioned she would like to maybe paint the walls blue next. I wholeheartedly agree that some blue paint WOULD be MAGIC in this kitchen!
But because there is little wall space in the kitchen itself, I recommend that she consider adding it to the ceilings. Notice that when the hard finishes are timeless and simple, it’s easy to add colour with your accessories and decor.
And when you tire of blue… it’s an inexpensive update.
I’ve photoshopped a version below with the ceiling painted a cool muted blue and also repeated in the island stools below.
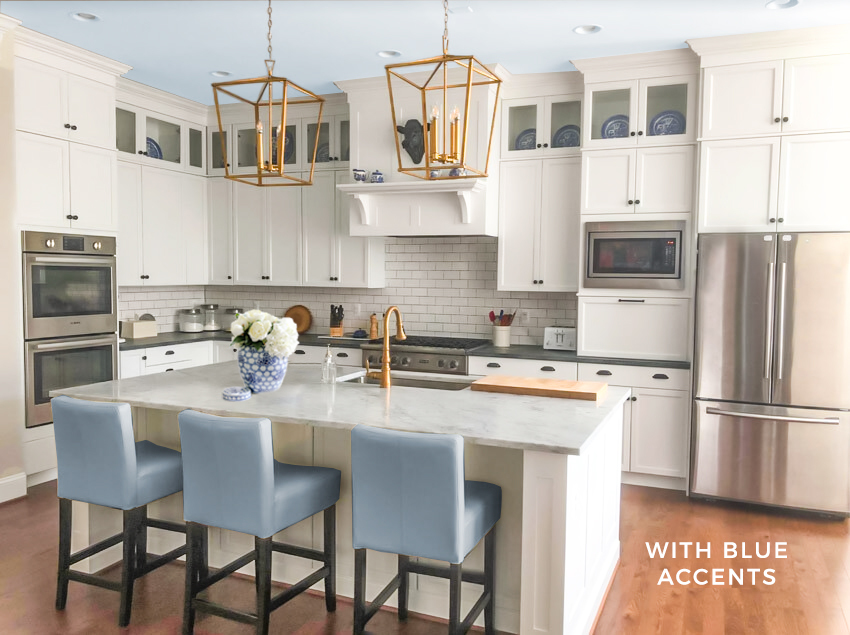
Lantern Chandelier similar here | Ginger Jar similar here and here
The existing stools could be reupholstered, but often it’s best to sell them and buy something new.
And actually, a chair with a bit more interest would be lovely, like this pretty one below:
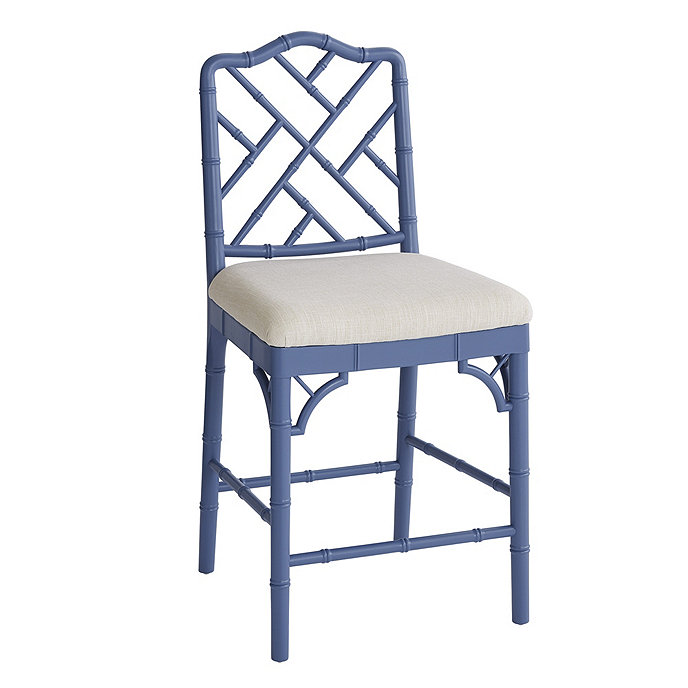
Dayna Stools from Ballard Designs
If you order new stools or fabric, wait for them to arrive before you nail down the specific ceiling colour so you can be sure to get a good match.
Need help choosing colour for decor and accessories when shopping online? I’ve got an online course for that. Trust me, when you start using mood boards for online shopping, it’s a complete #GAMECHANGER.
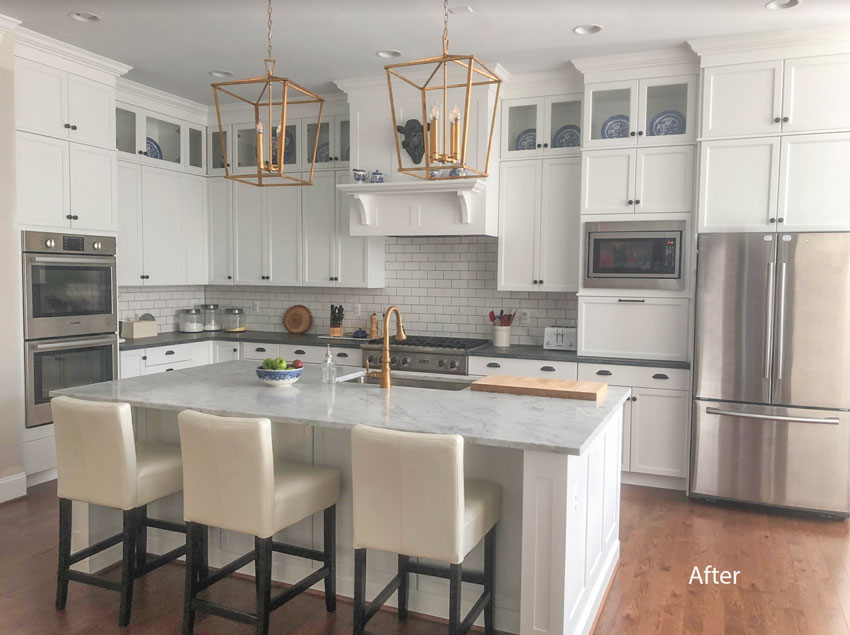
Before and After Kitchen Design
Let’s take one more look at the before and after of this reader kitchen refresh project. It really is stunning!
Here’s the before:
And the After:
When it comes to kitchen design details that matter, what else would you add? Tell me in the comments below.
In other news, I just celebrated 35,000 followers over on Instagram! If you’re not following me over there, you should. You’ll find more design advice on my stories every day!

PS. My mini-golden doodle Lucy is 5 months. She has discovered the front window and she looks almost like a person the way she’s leaning against the back of the sofa!
My new living room makeover reveal is coming soon, just waiting for one more piece of furniture! As you can see, we prefer the poodle clip to the scruffy look although she’s darn cute in both!
Related posts:
If you’re Still not Learning You’re Dead
WWMD: Help My White Painted Kitchen Cabinets Look Bad
Before & After; How to Brighten a Dark Room
The post 5 Kitchen Design Details that Matter; Before & After appeared first on Maria Killam | Classic and Timeless Colour.